|
0 members (),
3,868
guests, and
1,120
robots. |
|
Key:
Admin,
Global Mod,
Mod
|
|
|
|
Joined: Dec 2015
Posts: 6
Novice
|
Hi, hope Ive got this in the right sub-forum.
Ive got an old Greenfields 8 ride on and have a question about replacement of the cutter belt (GT120). I don't have a manual for this mower but I did find some belt replacement documents on this forum that came in handy for the drive belt replacement but I can't find anything that shows the style of cutter belt arrangement my Greenfields has. The drive belt tentioner is the typical Greenfields automatic ratchet system with spring and the docs I found on this forum shows the same tentioner for the cutter belt, but alas mine is different. Doesn't seem to have any type of tentioner system, only thing I can see is 3 spaced holes to change the location of the left side idler pulley. The shop gave me a A102 belt but it seems to big to me as the given 3 holes are not sufficient to get the belt tight.
So I suppose the question is does anyone know how to adjust the belt or is it possible the belt is too large?
Cheers
Charlie
|
|
|
|
|
Joined: Apr 2015
Posts: 310 Likes: 1
Apprentice level 4
|
Can you show me some pics, I may have the parts list.. If it's what I think it is, There are 3 bolt that move on a bracket which should have a strong spring for holding tension.. I find alot over tighten the nuts which stops it from moving.. Do you have a Deck mount bracket like this? ![[Linked Image]](https://www.outdoorking-forum.com.au/forum/uploads/usergals/2015/12/full-9138-25793-deck_mount_bracket.jpg)
Regards,
Paul
Such is life.......
Nothing better than a "GreenField" just mowed..
|
|
|
|
|
Joined: Feb 2015
Posts: 269 Likes: 3
Apprentice level 3
|
Hi Charlie
if you gave the shop the correct model number for your machine they will have given you the right belt,
Greenfield have always put the part numbers for belts and blades on the body of the machine, so if you give the right info it will be the right bit.
if you have the same carrier as SD has shown, then that carrier will slide to the rear for belt tension, make sure you put the belt on EXACTLY as the old one came off, should be no problem!
I always come back to an Echo
|
|
|
|
|
Joined: Jan 2012
Posts: 1,842 Likes: 14
Moderator
|
The ODK Shop listing for the GT120 belt describes it as 1/2" top width and 102" internal circumference, so A102 is the correct belt, I'd say. Same with the GA Spares listing for it.
One thing with Greenfield, they have always used standard industrial components where possible!
Cheers,
Gadge
"ODK Mods can explain it to you, but they can't understand it for you..."
"Crazy can be medicated, ignorance can be educated - but there is no cure for stupid..."
|
|
|
|
|
Joined: Dec 2015
Posts: 6
Novice
|
Yea I got the part number from the body of the mower, the only reason I I thought maybe the wrong belt is because I got it from a belts and bearings store, not a Greenfields dealership. The other reason is after some googling I remember coming across a thread were someone mentioned it required a A100, but there are a number of models so this might not be correct.
I probably should mention Ive been a HD diesel mechanic for the past 20 years so I know my way round a spanner, but know diddly about mowers. The Greenfields seem pretty basic in design though which helps.
The deck mount bracket is different to what you picture SuperD, there is no arched bar and no slotted holes. Its basically a mount for the pulley wheels which is bolted down to the deck with 4 x 10mm bolts, I loosened theses 4 bolts hoping it was slotted underneath but nope. I also loosened both the idler pulley's to see wether they were slotted but nope, only the left side has 3 spots where you can move it forward or backward but the distance is probably only 20mm overall but I need to remove a lot more slack than that with the new belt as its already in the centre hole.
Off the back of the deck bracket is an arm that basically sits inside a slot in another section of rear frame, to me it looks kind of like a guide arm that keeps the rear of the deck from swinging side to side but lets it move up and down, sort of like a swing arm I suppose.
I can't see any springs attached to any part of the deck mount. Theres every possibility that this mower has been modified, but Im not sure.
Ok Ill have a crack at posting pics..
Hmmm, not having any luck there. Ive resized my images to 800x600 (120kb) and followed the image upload directions but they don't seem to be loading in. Little bit different to the other forums Im used to, and Im a mod on one of them haha. Sorry Im sure its been done to death but any advice would be appreciated.
Cheers, Charlie
|
|
|
|
|
Joined: Jan 2012
Posts: 1,842 Likes: 14
Moderator
|
G'day Charlie, OK, I see that CyberJack has pointed you at the 'how to' page for loading pics HERE. The 'browse' button lets you navigate to the pic file [JPG or PNG format] on your PC; then once it's selected, click on the 'Add file from your PC' to upload it to the ODK server. Your file size is well under the limit [4Mb]. Repeat the 'Browse/Add' steps for each pic. When you've 'added' the desired pics, then click the 'All Done' button to insert the image tags in the post editing window. The pics will be visible if you click on the 'Preview Post' button. If you later decide to add more pics, just click on the 'File upload' button again. ODK handles pics a bit differently to many other forums, in that we prefer them to be uploaded to the ODK forum server. That way they don't succumb to 'link rot' in time, as is often the case for pics stored on external services like photobucket.
Cheers,
Gadge
"ODK Mods can explain it to you, but they can't understand it for you..."
"Crazy can be medicated, ignorance can be educated - but there is no cure for stupid..."
|
|
|
|
|
Joined: Dec 2015
Posts: 6
Novice
|
Hi Gadge, the 'add file from your PC' button doesn't seem to be working for me. Ive tried with numerous photos just in case there was an issue with the pics.
Either way, after removing the cutting deck completely yesterday I found that both idler pulley's have 3 hole selections so combined this gave me enough adjustment to tighten the belt. So the old girl is back in action once again.
I will keep trying to add pics as it may help others in the future if they come across a similar issue.
Cheers again.
|
|
|
|
|
Joined: Sep 2014
Posts: 113 Likes: 2
Apprentice level 2
|
Hi Gadge,
I remember having problems with loading pics early on, I can't remember exactly what it was but I think it had something to do with having/not having UBBCode/HTML thingy set properly.
Could that be Charliehorse's problem?.
|
|
|
|
|
Joined: Jan 2012
Posts: 1,842 Likes: 14
Moderator
|
Ah yes, thanks for the reminder, Buckets. There's a pulldown menu at the top of the Quick Reply window that has up to 3 options. It's below the window, in the Full Reply Screen. They are: using UBBCode using HTML Using HTML and UBBCode Try selecting the first option; it should be there. The second option is the one that prevents pic uploads. Also, using the the Full Reply Screen can help a lot. Past thread on this problem: https://www.outdoorking-forum.com.au/forum/ubbthreads.php?ubb=showflat&Number=56997
Cheers,
Gadge
"ODK Mods can explain it to you, but they can't understand it for you..."
"Crazy can be medicated, ignorance can be educated - but there is no cure for stupid..."
|
|
|
|
|
Joined: Dec 2015
Posts: 6
Novice
|
Nice work lads, looks like that was the trick. In the second pic you can just make out the 3 hole locations to shift the idler pulley from forward to back, both sides have this which allows proper adjustment. You can see the deck mount is quite different to the previous image posted. ![[Linked Image]](https://www.outdoorking-forum.com.au/forum/uploads/usergals/2015/12/full-9796-25855-dsc_0103.jpg) ![[Linked Image]](https://www.outdoorking-forum.com.au/forum/uploads/usergals/2015/12/full-9796-25856-dsc_0105.jpg) Cheers
|
|
|
|
|
Joined: Apr 2015
Posts: 310 Likes: 1
Apprentice level 4
|
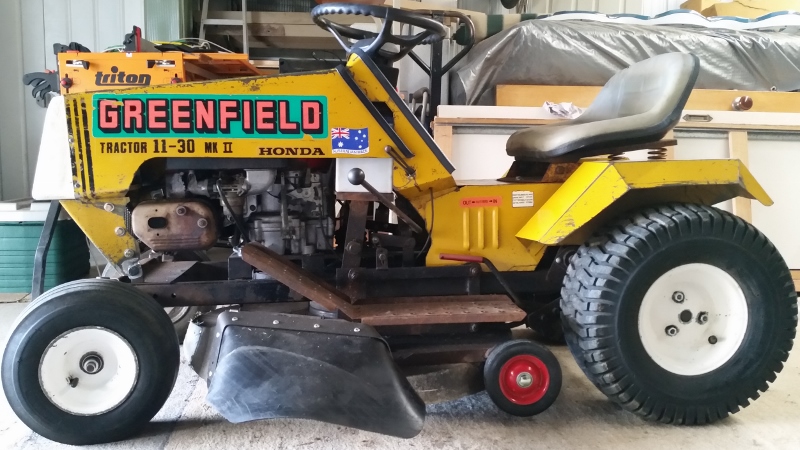
If you want, I have the parts book/list for that machine.. It's a PDF file so I'll have to send it to you via email.. On my 11/30 it has adjustment via the cutter engagement lever (The larger lever), It has a nut on the end of the rod ( the section where the clutch drive plates are in the pic) Or I can move it up to a 2nd hole... ![[Linked Image]](https://www.outdoorking-forum.com.au/forum/uploads/usergals/2015/12/full-9138-25858-greenfield_11_30_12.jpg) Below is the front page of the list. ![[Linked Image]](https://www.outdoorking-forum.com.au/forum/uploads/usergals/2015/12/full-9138-25857-greenfield_maual.jpg)
Last edited by SuperDooper; 16/12/15 07:34 PM.
Regards,
Paul
Such is life.......
Nothing better than a "GreenField" just mowed..
|
|
1 member likes this:
Bilby71 |
|
|
|
Forums144
Topics12,730
Posts106,679
Members17,977
| |
Most Online40,124
Apr 13th, 2026
|
|
|
|