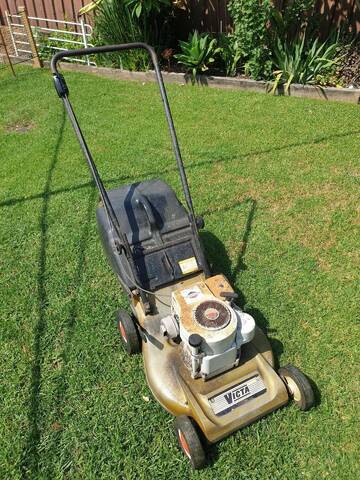
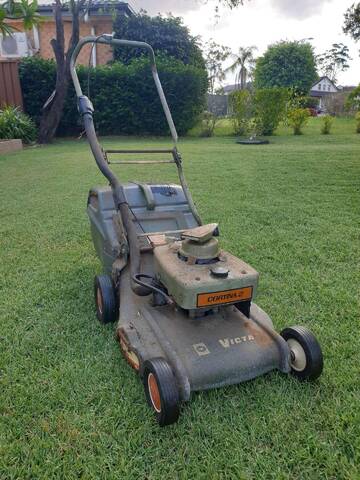
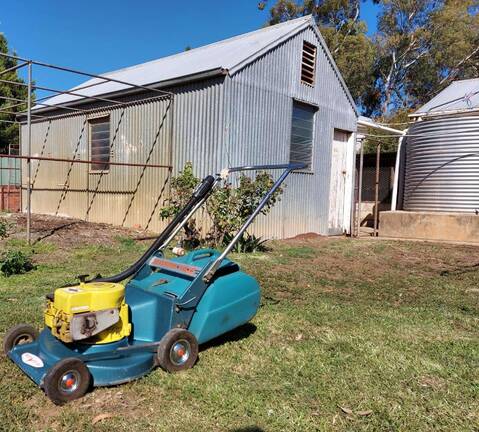
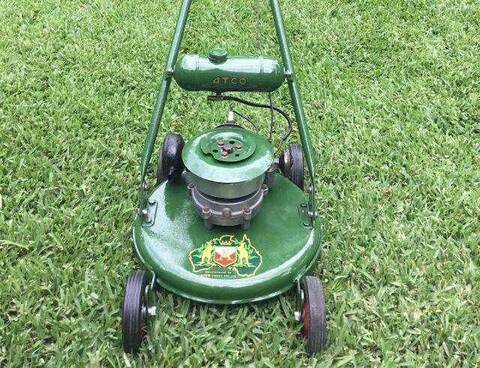
I hated the green cowl in pictures, but once I got my own VC-160 Auto Drive, it grew on me pretty quickly and think it compliments the dark green base. The donor mower looks like it would clean up a treat, apart from the handle bars which haven't responded well to the English climate. I can understand you wanting such good bits that this mower has to offer though. Looking forward to seeing progress.
Last edited by Mowerfreak; 30/09/1712:00 AM.
Ahh, if only victa had kept producing the thumblatch catcher series, they would be in better shape today!
What a lovely dress Cowl this has to, so white and not sun affected and to paint it such a hideous colour is a travesty.
I know what you mean. I always assumed they came out an off white colour as all the ones I have seen look this way, but cop a gander at that!! I can only wish my teeth looked that good. Where's Blumbly when you need him!
Ahh, if only victa had kept producing the thumblatch catcher series, they would be in better shape today!
OK.... I give in.. I'm not going to paint it... I'm gonna hold on this..!!
I felt bad enough taking it to pieces.. now I will be putting all those parts back on it again. I will keep looking to see if I can find something else that will be more worthy of the "green paint" treatment..!!!!
My missus will probably leave me in the meanwhile though, I promised her that this one would be for parts. I have 6 mowers now (4 of them are Victas) and no room in the garage to work on them... now that the handles have been removed though I recon I might be able to hide this one under the bed..??
I can sleep easy tonight knowing another VC160 will live on. LOL !
All I want now is for the Crows to win at the "G" today even though I'm a huge Swans fan myself, but as Adelaide is my home town I'm happy to support either the Crows or the Power whenever they make it to a Grannie as long as they aren't playing the Swannies.
I have one myself that I fell across and it's in near mint condition complete with its Green catcher with the magic eye.
I'm about to hoist it up into the air and hang it nicely from the roof purlins on an angle so all can see it from it's best side.
It will never cut a blade of grass again.
Cheers, BB.
I live a 24 Hour lifestyle, but every now and again I seem to fall asleep, well at least that's what my wife tells me.
OK.... I give in.. I'm not going to paint it... I'm gonna hold on this..!!
I felt bad enough taking it to pieces.. now I will be putting all those parts back on it again. I will keep looking to see if I can find something else that will be more worthy of the "green paint" treatment..!!!!
My missus will probably leave me in the meanwhile though, I promised her that this one would be for parts. I have 6 mowers now (4 of them are Victas) and no room in the garage to work on them... now that the handles have been removed though I recon I might be able to hide this one under the bed..??
This hobby can quickly get out of hand, but sorry, that standard VC does look in well preserved shape. Is the left hand side of the chassis edge badly scraped to the point where there is missing metal? If not, that is well worth preserving IMO and it would make a nice pairing with the Auto Drive. What happened with the plan to paint up the black replacement cowl? You can always use that as a mule to try the paint on, without using too much up, of course.
Ahh, if only victa had kept producing the thumblatch catcher series, they would be in better shape today!
The left side is quite deeply scratched, the grass flap is rusted through in places and the handle bars need new bushes where they attach to the deck. Apart from that it also needs a new muffler, the engine cowl is badly rusted and needs re-painting, on the whole it needs more work than the Auto Drive.
I decided against painting the black plastic cowl as compared to the real one, it is really flimsy and as I mentioned in an earlier post it also has a hole and some cracks where someone fitted a kill switch, I think it would just be a waste of paint.
The left side is quite deeply scratched, the grass flap is rusted through in places and the handle bars need new bushes where they attach to the deck. Apart from that it also needs a new muffler, the engine cowl is badly rusted and needs re-painting, on the whole it needs more work than the Auto Drive.
I decided against painting the black plastic cowl as compared to the real one, it is really flimsy and as I mentioned in an earlier post it also has a hole and some cracks where someone fitted a kill switch, I think it would just be a waste of paint.
Hmmm, maybe you were right to strip it after all! It's your machine. I wish Blumbly would chime in and give his take.
Ahh, if only victa had kept producing the thumblatch catcher series, they would be in better shape today!
A tasty collection of classic alloy hi arches I can see. I like the prop them up on bricks idea. I have always liked the purple sports and would jump at the chance to get my slimy hands on one. Alan. Have a heavy heart no more. Just restore restore restore!
Ahh, if only victa had kept producing the thumblatch catcher series, they would be in better shape today!
The bricks keep the mowers dry underneath when the ground is wet or damp.I have seen a lot of blade plates rusted away because people have left mowers on the ground and the blade plate is constantly damp.
It looks like you simply place sheets of corrugated iron on top of the machines to keep them dry and protected from the elements. Does it work okay? Rust is minimal on a couple of the handles in the pictures, so it seems to do the job well.
Ahh, if only victa had kept producing the thumblatch catcher series, they would be in better shape today!
If I have a mower with mint condition handles then I would not store the mower outside ,but these mowers would all have a little surface rust on the handles and placing sheets of iron on top, the handles have not rusted any more ,so the mowers are kept dry.
It's easy to tell if you have redbacks around by checking the spider web,if you throw a stone into the redbacks web it will hold the stone off the ground and with other spider webs the stone will break the web and land on the ground.The redbacks web is a lot stronger than other spiders.
I found a 70s utility with 160cc and G4 and a very rusty deck in a toss out pile early this year and when I saw a redback spider I said to myself no I'll pass. I just didn't want that in my car. Now I wish I had just removed the pesky critter and grabbed it as I now need a 160 cooling fan. It would have been a great candidate to strip for various other bits too.
Ahh, if only victa had kept producing the thumblatch catcher series, they would be in better shape today!
Sadly I think I need to do it. This machine has the parts that I need now and besides from the fact its already stripped, I don't think I am going to find another one soon.
Well, winter is starting to kick in here and that means one thing... its time to retreat to the man cave and avoid all those shitty programs that lead up to Xmas on the TV like "The Apprentice" and the like, you know the ones, that shite that turns your brain to mush..!!
Before I do the dirty deed though, should I use a plastic primer on the cowl or would a good ruff up suffice? also, would you put a petrol resistant clear coat/lacquer on it when its done?
Before I do the dirty deed though, should I use a plastic primer on the cowl or would a good ruff up suffice? also, would you put a petrol resistant clear coat/lacquer on it when its done?
I found this much earlier in the thread. Hope it helps.
Originally Posted by Blumbly
As for painting you cowl it shouldn't be that hard as they are made of some kind of fiber not plastic,(the later model auto drives were plastic but not this model)you should be able to (after removing the black paint) just rub it back with about 400 grit wet and dry sandpaper (with some soapy water) then just blow you colour over that. As I did with my VC-160's and I think they turned out better than new.I know their not auto drives but the cowls are made of the same materiel.They were just clear coated.See below.
Ahh, if only victa had kept producing the thumblatch catcher series, they would be in better shape today!
Initially I wasn't totally convinced with my colour choice so I sprayed a little on both sides of a sheet of paper and compared it... the colour appears to be a good match:
Although I was advised it would not be needed I decided to apply a white plastic primer, this was mainly to fill in some of the small scratches/imperfections before painting:
I let the primer harden for a while then 24hrs later.... on goes the green...
Amazing how different the colour looks under different lighting/flash..??
I decided to put the badge on it temporarily just to see how the (almost) finished product would look:
Well,
On the whole I am really pleased with the result, I like it and it's staying the way it is.
I'm a little sad to have to paint such a good white dress cowl but I'm also really pleased with the finish and hope it resembles what it would have been for this machine when it rolled off the production line, it matches the underside of the zip starter perfectly when I look at it so.... although the rest of the machine has some sunburn... this is the colour.
Ok, another question, I want to seal it now so should I put on a matt or gloss 2k finish to protect it from petrol?
Thanks again everyone for all your input and suggestions, I wouldn't have got this far without them.
Once I get this part finished.. it's on with the rest of it..!!
The only issue I can see with putting a gloss clear over base is that it will slightly change the colour a little, essentially a tad darker and deeper I'd say.
Cheers, BB.
I live a 24 Hour lifestyle, but every now and again I seem to fall asleep, well at least that's what my wife tells me.
Guys, Looks like photobucket have blocked the pictures..!!! Here's the post again with a different host: ........................................................................................................................................
Well, here goes then...
Initially I wasn't totally convinced with my colour choice so I sprayed a little on both sides of a sheet of paper and compared it... the colour appears to be a good match:
Although I was advised it would not be needed I decided to apply a white plastic primer, this was mainly to fill in some of the small scratches/imperfections before painting:
I let the primer harden for a while then 24hrs later.... on goes the green...
Amazing how different the colour looks under different lighting/flash..??
I decided to put the badge on it temporarily just to see how the (almost) finished product would look:
Well,
On the whole I am really pleased with the result, I like it and it's staying the way it is.
I'm a little sad to have to paint such a good white dress cowl but I'm also really pleased with the finish and hope it resembles what it would have been for this machine when it rolled off the production line, it matches the underside of the zip starter perfectly when I look at it so.... although the rest of the machine has some sunburn... this is the colour.
Ok, another question, I want to seal it now so should I put on a matt or gloss 2k finish to protect it from petrol?
Thanks again everyone for all your input and suggestions, I wouldn't have got this far without them.
Once I get this part finished.. it's on with the rest of it..!!
W W!! That looks professional!! As for which clear to use, go with gloss!
Thanks Mowerfreak, As luck would have it I got some 2k gloss when I bought the paint.
Originally Posted by Bonnar_Bloke
The only issue I can see with putting a gloss clear over base is that it will slightly change the colour a little, essentially a tad darker and deeper I'd say.
Cheers, BB.
That was my concern. I have read similar stuff from people that have used gloss on their diy paint jobs. Don't get me wrong, I'm not keen to go out and buy matt 2k, it's pretty expensive (about �20 a can)... I think this has cost me enough so far.
Wouldn't the original finish have been matt? I have never seen one in the flesh before, I've only seen a few pics so I cant really comment.
The cowl looks the right finish when comparing it to under the starter,I would paint a green test section on a plastic drink bottle then wait a few weeks for the paint to harden then wipe a fuel soaked rag on the test section and if the paint does not come off leave the cowl without a clear coat.
It’s been quite a while now since my last post. Many of you guys have shown an interest in my VC109 project (and gave me ,sound advice) I promised myself that I would keep you all updated with my progress. I now realise the importance of uploading pics directly to the site as apposed to the picture hosting sites as they quickly took the images away..... lesson learned..!
Well...on the whole, not too much progress to report really. I don’t know how far to go with this “semi restore” so for the time being I have just fettled and tidied it up a bit. I've added a few of the parts from the donor VC160 along with some other parts that I was lucky to find on ebay recently to try and make it more functional/original but that's about it,
“That Horrible Green Cowl”
The VC109, revered by many as "The Ugly Duckling". After the spray job, in the end I went with a really good quality 2k matt clear coat lacquer to finish it. I obviously wanted to avoid the extra expense of doing this but I tried a sample of the untreated spray paint on a ruffed up old plastic coke bottle (as kindly advised by Maxwestern) but even after it was left for a week to harden a petrol soaked rag wiped it off easily... Ouch..!! I recon it has cost me around £45+ to paint this originally white VC160 cowl (including the lacquer and special mix paint) I know some will disagree but I still think It was worth it.
Throttle Control Lever-
Had a bit of luck here, I managed to get hold of a NOS throttle control lever to replace the retro–fit one that was bastardised onto the handlebars (extra drill hole in the handlebar) I never thought I was going to find a brand new original control lever here in the UK so I was pretty chuffed when I did.!
Electrolysis –
A bit of research over the winter to get the engine cowl back to bare metal and recover the "70 Series” decal. I set up a tank to strip off all the old paint/rust, It worked a treat and I managed to recover the original decal although (rightly or wrongly) I decided not to stick it back on the now repainted cowl as it didn’t look too good. I finished the gloss black spray paint finish with some 1k petrol resistant lacquer. I got in touch with Silensemessor and bought a new set of decals from him on ebay. I’m really impressed with them, they are really good quality, I just need to decide if I should replace the cowl decal, as you can see I haven't done this yet.
Exhaust Muffler-
This was in good condition so a good rub down with a wire brush drill attachment and a few coats of 400*c matt black spray paint was applied. I managed to break the gasket up pretty badly when I removed it so I had to buy a replacement.
Well, apart from a few cowl screws (that I haven't got round to cleaning up yet) it's back together and I absolutely love it. I have cut my postage stamp size lawn with it a few times now and it is a bloody joy to use, it starts 1st pull every time but it's retirement for this one now. It has a reserved place in my garage and apart from the odd run up it won't be cutting any more grass in the future.
Mowerfreak also said that "This Victa collecting thing can get quickly our of hand" boy...he was right..!
Even though I am struggling for space the "Victa bug" has got a grip on me and I have recently bought a 85cc Lightweight/Compact (this is the machine that started my Victa obsession 20+yrs ago) a rough 1974 VC160 (for parts) and a 1966 V37 (model 548). I have never seen a V37 here in the UK since I took an interest in Victa mowers so at £35 I just had to buy it. It will take some time but I want to do a proper restore on this one when I can get it running properly.
The V37 starts 1st crank (on full revs with the 3Q carby fully primed) it has good compression, but it just dies out after that. I have thoroughly cleaned the carb, replaced the coil/condenser/plug/points but still no joy so I suspect it is a carb jet, crank seal or ring problem. The seals show no signs of leakage though so any suggestions are welcome with this as I don't know what to do next?
Hi Alan!, long time no see! How's the grass on your side of the globe? I see the disease has hit I have just got my18th and 19th mower recently, you are doomed lol! That 85cc will be perfect for your lawn and the VC 160 Auto Drive is looking as it should. Where did you source the catcher? Well done getting your hands on a green one. It seems stuff is easier to come by in the UK than here where the machines were born! We exported absolute ship loads to your area, so I am not totally surprised and your population base is far higher, so I wouldn't be surprised if at least as many Victas reached your shores as stayed behind. BTW that was Maxwestern who came up with the drink bottle test! Loved the photos.
Ahh, if only victa had kept producing the thumblatch catcher series, they would be in better shape today!
The grass is almost dead here, we have had no proper rain where I am in the south east since the end of May. Who would have thought it eh.. a heatwave in the UK..!!
The green catcher for the VC was the one that came with it. It has some fairly bad cracks though so not sure how long it will last. I don't see that many Victas here nowadays, not as many as there was when I first got interested in them.
The 85cc Lightweight is absolutely perfect for my needs, starts first pull and has all the power I need. It's a proper little workhorse and was used regularly when the grass was growing.
Crikey 19 mowers... where do you keep them all..?
From now on my last mower will be a Twin/500 (if I get the opportunity) and that will be the last and final piece in the jigsaw.
Sorry for mixing you up with Maxwestern, good advice all the same and it could have saved me a few quid had it paid off. What do you recon on the V37? any thoughts on the running problem? Looks like it has had an adaptation to the exhaust, must have been homemade as I cant see anything like it in my records.




![[Linked Image from i86.photobucket.com]](http://s86.photobucket.com/user/Alanuk1969/media/WP_20171001_001_zpsnmzvbwdd.jpg.html)
![[Linked Image from i86.photobucket.com]](http://s86.photobucket.com/user/Alanuk1969/media/WP_20171007_013_zpszfnk133m.jpg.html)
![[Linked Image from i86.photobucket.com]](http://s86.photobucket.com/user/Alanuk1969/media/WP_20171007_008_zpste4a3afw.jpg.html)
![[Linked Image from i86.photobucket.com]](http://s86.photobucket.com/user/Alanuk1969/media/WP_20171007_043_zpsna24m7e7.jpg.html)
![[Linked Image from i86.photobucket.com]](http://s86.photobucket.com/user/Alanuk1969/media/WP_20171007_061_zpskhbrkkl6.jpg.html)
![[Linked Image from i86.photobucket.com]](http://s86.photobucket.com/user/Alanuk1969/media/WP_20171007_058_zpsy5xptyn3.jpg.html)
![[Linked Image from i86.photobucket.com]](http://s86.photobucket.com/user/Alanuk1969/media/WP_20171008_011_zpsj9uw70es.jpg.html)
![[Linked Image from i86.photobucket.com]](http://s86.photobucket.com/user/Alanuk1969/media/WP_20171008_009_zpsiojgukjm.jpg.html)
![[Linked Image from i86.photobucket.com]](http://s86.photobucket.com/user/Alanuk1969/media/WP_20171008_008_zpssiuayedr.jpg.html)
![[Linked Image from i86.photobucket.com]](http://s86.photobucket.com/user/Alanuk1969/media/WP_20171008_003_zpscmbnycvo.jpg.html)
![[Linked Image from i86.photobucket.com]](http://s86.photobucket.com/user/Alanuk1969/media/WP_20171008_024_zps4pp3zeto.jpg.html)
 W!! That looks professional!!
 ![[Linked Image from s20.postimg.org]](https://s20.postimg.org/ge10ba6v1/WP_20171001_001.jpg)
![[Linked Image from s20.postimg.org]](https://s20.postimg.org/ulqozxjjx/WP_20171007_012.jpg)
![[Linked Image from s20.postimg.org]](https://s20.postimg.org/k06tnxd8d/WP_20171007_025.jpg)
![[Linked Image from s20.postimg.org]](https://s20.postimg.org/9reci3p6l/WP_20171007_027.jpg)
![[Linked Image from s20.postimg.org]](https://s20.postimg.org/uct4a06rh/WP_20171007_038.jpg)
![[Linked Image from s20.postimg.org]](https://s20.postimg.org/q8wqv9071/WP_20171007_062.jpg)
![[Linked Image from s20.postimg.org]](https://s20.postimg.org/dqbk0xdtp/WP_20171008_016.jpg)
![[Linked Image from s20.postimg.org]](https://s20.postimg.org/vhn6fdt8d/WP_20171008_011.jpg)
![[Linked Image from s20.postimg.org]](https://s20.postimg.org/ofp8t6pml/WP_20171008_008.jpg)