|
1 members (maxwestern),
7,150
guests, and
1,143
robots. |
|
Key:
Admin,
Global Mod,
Mod
|
|
|
|
Joined: Jan 2015
Posts: 988 Likes: 7
Qualified Senior
|
Good morning all,
I would think that the screen sat on top of the cowl and hard up against the underneath of the starter. I am pretty sure I have one that came with my mower, when the temperature cools off a bit I can have a better look.
The screen was for two purposes, not so much fingers but keeping out grass and rodents. I will find it and post a pic.
|
|
|
|
|
Joined: Jan 2017
Posts: 760 Likes: 4
Senior Contributor
|
Many thanks Paul. This heat has been unrelenting. Looking forward to a cool change, whenever that may be. Measurements on the screen will also be greatly appreciated. 
|
|
|
|
|
Joined: Jan 2015
Posts: 988 Likes: 7
Qualified Senior
|
Now I am another kilo lighter, here are some pics. Measurements will come later as the tape measure is in the shed and I am not going back out there! ![[Linked Image from i313.photobucket.com]](http://i313.photobucket.com/albums/ll376/prc2008/image_zpsxkz0l6sl.jpeg) ![[Linked Image from i313.photobucket.com]](http://i313.photobucket.com/albums/ll376/prc2008/image_zps7zvntqpz.jpeg) ![[Linked Image from i313.photobucket.com]](http://i313.photobucket.com/albums/ll376/prc2008/image_zpsb1ibhvxr.jpeg) :-)
|
|
|
|
|
Joined: Jan 2017
Posts: 760 Likes: 4
Senior Contributor
|
Thanks Paul, greatly appreciated. Should be easy enough to make one of these. I'm guessing the perforations are around 4-5mm diameter.
Yes it is very easy to shed a few kilos just walking to the mail box lately. Even the air feels like it is on fire. I'm very tempted to put an air conditioner in my shed!
Last edited by vint_mow; 06/02/17 06:26 AM.
|
|
|
|
|
Joined: Jan 2017
Posts: 760 Likes: 4
Senior Contributor
|
I've been trying to think what these screens remind me of. Then it dawned on me. Design-wise they look a lot like the screens on some chainsaws, e.g. some Homelite models. While searching the net I came across another very similar screen on an old Briggs and Stratton, but oddly enough it was a rotating screen. And it looks a lot like the Tecumseh screen (Part No. 590417) that I have already mentioned, however the Tecumseh screen comes in at 4-5/8" diameter and about 3" hole in centre, so probably a lot smaller than the Southern Cross screen. The Tecumseh, like the Briggs and Stratton, is also a rotating screen, not stationary. Whether a rotating screen could be attached to a Southern Cross is anybody's guess at this stage. Looking at the cowl on my KXD-2, there is not a lot of clearance there, but it certainly may be possible to fit one.
|
|
|
|
|
Joined: Nov 2013
Posts: 6,938 Likes: 322
Forum Historian
|
G'day all
It is fantastic that members help out other members.
A big thank you to Paul for the thoughtful images...
I mean,a contrasting background that gives great detail.
I think 4-5 mm diameter might be a tad large...?
From what I think vint-mow is saying, this was a static screen,
not affixed to the flywheel, but supported and held by the sandwich
between the cowling and the starter assembly.
This is an interesting post because it concerns the minutiae or
detail of quality restorations of the EC-B SC engine.
-------------------
Jack
|
|
|
|
|
Joined: Jan 2012
Posts: 1,842 Likes: 14
Moderator
|
The screen was for two purposes, not so much fingers but keeping out grass and rodents. I will find it and post a pic. And in Oz, snakes. Seriously - the mechanic in my family business once found a small tiger snake wound around the flywheel fins of a Briggs. Which explained why it was hard to pull over. Fortunately he was a very strong bloke, so the snake got a bit minced, before he took the cowling off!
Cheers,
Gadge
"ODK Mods can explain it to you, but they can't understand it for you..."
"Crazy can be medicated, ignorance can be educated - but there is no cure for stupid..."
|
|
|
|
|
Joined: Jan 2016
Posts: 8,191 Likes: 233
SENIOR TECHNICIAN
|
Hi Jack, not sure how many would remember the Esso add that "put a tiger in your tank" and the tiger tail you could get to tie onto your petrol cap and having it flap in the breeze
|
|
|
|
|
Joined: Jan 2017
Posts: 760 Likes: 4
Senior Contributor
|
G'day all
It is fantastic that members help out other members.
A big thank you to Paul for the thoughtful images...
I mean,a contrasting background that gives great detail.
I think 4-5 mm diameter might be a tad large...?
From what I think vint-mow is saying, this was a static screen,
not affixed to the flywheel, but supported and held by the sandwich
between the cowling and the starter assembly.
This is an interesting post because it concerns the minutiae or
detail of quality restorations of the EC-B SC engine.
-------------------
Jack Thanks Jack. Yes "stationary" screen = static screen. I am very thankful to Paul for his help. I tend to be a "fussy" renovator. I even go so far as trying to match up bolts that were from the period, rather than use modern bolts. If I do use modern bolts, I try to age them by removing the Zinc coating and grinding off any lettering on the heads. I only use modern replacement parts if I can't find the original ones, which I replace once I finally get hold of the originals. The engine mounting bolts on my Southern Cross are 5/16" x 2-1/2" UNC. They have *AJAX* stamped on the heads. I don't think they ever had any Zinc coating. They just look like plain, mild steel, and are probably only about Grade 4 or maybe less. I am inclined to think these were the original bolts, as Ajax was one of the big bolt manufacturers at the time. The nuts and bolt heads are also a smidgen larger than today's 5/16" x 2-1/2" bolts. Oddly enough I still have four of the original bolts that were used to fit the Southern Cross blades, but by today's standards they look a tad dangerous. Two of them are slightly bent. In fact I suspect they would bend long before they would ever break, which perhaps made them safer than today's high tensile bolts, which are more prone to sudden and catastrophic failure if you hit something hard. Incidentally, some years ago I had just bought a brand new Supaswift mower and took it for a spin along the footpath. Unknown to me a vandal had broken off the metal post that showed the position of the underground HP fire main. The butt of the post was stuck up several cms but concealed in the grass. Of course I hit it with one hell of a jolt, which not only cracked a blade, but also sheered a blade bolt almost clean through. The mower has never ran the same since. I wonder if I had done this in the old SC, the blade carrier may have cracked, but I am sure the blade bolts would have simply bent and buckled. The Briggs and Stratton & Tecumseh flyscreens I've measured from that period have all had around 4 mm diameter perforations. Today's screens are more like 2-3 mm. ![[Linked Image]](https://www.outdoorking-forum.com.au/forum/uploads/usergals/2017/02/full-10975-32792-s_l2.jpg) Air flow is considerably compromised the smaller you go in size, so a compromise has to be reached between stopping debris (and snakes/rodents) and air flow. The pattern of the holes (and distance apart) also greatly influences the amount of free air space available. I'll be interested to hear from Paul which hole size Southern Cross chose for their screens.
Last edited by vint_mow; 07/02/17 07:30 PM.
|
|
|
|
|
Joined: Jan 2017
Posts: 760 Likes: 4
Senior Contributor
|
The screen was for two purposes, not so much fingers but keeping out grass and rodents. I will find it and post a pic. And in Oz, snakes. Seriously - the mechanic in my family business once found a small tiger snake wound around the flywheel fins of a Briggs. Which explained why it was hard to pull over. Fortunately he was a very strong bloke, so the snake got a bit minced, before he took the cowling off! I've had similar problems in the past with frogs. They love to get down under the cowl and in the cool spaces between the fins. Of course, they often don't do too well once the engine starts. I got into the habit of checking around the engines before starting them. On a side note, I've had trouble with the garden hoses in the heatwave lately. Small lizards have been squeezing into the ends of the nozzles and making their way up the hose to get moisture. You screw the end off the nozzle and out falls a lizard, sometimes two.
|
|
|
|
|
Joined: Jan 2017
Posts: 760 Likes: 4
Senior Contributor
|
Got talking to a bloke this morning about making a static flywheel screen. He told me a mate of his once made one out of an old colander that his wife was throwing out. ![[Linked Image]](https://www.outdoorking-forum.com.au/forum/uploads/usergals/2017/02/full-10975-32793-bellemain_colander_3.jpg) I'm off to raid the pantry! 
|
|
|
|
|
Joined: Nov 2013
Posts: 6,938 Likes: 322
Forum Historian
|
not sure how many would remember the Esso add that "put a tiger in your tank" and the tiger tail you could get to tie onto your petrol cap and having it flap in the breeze G'day NormThat's brilliant! I wasn't aware of the tiger tail. In the day petrol companies tried to differentiate themselves - that one had a better product. I guess this harks back to the days when fuel was less quality controlled - like Pratt's Perfection Spirit... or Plume ... or Caltex Power Chief... Advertising centered on the best product. ![[Linked Image]](https://www.outdoorking-forum.com.au/forum/uploads/usergals/2017/02/full-7392-32795-1947_boundary.jpg) [Brisbane folk might recognise Petrie Bight] Oddly enough I still have four of the original bolts that were used to fit the Southern Cross blades, but by today's standards they look a tad dangerous. Two of them are slightly bent. In fact I suspect they would bend long before they would ever break, which perhaps made them safer than today's high tensile bolts, which are more prone to sudden and catastrophic failure if you hit something hard. Hi vint-mow - this is a great post, and I am compelled to say something about blade lawnmower blade/bolt sets. In the very early 1950s the issue was with electric lawnmowers - fatalities by electrocution were reported. By the late 1950s, the issue was injury (not fatality) caused by blades becoming projectiles, or skirt-less bases becoming 'toe cutters'. In 1968 an historic Code of Safety was implemented - and led by mower manufacturers. The reversible blade carried a problem - most folk would save money by reversing the blade without replacing the fixtures. I also feel that the very nature of the rotary lawnmower has changed. In the early days, domestic lawnmowers were advertised as being able to cut any height of grass. Quite irresponsible in hindsight... The best advice, today, is to replace both blades and fixtures at the same time. Bar blades offer a safety advantage here, but the concept has its own disadvantages... That's an interesting observation about screen hole diameters! Many thanks vint-mow for spicing these forums! -------------------- Jack
|
|
|
|
|
Joined: Jan 2017
Posts: 760 Likes: 4
Senior Contributor
|
[quote]
In 1968 an historic Code of Safety was implemented - and led by mower
manufacturers.
The reversible blade carried a problem - most folk would save money by
reversing the blade without replacing the fixtures.
--------------------
Jack I'm learning a lot from this forum. Jack, I could be wrong, but aren't the only reversible blades these days found on the much larger agricultural drum mowers/slashers? Also, my Bunnings-bought garden shredder/mulcher has reversible blades. I had one of these blades fail one time but luckily the screw had held it in place and I noticed the crack in time. I believe the new-fangled "robot" mowers coming from China have double-sided (hence "reversible") blades too. They look very similar to shredder blades.
|
|
|
|
|
Joined: Jan 2012
Posts: 1,842 Likes: 14
Moderator
|
not sure how many would remember the Esso add that "put a tiger in your tank" and the tiger tail you could get to tie onto your petrol cap and having it flap in the breeze G'day NormThat's brilliant! I wasn't aware of the tiger tail. My brother and I had one each of those tiger tails - I seem to recall that we nagged the olds into buying them when refuelling on a long road trip! Cobram, Vic to NSW South coast, it would have been. In the day petrol companies tried
to differentiate themselves - that one had a better product. I guess
this harks back to the days when fuel was less quality controlled -
like Pratt's Perfection Spirit... or Plume ... or Caltex Power Chief...
Advertising centered on the best product. Very much a case of the, 'if you can't blind 'em with science, baffle 'em with bullshit' salesman's approach! [Brisbane folk might recognise Petrie Bight] Wouldn't be many folk left who even remember that multi-brand petrol servo sites even existed, now.
Cheers,
Gadge
"ODK Mods can explain it to you, but they can't understand it for you..."
"Crazy can be medicated, ignorance can be educated - but there is no cure for stupid..."
|
|
|
|
|
Joined: Jan 2017
Posts: 760 Likes: 4
Senior Contributor
|
Wouldn't be many folk left who even remember that multi-brand petrol servo sites even existed, now. A bit before my time. But as I lived in a rural area, I do recall those old style bowsers outside the local shop and garage. We never used them, as we had a truck deliver all of our fuel and oil to the farm in bulk. I can tell an interesting story from the 1970s. We had a fuel tank at the far end of our place that we no longer used. When my parents sold the farm, we decided to move the tank up for the auction. To our great surprise it was full to the brim with diesel. We had never received a bill for it. For a long time after we wondered which neighbour had got a puzzling bill in the mail demanding payment for fuel they had never ordered! Or, someone must have been wondering why they never received the fuel they had ordered. It could have been sitting in that tank for years. Great bit of history in those photos!
Last edited by vint_mow; 10/02/17 06:19 PM.
|
|
|
|
|
Joined: Jan 2012
Posts: 1,842 Likes: 14
Moderator
|
Wouldn't be many folk left who even remember that multi-brand petrol servo sites even existed, now. A bit before my time. But as I lived in a rural area, I do recall those old style bowsers outside the local shop and garage. We never used them, as we had a truck deliver all of our fuel and oil to the farm in bulk. The last multi-brand site in Melbourne I recall was in East Burwood, and it lasted well into the 1980's before it went to monobrand! Yeah, there was a significant price advantage in being a 'bulk delivery customer', back a while. Even for some townies. The builder who lived across the road from me in the 1970's had an underground tank under his driveway, and a mounted Macnaught hand pump next to it. That was just so he could get bulk pricing on petrol to run his work utes. Great yarn there about the mystery diesel.
Cheers,
Gadge
"ODK Mods can explain it to you, but they can't understand it for you..."
"Crazy can be medicated, ignorance can be educated - but there is no cure for stupid..."
|
|
|
|
|
Joined: Jan 2017
Posts: 760 Likes: 4
Senior Contributor
|
Here is a template for the Southern Cross windrower ("side chute"). Again, many thanks go to Paul. Anyone who is handy at working with metal and welding should be able to knock one of these up in no time. I am getting a local engineer to make one for me. I could have a go myself, but the end result would look a bit rough! The engineer said he can make it fairy close to the original out of 1.5mm mild steel. However he tells me the reinforcing struts were not pressed out on the originals because the whole chute was moulded in one piece. Obviously it would be ridiculously expensive to create a new mould, so the alternative is to weld some 5mm rod or similar along the same positions and sand them back until they look close to the originals. The other things to note are the struts should be tapered off on both ends, not cut straight off as shown in the illustration, and the tabs will need to be bent down gradually until they fit the mower chassis. I'm guessing the angle of these tabs will be around 30-45 degrees. ![[Linked Image]](https://www.outdoorking-forum.com.au/forum/uploads/usergals/2017/02/full-10975-32811-windrower_dr3.jpg) ![[Linked Image]](https://www.outdoorking-forum.com.au/forum/uploads/usergals/2017/02/full-10975-32812-20160302_160615original.jpg)
Last edited by vint_mow; 11/02/17 01:44 AM.
|
|
|
|
|
Joined: Jan 2012
Posts: 1,842 Likes: 14
Moderator
|
G'day vint_mow, I'd strongly suspect that those tabs would have a 'double bend', as in fig 5 of this article: http://www.thefabricator.com/article/stamping/know-your-bending-basicsaeuropart-ii That way they would 'hook' into the chassis slots, to retain the windrower in position. In the absence of a die set to press form these, it would be easy enough to fab up a simple bottom former from a couple of bits of flat mild steel, and just use a hammer and a square drift to cold form them. In my case, I'd probably just use the step between my anvil's cutting table [the small flat at the base of the horn] and main face as the former. ![[Linked Image]](https://www.outdoorking-forum.com.au/forum/uploads/usergals/2015/04/full-5630-21056-anvil_01b.jpg)
Cheers,
Gadge
"ODK Mods can explain it to you, but they can't understand it for you..."
"Crazy can be medicated, ignorance can be educated - but there is no cure for stupid..."
|
|
|
|
|
Joined: Jan 2017
Posts: 760 Likes: 4
Senior Contributor
|
Thanks Gadge, You're probably right, I'll have to ask Paul about the shape of those tabs. That is a good idea about forming the double bend. I'm in unchartered waters here at present. I'll just have to gradually bend the tabs until I get a good fit.
|
|
|
|
|
Joined: Jan 2015
Posts: 988 Likes: 7
Qualified Senior
|
Hi all, Mine is not in the best shape ![[Linked Image from i313.photobucket.com]](http://i313.photobucket.com/albums/ll376/prc2008/20170211_103331_zpsjc55rmqd.jpg) ![[Linked Image from i313.photobucket.com]](http://i313.photobucket.com/albums/ll376/prc2008/20170211_103347_zpspczn5a6a.jpg) ![[Linked Image from i313.photobucket.com]](http://i313.photobucket.com/albums/ll376/prc2008/20170211_103308_zpsqecpcavb.jpg)
Last edited by paul_c; 11/02/17 09:59 PM.
|
|
|
|
|
Joined: Jan 2017
Posts: 760 Likes: 4
Senior Contributor
|
Thanks Paul, It's definitely a double bend. The top bend looks to be about 45 degrees, and the bottom bend appears to be horizontal with the top. I notice the grooves in my chassis slope inwards so are on an angle too.
|
|
|
|
|
Joined: Jan 2017
Posts: 760 Likes: 4
Senior Contributor
|
Oops, on second look this is actually a triple bend, as the reinforcing strut forms an additional bulge in the top of the tab. The tabs look to be a bit longer than on the template. This may prove difficult to reproduce accurately! But it should be possible to at least bend the tabs in a way that will hold the chute on there. 
|
|
|
|
|
Joined: Jan 2017
Posts: 760 Likes: 4
Senior Contributor
|
Here are a few seemingly trivial details relating to blade fasteners, but I thought I'd post them up as they may help some people either now or in the future. It is amazing how difficult it can be to figure out suitable parts when you are working blind and having to "backwards engineer" everything. I guess this is why they say "the Devil is in the detail"! KXD-2 blade fasteners. ![[Linked Image]](https://www.outdoorking-forum.com.au/forum/uploads/usergals/2017/02/full-10975-32884-full_7392_32420_kxd2_b.jpg) A 3/8" UNC x 1-1/2" black high tensile Grade 8 hex bolt (preferably shanked). B Original blade with 10mm (or 3/8") diameter hole. C Original bushing. D High tensile 3/8" Grade 8 zinc or black oxide washer. E 3/8" UNC Nyloc heavy duty (high profile) nut. These are easily obtainable from most mower shops.
|
|
|
|
|
Joined: Jan 2017
Posts: 760 Likes: 4
Senior Contributor
|
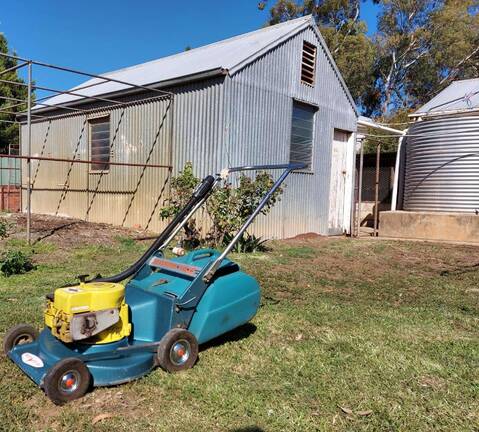
I thought I would write about the paint used on the KXD-2. As Paul informed me in an earlier post, the type of paint used on these mowers is called "hammertone". I have been trying to track down a modern spray paint that provides a similar effect and has similar shades of the two main colours that were originally used on the KXD-2, being gold and blue. The blue is a mid-range blue, not too light and not too dark. Having experimented with several different brands, I believe I have found the most suitable replacements: Ultracolor Hammertone Blue Ultracolor Hammertone Gold These come in handy pressure packs, but a word of warning on these: the cans are only 250 grams. Don't be like me and think you can spray an entire frame with just one can. It took two cans of blue to fully cover the top and underside of the carriage with just one coat. As for the gold, two cans gave two coats inside and out on the cowl, and it took another half a can just to do the handlebars. A second word of warning, although hammertone paints are generally very forgiving in that they can successfully cover up minor imperfections (such as small pits, stray casting specks, and weld marks), they can also be very difficult to work with. Spraying on different angles and from different heights and at different speeds provides an entirely different finish. Also if you do a second coat it will turn out looking very different to the first coat, being more dimpled in appearance with smaller toning changes (giving a rougher, more "flecked" appearance). Through trial and error I found that by applying one heavy coat I got a finish that was closest in appearance to the original. This was despite the instructions on the can saying to build up the paintwork with light coats rather than one heavy coat. Whenever I tried building up the coats in this way, I ended up with a very rough, dimpled finish. I got to thinking that in a factory environment, these mower parts were probably sprayed in one heavy yet even pass in order to save time. The best method I found was to keep the spray can moving, but stay fairly close to the work and apply the paint fairly thickly in one even coat. Keep going over it while it is still wet, but allowing perhaps a few seconds for the paint to flash off. Avoid staying in any one place for too long to prevent runs or sags. Hammertone paint is again fairly forgiving in this regard and a few sags will generally go unnoticed. I am not a great painter, so I always end up with a couple sags. A third word of caution with these products: Wear a respirator, as it is very "fumey", particularly the gold spray paint for some reason! A fourth word of caution: When these spray cans get close to being empty, stop using them! (I keep them only for doing minor touch up work by spraying some paint on a plastic card and applying with a fine paint brush.) The reason I say this is I had just finished painting the top of the deck with a near empty can and next thing disaster! It "splurted" out about a hundred big blobs of paint all over my perfect art work. It made a real mess. There was only one solution and that was to wipe it all down and sand it off and start again. Took me over an hour to clean off and I had to order more cans.  The only other colours are red and black. The petrol cap is black for which I used a stock standard black spray paint. The best red for the wheels by far is Rust-oleum "Farm and Implement" Massey Ferguson Red.
|
|
|
|
|
Joined: Jan 2012
Posts: 1,842 Likes: 14
Moderator
|
G'day folks,
The dimpled finish is called 'hammertone' because it replicates the appearance of beaten sheet copper - often seen on old hand-beaten [using a variety of wooden mallets and metal hammers] copper utensils.
I believe that the word itself may have been trademarked, because some paint manufacturers called their hammertone products by other names - one that I recall was 'polycrater'.
Cheers,
Gadge
"ODK Mods can explain it to you, but they can't understand it for you..."
"Crazy can be medicated, ignorance can be educated - but there is no cure for stupid..."
|
|
|
|
|
Joined: Jan 2017
Posts: 760 Likes: 4
Senior Contributor
|
Thanks Jack and Gadge,
I am currently restoring a KXD-2 and trying to keep to the original colours and style of paintwork. However I "cheated" in one place, as I could not remove the handlebars from the frame. The bolts had welded themselves to the frame with rust and nothing would loosen them. Rather than cut the old bolts off and potentially make a mess, I decided to paint only as far as the adjustments with gold. It would have taken a great deal of care to wrap all the pieces up in paper and masking tape to keep the two colours apart in this situation, and I would have still ended up with overspray. Ideally the gold should extend down over the adjustments. It was a compromise, but I note that very few restorers ever stick precisely to the original scheme. I doubt if anyone will even notice, except for an old fusspot like me!
|
|
|
|
|
Joined: Jan 2017
Posts: 760 Likes: 4
Senior Contributor
|
I've finally found some suitable modern replacement blades that are a perfect fit for the KXD-2. They are Jet Fast "GA Spares" Part No. BLD289, which replaces P/N 900120. I reckon they would probably work better even than the original Southern Cross ones. Once again, if anyone fits these blades, please double check they are not hitting against any part of the base prior to using. I can report no problems on a KXD-2 that I have fitted with these blades.
|
|
|
|
|
Joined: Jan 2017
Posts: 760 Likes: 4
Senior Contributor
|
Several more modern replacement parts for the KXD-2 just to hand. Filter cartridges to fit the original Bendix Type K filter canister: *AIR FILTER WISCONSIN SUBARU ROBIN EY 1573620101 * NOTE: Leave off the foam pre-filter that comes with this cartridge. Electrical ignition parts: Original ignition ground plate: LMPT6Z Bosch points equivalent: Bosch 1-217-013-021 Original condensor no: LMKO1Z1Z *Bosch condensor equivalent: 1-237-330-035 * NOTE: Someone else told me that the correct Bosch condensor is 1-237-330-037 I am not sure if there is much difference between the 035 and 037 condensors in any case??? Fuel caps: A suitable replacement is O.E.M. No. 157/40. VINTAGE GAS TANK CHROME CAP 65mm FUEL FILLER HUSQVARNA MAICO ZUNDAPP Penton KTM for example http://www.ebay.com.au/itm/351872397022 WARNING: This is a very expensive cap, but it will provide a perfect fit and last forever! Thanks to PaulC, a far cheaper option which also fits the Southern Cross KXD-2 is Tridon Non-Locking Fuel Cap - TFNL206V available from Supercheap Auto and probably also eBay. This is a neat chrome cap. It has a wider outside profile than the original cap and ventilates from the bottom. Plastic wheel caps The originals are a very difficult item to find in any condition. Believe it or not, I have found these furniture end plugs which are basically the same shape and can be adapted to fit. The 40mm size is the right one. Just cut back the insert so that it looks like the original, then maybe add a spot of glue for good measure.  http://www.ebay.com.au/itm/311838640302 http://www.ebay.com.au/itm/311838640302
|
|
|
|
Forums144
Topics12,730
Posts106,679
Members17,977
| |
Most Online40,124
Apr 13th, 2026
|
|
|
|


![[Linked Image from i313.photobucket.com]](http://s313.photobucket.com/user/prc2008/media/image_zpsxkz0l6sl.jpeg.html)
![[Linked Image from i313.photobucket.com]](http://s313.photobucket.com/user/prc2008/media/image_zps7zvntqpz.jpeg.html)
![[Linked Image from i313.photobucket.com]](http://s313.photobucket.com/user/prc2008/media/image_zpsb1ibhvxr.jpeg.html)


![[Linked Image from i313.photobucket.com]](http://s313.photobucket.com/user/prc2008/media/20170211_103331_zpsjc55rmqd.jpg.htm l)
![[Linked Image from i313.photobucket.com]](http://s313.photobucket.com/user/prc2008/media/20170211_103347_zpspczn5a6a.jpg.html)
![[Linked Image from i313.photobucket.com]](http://s313.photobucket.com/user/prc2008/media/20170211_103308_zpsqecpcavb.jpg.html)