|
0 members (),
3,868
guests, and
1,120
robots. |
|
Key:
Admin,
Global Mod,
Mod
|
|
|
|
Joined: Oct 2010
Posts: 1,819 Likes: 6
Junior Technician
|
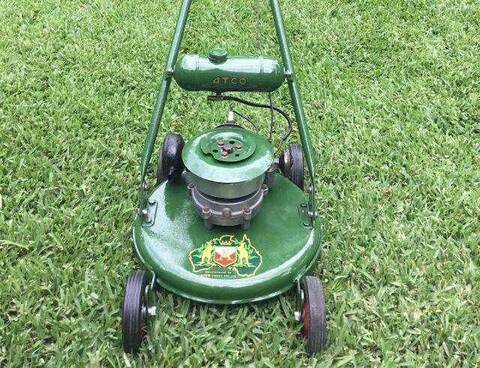
I have a GV150 here. It's on a Vulcan (superswift) babybob. I have a Superswift contractor base that i want to fit the motor too. I think they will be a good match. I pulled the carb apart on the motor, cleaned it all out, emulsion tube was covered in crud. I think i have the linkage all worked out. Perhaps too much pull on the spring as its revving a bit hard. Just ondering what the specs were for the adjustment screw on the back of the carb. Is it a mixture screw?? Low speed or high speed. I cant seem to get it to either idle right, or not hunt at revs. Can anyone help?? Cheers, Bob. ![[Linked Image]](https://www.outdoorking-forum.com.au/forum/uploads/usergals/2012/03/full-4181-5514-2mar12_008.jpg)
|
|
|
|
|
Joined: Jan 2009
Posts: 6,926 Likes: 10
Pushrod Honda preferrer
|
The usual source does not have a manual for a GV150, only for a GV100 or a G150. Some of the literature suggests it is the same carburetor. However, the GV100 illustration shows someone adjusting the pilot screw while the carburetor is on the engine, which doesn't sound as if it is on the back of the carburetor. Here is the GV100 download URL: http://www.honda-engines-eu.com/en/engines/models_range/GV_range/GV100/shop.jspHere is the G150 download URL: http://www.honda-engines-eu.com/en/images/1004.pdfThis one says just set the pilot screw to a standard 1 and 5/8 turns, and you're done. That sounds a lot more like a screw that you can't access when the engine is running.
|
|
|
|
|
Joined: Oct 2010
Posts: 1,819 Likes: 6
Junior Technician
|
Thanks Grumpy.
I will see what i can do.
I think i had the screw out over 2 turns.
You can sorta get at it with the air cleaner off.
Its not running too bad, just popping a bit and the spring needs looking at as it revs too hard.
|
|
|
|
|
Joined: Oct 2010
Posts: 1,819 Likes: 6
Junior Technician
|
Got back into this one today.
Well got it out, it was in the way. Started it up 2nd pull.
Had another GV150 on a Victa base that I got from the scrap yard that had a broken rod.
Thought it might offer an answer but the carb has been messed with and had a fair whack of dirt in it, it does look clean in the fuel bowl.
Still cant work out this pilot screw.
The G150 manual says 1 5/8
The Gv100 manual says 2 3/8
|
|
|
|
|
Joined: Jan 2009
Posts: 6,926 Likes: 10
Pushrod Honda preferrer
|
I have no experience with side valve Honda carburetors. My experience with OHV Honda carburetors so far has been that the pilot screw is just an idle mixture screw, and it is quite insensitive: you need to be wrong by more than half a turn to have an effect that I can even notice without using instruments. (I tend to watch the tachometer, let it settle for a while, and maybe find a difference of 10 rpm for a quarter of a turn of the screw. I sometimes do that at around 1500 rpm rather than the specified idle speed of 2000 rpm, to increase the sensitivity.) The idle jet provides the main restriction in the idle system, the pilot screw seems to be mainly an emissions control adjustment.
If you have a problem under load or at maximum engine speed, it won't be the pilot system. If it won't idle, look first at the carburetor to port gasket, then secondly at the complete pilot system, especially the jet. Blow some carburetor cleaner through the pilot screw system of course, but the problem is usually that the jet is obstructed.
|
|
|
|
|
Joined: Oct 2010
Posts: 1,819 Likes: 6
Junior Technician
|
Perhaps the other carb was not messed with. It had an extra spring on next to the govenor spring and no cutout spring so someone had been fiddling with it. ![[Linked Image]](https://www.outdoorking-forum.com.au/forum/uploads/usergals/2012/10/full-4181-8495-14oct12_008.jpg) I wound the screw in on it and it was out 2 1/4. So I went with that. But its probably a bit more as Im not sure I could get the screw on the mower done up seated. Using a phillips head screwdriver sort of like a bevel gear on the top of the screw. It wasnt doing the screw any favours. Pics will explain it. The slot in the base of the air cleaner housing is a bit forward of the screw. ![[Linked Image]](https://www.outdoorking-forum.com.au/forum/uploads/usergals/2012/10/full-4181-8496-14oct12_011.jpg) ![[Linked Image]](https://www.outdoorking-forum.com.au/forum/uploads/usergals/2012/10/full-4181-8497-14oct12_010.jpg) ![[Linked Image]](https://www.outdoorking-forum.com.au/forum/uploads/usergals/2012/10/full-4181-8498-14oct12_005.jpg) I wound the idle screw right in. The pilot seemed to be better so I wound the idle out until it was idling at a good speed. That was back past where it was. Strange. It will idle and picks up clean to full revs. But it goes past full revs and screams util the choke comes on. So it will still need a bit more work. I think I might take the carb off again and check the gaskets as suggested. Also tackle the screw again, I think it might need to come out another 1/4 or more. At least I will be able to wind it in and get an accurate count. The carb should be clean as a whistle inside, I cleaned it out twice back when I was first messing with it. I would rather not used the grubby carb if I dont have too. Ive got another GV150 here thats got no carb or exhaust on it, id like to have a crack at getting it going. Once this motor is running right its getting swapped for a Tecumseh thats on a 19 inch supaswift contractors base.
|
|
|
|
|
Joined: Jan 2009
Posts: 6,926 Likes: 10
Pushrod Honda preferrer
|
If you are supposed to adjust that pilot screw with the carburetor installed, I suspect you are meant to do it either from above by using a universal joint on a socket extension, with a screwdriver bit attached: ![[Linked Image]](https://www.outdoorking-forum.com.au/forum/uploads/usergals/2012/10/full-2772-8500-honda_gv150_pilot_adjustment_tool.jpg) or from in front with one or other of these: ![[Linked Image]](https://www.outdoorking-forum.com.au/forum/uploads/usergals/2012/10/full-2772-8501-honda_gv150_pilot_adjustment_tool2.jpg) If the engine over-revs that can't have anything to do with the idle (pilot) system - on a 4 stroke it sounds like a governor problem, not a carburetor one. Interesting that the other engine had a second governor spring fitted, as if it had governor trouble and the tenant made an improvement. Also, I notice the GV150 has an air vane governor, very much like a second and later generation Briggs one, but with a complicated and fraught-looking vane pivot. It sort of all comes together if there is a friction or binding problem in the governor vane or linkage. The vane pivot looks like a good candidate for causing trouble when its really old and corroded: ![[Linked Image]](https://www.outdoorking-forum.com.au/forum/uploads/usergals/2012/10/full-2772-8499-honda_gv150_carb_and_governor.png) If you want to look at pages from the illustrated parts list, it is available (free) here: http://www.ereplacementparts.com/ho...ine-parts-c-37657_37658_38010_38030.htmlOn a different subject, why not clean up your dirty carburetor anyway, since you have another engine?
Last edited by grumpy; 23/10/12 10:18 AM. Reason: Add detail
|
|
|
|
|
Joined: Jul 2005
Posts: 6,362 Likes: 11
Administrator - Master Technician
|
Hi Guys, its always great when you have the right tool for the job! I must get myself a universal joint on a socket extension, with a set of screwdriver bits. Could come in handy for a few of my projects. Thanks for posting the pic.  
Please do not PM me asking for support. Please post your questions in the appropriate forums, as the replies it may receive may help all members, not just the individual member. Kindest Regards, Darryl 
|
|
|
|
|
Joined: Oct 2010
Posts: 1,819 Likes: 6
Junior Technician
|
Thanks for the link.
I am pretty sure that it is not meant to be adjusted on the motor.
None of those things would fit, its in a hell of a spot.
The 1/4 drive wont fit though the slot in the air cleaner base.
The 90 deg screwdriver wouldnt work as you need to get a full 45 deg swing to get another bite at it.
That ratchet type setup would probably work if you could get it in through the hole but i doubt you would.
I suppose the deal would be to have a modified metal cover so you could get access.
I had thought about removing the air cleaner housing and fiddling while running, but that sort of takes away from what I am trying to achieve. It needs to be right with the restriction of the air cleaner and its housing.
Nothing wrong with the vane pivot. The one I stripped (broken rod) had the number 6 type.
I think the issue is cable drag.
Item 17 does not have that many teeth, a slot for choke, then a slot further back for high speed antoher for low. If you pull the cable full forward to choke it is stretching the govenor spring. I am sure that if the cable was light, the govenor spring would pull back on the throttle lever and get it to notch in the high speed position.
Perhaps the tennant spring was something along these lines. Perhaps its the reason the cap let go on the rod too. Theres a bolt and a half in the sump. Bore and piston are fine. There is some damage in the crankcase, will need to strip it. Some bits busted off the bottom of the crank case breather setup by the look of it. I should be able to rebuild it, but dont have a carb etc.
This motor has been sidelined again. Pulled the blade plate off it and its a short shaft with a long boss on it.
So the motor would be for a Victa or a SB or the like.
Might be going in the mini hot rod i want to build.
The carb less motor has real good compression, spark, and the right length shaft for the Commercial Supaswift base I had picked out. So I will rip the head off and look inside, check the valve clearances. Then clean up that carb etc and get it together.
|
|
|
|
|
Joined: Jan 2009
Posts: 6,926 Likes: 10
Pushrod Honda preferrer
|
Not having the engine in front of me, I don't know what you mean by cable drag. Vane governors produce very small forces - operating through one wire link is about maximum for them. If yours is supposed to move the inner part of a Bowden cable, I think it is set up incorrectly - there is no way it can reliably generate that amount of force, especially since the efficiency of Bowden cables is highly variable (as well as always being low). On a really old engine like that, if it is actually operating the vane governor through an ancient Bowden cable, it is no surprise that the engine scattered. Also, since the governor spring opens the throttle while the vane closes it, double governor springs is a good way to get the hot metal flying around even without a sticky mechanism.
Running the engine with the air cleaner housing in place, but no element, seems pointless to me, especially at idle. I think the suction created by the element would be greater than that created by the housing. I'd be looking for a way to hold the element in place without the housing, to do the idle tuning job. Or, if that really wouldn't work, I'd just attach a tachometer, then adjust the pilot screw in quarter turn increments by stopping the engine each time. You'd have to wait for the idle speed to stabilise after each restart, but it should work eventually.
|
|
|
|
|
Joined: Oct 2010
Posts: 1,819 Likes: 6
Junior Technician
|
I dont have a wide enough shot to show how the throttle link works.
If you put the parts diagram together in your head that will give an idea. Keeping in mind what I said about about only 3 detents.
There is a lever on the side under the air cleaner housing (item 16). Perhaps it should just be that lever and no cable.
The drag of a cable makes it impossible to feel the detent for full speed. Perhaps there is meant to be no cable.
I would need to find an old HR21 fitted with the GV150 originally to find out what cable if any they had originally.
It definately does have a keeper for the outer of a cable.
Perhaps it should have a cable similar to the GXV motors. Rather than the solid core spiral wound cables most mowers use.
I am not sure how hard it has to push to get the motor to shut off.
I was not running the engine while adjusting. I was adjusting and then running like you suggested.
It runs the same filter as the GXV120. The housing is different due to the manfiold going 45 deg and the carb being beside the engine. The GXV120 has a 90 deg in the front, this has a 180 deg at the rear.
|
|
|
|
|
Joined: Jan 2009
Posts: 6,926 Likes: 10
Pushrod Honda preferrer
|
So, the gear sector and cable you were talking about, are on the opposite end of the governor spring from the governor and carburetor. You are talking about how to set the amount of tension in the governor spring with the speed control lever. Is your concern that you are overspeeding the engine because the gear sector, Item 17, does not apply the choke until the control lever (item 16) has already applied too much tension to the governor spring? Hence when you start to open the choke, the engine over-speeds, but you can then bring the speed down by continuing to move the speed control toward slow?
What operates the choke linkage - is it one of the functions of Item 21 or 22? It sounds as if you have an adjustment/timing problem in the relationship between the control lever (Item 16) and the lever/link that pulls the choke.
|
|
|
|
|
Joined: Oct 2010
Posts: 1,819 Likes: 6
Junior Technician
|
Perhaps I should go and take a couple of extra pictures. Theres details that the diagram does not show up.
21 and 22 are the different cutout/stop switches. This motor has 21 with the spring. Perhaps the other has 22 without spring.
17 is fixed, 16 piviots. Right above the 7 in 17 there is a downward indentation.
18 trips the choke.
Below the - before the 16 there are 3 holes in the front edge of the throttle arm for the govenor spring. High med and low goverened high speeds. The other end of the spring goes over the pin on the butterfly arm on the carb. Then wire link to the vane.
In the high RPM position the govenor spring is in tension and the indent in the slot. Below a certain spot there is no govenor tension due to the oval hole/wrap on the butterfly end of the spring. So it is spring/vane goverend at high RPM setting and perhaps the top 60-80%, below that you only have idle set by the stop screw. So to me that would say that the motor is designed to run at either idle or full speed nothing in between.
Choke position is above high speed. Quite a few degrees, when the engine is running you can move the lever up past the high speed detent over revving the engine and leave it set there without the choke coming on. The choke does come on as it should at the end of the levers movement.
Perhaps the movement so far past the high speed detent before full choke engagement is to put extra tension on the govenor spring to ensure that the throttle butterfly stays open for more reliable starting. At high speed perhaps the spring tension is not high enough to stop the butterfly 'flapping' with the air pulses.
What I was getting at is that with probably almost any type of control cable used on a mower it is not possible to 'feel' for the correct spot for the engines high speed throttle setting without looking at the side of the air cleaner and using the sticker on the lid and the lever as a refference.
|
|
|
|
|
Joined: Oct 2010
Posts: 1,819 Likes: 6
Junior Technician
|
On another note, I was looking around yesterday for the next victim to drag into the shed and I spotted another GV150 on a mower half way down the driveay. Its on an old rusted out sidethrow pope chassis.
Better get that one in the shed and check it out.
|
|
|
|
|
Joined: Jan 2009
Posts: 6,926 Likes: 10
Pushrod Honda preferrer
|
I follow most of that Bob, but I don't understand why you can't drop to the middle position governor spring setting. If that gives you a sensible speed (like 3,000 rpm) just before the choke closes, it would be operating like a modern Honda: past the speed control lever detent the choke is on, just before that detent the choke is open and the engine runs on maximum governed speed (3,000 rpm). If you want to you can set intermediate speeds between 3,000 and idle (2,000 rpm) but I currently use 3,000 rpm for mowing, and 2,000 for emptying the catcher or wheeling the machine around between grass patches. The choke detent may be part of the secret ingredient for making it work: it jumps between full choke and full speed with no choke, so you don't expect smooth operation between the two.
Has every GV150 you've seen, had the governor spring in the highest speed position? If so, have you figured out why?
|
|
|
|
|
Joined: Jan 2009
Posts: 6,926 Likes: 10
Pushrod Honda preferrer
|
Here are some late additional comments, now that I've finally looked at the service manual. First, here is how you tune the pilot screw: ![[Linked Image]](https://www.outdoorking-forum.com.au/forum/uploads/usergals/2013/01/full-2772-9663-honda_gv150_idle_and_pilot_adjustment.png) The doctrine according to Honda, is you adjust it with the air cleaner housing removed. Here is the doctrine on setting up the governor: ![[Linked Image]](https://www.outdoorking-forum.com.au/forum/uploads/usergals/2013/01/full-2772-9664-honda_gv150_governor_setup.png) Incidentally one of the interesting things I noticed is that the GV150 has an oil pump. It might be a good idea to clean it out and check that its input and output are clear. You access it from the bottom of the engine - no need to open the crankcase. With regard to the engine speed being hard to manage between the high speed position and the choke position, perhaps that is why Honda switched to a more elaborate system on the OHV engines, using a very strong detent on the speed control lever between "Fast" and "Choke", as well as a screw-adjustable speed stop on some models.
|
|
|
|
|
Joined: Apr 2013
Posts: 336
Apprentice level 4
|
Hi everyone,don't know if I'm in the right area here.I have a gv 150 honda mower ,runs well except for the oil leaking out of the top crankshaft oil seal which floods the points area.I have replaced the oil seal twice but still leaks ,have done plenty oil seals before but first time on this model,this has me boggled.anyone please help.
|
|
|
|
|
Joined: Jan 2009
Posts: 6,926 Likes: 10
Pushrod Honda preferrer
|
Here is the instruction page on installing the top bearing and oil seal: ![[Linked Image]](https://www.outdoorking-forum.com.au/forum/uploads/usergals/2013/04/full-2772-10328-honda_gv150_top_crankshaft_seal.png) Here is the instruction page on cleaning and checking the top bearing: ![[Linked Image]](https://www.outdoorking-forum.com.au/forum/uploads/usergals/2013/04/full-2772-10329-honda_gv150_top_crankshaft_bearing.png) Oil seals work unless one of four faults exists: Fault 1: The seal - especially its sealing lip - is damaged or the shaft has a non-round or rough surface. Fault 2: The seal is eccentric to the shaft. Fault 3: The shaft is too small relative to the seal. Fault 4: The outer support ring of the seal does not fit the housing or the housing has not been cleaned properly, so leakage occurs between the two. Expanding on Fault 1, the shaft needs a perfect, ground surface where it runs against the seal. If it is pitted, scarred, or otherwise damaged, sealing may be ineffective. Also, you cannot cure a rough shaft by reducing its diameter, since unless this is done on a lathe, you will always end up with the shaft eccentric to the seal. Even if you use a lathe, the seal can only tolerate a rather small clearance to the shaft - depending on seal type, it can be as little as 0.003" undersize from nominal shaft diameter. (Seals with springs around the lip may accept 0.020" undersize.) Expanding on Fault 2, if there is wear in that upper ball race supporting the crankshaft, the shaft will wobble about. The maximum momentary eccentricity normal oil seals can stand, and still seal, ranges from only about 0.0015" TIR for low pressure types without springs, up to perhaps twice that for higher pressure types with springs. You deal with this issue by making sure there is no wear in that top ballrace. Expanding on Fault 3, the sealing lip will usually create a wear groove in the shaft over a long period of running. A new seal will then not work effectively because the shaft is too small and the seal lip does not touch it properly. You deal with this by installing the new seal slightly higher or lower on the shaft so the lip does not coincide with the wear groove in the shaft. Expanding on Fault 4, you need to be sure the housing is clean and undamaged before you press the seal into it. Post-edit: I should have included Fault 5: Installing the seal backwards. Seals are usually uni-directional. If they have lips on both sides, normally one will be the oil seal and the other, just a dirt seal which will not hold under pressure.
Last edited by grumpy; 08/04/13 01:01 AM. Reason: Add post-edit
|
|
|
|
|
Joined: Apr 2013
Posts: 336
Apprentice level 4
|
Best information I've seen in a long time.Very much appreciated thankyou so much and take care.
|
|
|
|
|
Joined: Jan 2009
Posts: 6,926 Likes: 10
Pushrod Honda preferrer
|
roebuck, please let us know whether you now succeed in getting that oil seal to work. When this is resolved we will be able to close this thread.
|
|
|
|
|
Joined: Apr 2013
Posts: 336
Apprentice level 4
|
Grumpy, waiting on parts from usa .this includes top bearing and two new top seals lol.engine has been stripped down ready for new parts and reassemble, in the meantime I'm going to make a tool from poly on the lathe just like the one in the picture .I will let you know as soon as I'm finished assembling and tested.Thanks again .
|
|
|
|
|
Joined: Jan 2009
Posts: 6,926 Likes: 10
Pushrod Honda preferrer
|
Thanks for the update - I'd like to see pictures of your polyethylene press tool before, during, and after, because I'd have used steel. It should take well under a ton to push the bearing in, and even less for the seal, but my limited experience with plastic press tools has been very unsatisfactory. My explanation is that their extremely low Young's Modulus results in a lot of distortion under load, so they don't push things in straight. The tiniest difference in load from one side to the other, results in allowing the sticking spot to lag behind, and then you're pushing the thing in crooked. Force required immediately rises very high, and the press tool distorts more. The outcome is a press tool that looks as if it has melted, and a botched job - perhaps even a damaged housing.
|
|
|
|
|
Joined: Apr 2013
Posts: 336
Apprentice level 4
|
Hi Grumpy.Thanks for that .I will use a steel tool . I'm only a backyarder .The poly tool I made today was made out of a skateboard wheel which is a bit too soft for this job. Makes total sense what you have said. The model I am working on is /GV 150-3157301 purs like a kitten - roars like a lion when you want it to untill oil seaps into the points. The oil seal in the motor which is what the mower shop sold me is a 41-25-6 unlike the one in the picture which is a 41-21-6 so I hope I have ordered the right one this time .The seal I used last time seemed to go in quite easy and the mower shop told me to push in as far as it would go but didn't look right. It sat in about 5+ mm and the diagram shows 2mm.I've fixed a lot of different engines and have always replaced with new seals top and bottom and never had a problem like this one. As for uploading photos I will when I learn how to.I barely know how to get to this page.I'm hopeing to get one of the kids to show me how to use the forum properly one day.please have patients I will learn .once again thankyou very much and I hope I havnt confused you any with what I have written because I think its confused me.
|
|
|
|
|
Joined: Jan 2009
Posts: 6,926 Likes: 10
Pushrod Honda preferrer
|
There is no problem, roebuck, you are getting the job done, and learning without breaking anything or hurting anyone. An oil seal is usually described by three dimensions: interior diameter, exterior diameter, and width. Honda says the top crankshaft seal is 21x41x6. That means they think they made the crankshaft to fit a top oil seal with an interior diameter of 21 mm. It would appear that you have been sold 25 mm oil seals up to now, so the diameter of the sealing lip was 4 mm larger than the shaft it runs on. Because that engine has a pressure lubrication system, and one of its purposes is to lubricate the ballrace at the top of the crankshaft, having effectively no oil seal behind that ballrace would inevitably result in rather a lot of oil ending up on your breaker points. Up to now I'd been wondering how you were getting as much oil as you reported - even a sick and sorry oil seal would only ooze a bit, and you were talking about a lot more oil than that. Now it all becomes clear. Just for interest, here is the assembly diagram for the crankshaft: ![[Linked Image]](https://www.outdoorking-forum.com.au/forum/uploads/usergals/2013/04/full-2772-10342-honda_gv150_crankshaft.png) As you can see, the oil seal goes in from the top of the crankcase casting, and the ballrace goes in from underneath. The crankshaft must have a step-up in diameter just behind where the oil seal runs on it, because its ballrace is a 6205, which has an internal diameter of 25 mm and an external diameter of 52 mm. Post edit: As will become clear later in this thread, the Honda workshop manual turns out to be incorrect. The correct seal for this engine is 25x41x6. With regard to posting pictures, if you look at the box you type your post in, right above it is a row of colourful icons. The fifth one from the left looks rather like a paint spray can with a blue upward arrow in the top right corner - I've circled it in red here: ![[Linked Image]](https://www.outdoorking-forum.com.au/forum/uploads/usergals/2013/04/full-2772-10343-how_to_post_pictures.png) If you select that icon, you will see this: ![[Linked Image]](https://www.outdoorking-forum.com.au/forum/uploads/usergals/2013/04/full-2772-10344-how_to_post_pictures2.png) Stab the browse button, and you will see whatever file directory in your computer you looked at last. Navigate to where you put the pictures you want to upload, and double-click the first one. Its location will then appear to the left of the browse button. Jab the "Add file from your PC" button. There will be a little animated picture with red diagonals sliding across it for a while, then a thumbnail of the picture will appear in the top left corner of the box. Punch the "All done" button on the bottom right. You will then be back in the typing box, posting your message.
Last edited by grumpy; 08/04/13 01:03 AM. Reason: Add post-edit
|
|
|
|
|
Joined: Apr 2013
Posts: 336
Apprentice level 4
|
|
|
|
|
|
|
Joined: Jan 2009
Posts: 6,926 Likes: 10
Pushrod Honda preferrer
|
I can't identify that device. It looks as if it is a press tool, probably for installing a seal or bearing (or maybe one of each), but I have no idea what its specific application was. To move forward with this top seal problem, I suggest you measure the diameter of the crankshaft, where the oil seal runs on it. If you look at the diagram from the parts list, you can see a parallel section (circled in red) just below the flywheel taper, then a step up to the larger diameter for the inner ring of the ball race: ![[Linked Image]](https://www.outdoorking-forum.com.au/forum/uploads/usergals/2013/04/full-2772-10361-honda_gv150_crankshaft2.png) According to the engine repair manual, the oil seal diameter (circled in red) should be 21 mm, and the ball race diameter right below it, should be 25 mm. If you confirm those diameters, we will know that the workshop manual refers to the engine you have. I can't see how it can be otherwise: your serial number fits for a GV150 K1 (that is, not an early production GV150) but let's just make sure we are all talking about the same engine. So far I have never known a Honda workshop manual to talk nonsense, but we all have new experiences every day. Here are the production records for the GV150. As you can see, they were all made in Japan: ![[Linked Image]](https://www.outdoorking-forum.com.au/forum/uploads/usergals/2013/04/full-2772-10363-honda_gv150_production_records.png) The reason I want to be very sure about this, is that the Honda spare parts list seems to only show a 25x41x6 oil seal (part number 91201-Z0T-801). This would be the right size to fit on the same diameter part of the crankshaft as the ball race. So, we need to confirm that your crankshaft is like the one in the diagram I've shown in this post, with a step down in diameter from 25 mm where the ball race fits on it, to 21 mm where the oil seal runs on it. The parts list and the manual could both be correct if there had been a running change in the engine design, making the crankshaft diameter a constant 25 mm, and deleting the step down to 21 mm shown in the workshop manual. Workshop manuals are often not updated when that kind of thing happens. The problem we have is that if your engine is the original 21 mm version, it may be difficult to get an oil seal for it. 21x41x6 is not a standard size for oil seals. Of course one possibility here is that someone in Honda's Department of Cost Saving Ideas That Only Screw Up the Product a Little Bit, found that the recess in the top of the crankcase casting that the oil seal presses into, was just about deep enough for the oil seal's lip to reach onto the 25 mm diameter part of the crankshaft. They could then substitute the 25x41x6 seal for the original 21x41x6 seal, and warn their dealers to be sure and always press the seals in as deeply as possible, because if they didn't, the points compartment would fill with oil and the engine would stop. Please come back to us with a picture of the top part of the crankshaft, and those two diameters.
Last edited by grumpy; 07/04/13 03:08 AM. Reason: Add detail
|
|
|
|
|
Joined: Apr 2013
Posts: 336
Apprentice level 4
|
|
|
|
|
|
|
Joined: Jan 2009
Posts: 6,926 Likes: 10
Pushrod Honda preferrer
|
First, the easy bit. 8 is a timing chain. It runs around a small sprocket on the crankshaft and a large sprocket on the camshaft, so that the camshaft rotates exactly 1 revolution for each 2 revolutions of the crankshaft. This is at the bottom of the crankshaft, close to the large cover that goes across the bottom of the engine. You make a good point, though. Your GV150K1 has timing gears, where the original GV150 had a timing chain. The online parts list is for an early GV150 with a chain. http://www.ereplacementparts.com/ho...ine-parts-c-37657_37658_38010_38030.htmlNow, let's talk about the flywheel end of the crankshaft. 1. In your last picture, is the inner ring of the ball race a good fit on the crankshaft? 2. What is the diameter of the surface in the red circle? ![[Linked Image]](https://www.outdoorking-forum.com.au/forum/uploads/usergals/2013/04/full-2772-10370-honda_gv150_crankshaft3.png) 3. Is the surface in the green circle eccentric to the rest of the crankshaft? If it is, it is a cam that operates the breaker points. This is a bit concerning, because Honda's manual shows the cam as being the first parallel surface after the flywheel taper - see red oval: ![[Linked Image]](https://www.outdoorking-forum.com.au/forum/uploads/usergals/2013/04/full-2772-10371-honda_gv150_crankshaft_4.png) 4. There is a narrow shiny surface inside the yellow circle. Is this where the lip of the oil seal has been touching the crankshaft? What is the exact diameter of the shaft right there?
Last edited by grumpy; 07/04/13 04:49 AM. Reason: Add details and make corrections
|
|
|
|
|
Joined: Apr 2013
Posts: 336
Apprentice level 4
|
1The inner ring of the bearing fits snug. 2The red line is 16mm shaft. 3The green is the cam that opens and shuts the points.4 yes I'm pretty sure this is where the lip of the seal has been running . Could you show me with a dot where the oil seal lip is supposed to be. ![[Linked Image]](https://www.outdoorking-forum.com.au/forum/uploads/usergals/2013/04/full-6680-10372-img_20130406_085404.jpg) ![[Linked Image]](https://www.outdoorking-forum.com.au/forum/uploads/usergals/2013/04/full-6680-10373-img_20130406_084901.jpg)
|
|
|
|
|
Joined: Jan 2009
Posts: 6,926 Likes: 10
Pushrod Honda preferrer
|
It appears that the Honda workshop manual is wrong about the correct required size of that seal: it has to be the same size as the shaft, which unfortunately is a bit undersized from 25 mm. Also, I now understand why the counter jockey told you to push it in a long way more than 2 mm below flush: the shaft is tapered, and the further you push it in, the closer the shaft is to the correct size. The shiny mark, with the yellow oval, appears to be where the seal-lip has been running throughout the engine's life up to now: ![[Linked Image]](https://www.outdoorking-forum.com.au/forum/uploads/usergals/2013/04/full-2772-10374-honda_gv150_crankshaft5.png) Run your fingernail across that shiny mark and look at it closely, to ensure that it is a mark, not a groove. If it is a groove, you need to move the seal 2 mm sideways from that previous position. Next, I suggest you oil the lip of a good seal then slide it down over the shaft until its lip is right over that shiny mark, and verify that the lip is in firm contact with the shaft, all the way around. Then check that the housing is clean where the outside of the seal will sit in it. Now, do you know which way around to install the seal? The correct answer is, the same way around that Honda did when they built the engine. In case you don't remember which way that was, please read this carefully: http://www.sealing.com/fileadmin/docs/Lip_Seal_Installation.pdfIf you are unclear about anything, please say so before you install the seal, since it is difficult to get them out without damage, once they are pressed in.
|
|
|
|
Forums144
Topics12,730
Posts106,679
Members17,977
| |
Most Online40,124
Apr 13th, 2026
|
|
|
|


![[Linked Image]](https://www.outdoorking-forum.com.au/forum/uploads/usergals/2013/04/full-6680-10355-img_20130405_171009.jpg)
![[Linked Image]](https://www.outdoorking-forum.com.au/forum/uploads/usergals/2013/04/full-6680-10356-img_20130405_171912.jpg)
![[Linked Image]](https://www.outdoorking-forum.com.au/forum/uploads/usergals/2013/04/full-6680-10357-img_20130405_171555.jpg)
![[Linked Image]](https://www.outdoorking-forum.com.au/forum/uploads/usergals/2013/04/full-6680-10364-img_20130406_084741.jpg)
![[Linked Image]](https://www.outdoorking-forum.com.au/forum/uploads/usergals/2013/04/full-6680-10366-img_20130406_084901.jpg)
![[Linked Image]](https://www.outdoorking-forum.com.au/forum/uploads/usergals/2013/04/full-6680-10367-img_20130406_085215.jpg)
![[Linked Image]](https://www.outdoorking-forum.com.au/forum/uploads/usergals/2013/04/full-6680-10368-img_20130406_085404.jpg)