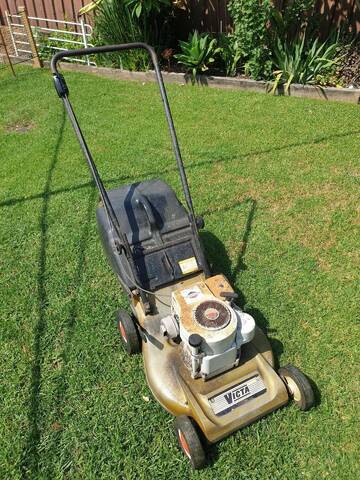
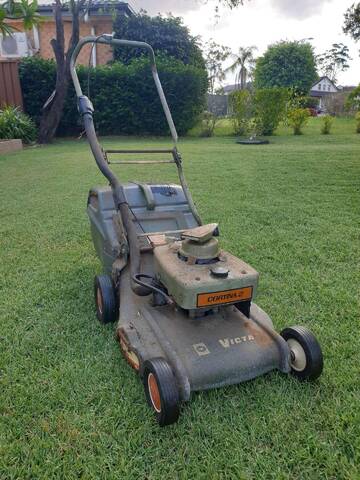
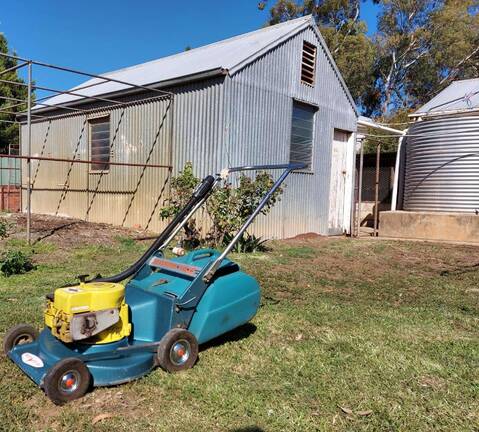
I looked around for a suitable container and found this yellow basin to be the perfect size to dip this rusted Victa 125 cowl from the late 70s. I used a litre of the tan nectar along with about 8 1/2l of hot water from the tap. I then stirred it for about five minutes with a plastic kitchen spatula, scraping the bottom for silt before throwing it in. The bath is pictured with the cowl already submerged. I also threw some selected nuts and bolts into the brew. I shall see how they have gone after about a month. I have covered it with a piece of particle board and will find some cardboard to add some extra seal.
Ahh, if only victa had kept producing the thumblatch catcher series, they would be in better shape today!
Normally you would use washing Soda and also place Anodes into the bath and then hooking up a battery charger to both the anodes (two of) and the job, thus finishing the process in less than 24 hours and not a month as you suggest.
Cheers, BB.
I live a 24 Hour lifestyle, but every now and again I seem to fall asleep, well at least that's what my wife tells me.
Just curious are guys removing paint or just the rust? Just need a little educating on this one.
Currently I use muriatic acid to remove rust quickly or household white vinegar if if I am not in a hurry. Of course can't use it on aluminum, that is where I use sulfuric acid clean it.
Now with carburetors I opt for the slow white vinegar as I working with multiple metals as the same time.
Normally you would use washing Soda and also place Anodes into the bath and then hooking up a battery charger to both the anodes (two of) and the job, thus finishing the process in less than 24 hours and not a month as you suggest.
Cheers, BB.
Hello Bonnar_Bloke, Speedie and AVB, BB, I was referring to the sugar cane molasses you mix with the water. I will try the electrode method when I run out out of molasses. Speedie, what do you do once the items come out? AVB I don't know about the paint, but any rust showing through will certainly be targeted.
Ahh, if only victa had kept producing the thumblatch catcher series, they would be in better shape today!
I was a keen believer in the molasses bath until I read some unsubstantiated stuff on how the process alters the metallurgy (surface metallurgy? ) of the steel. Read something about it being death to case hardened steels and even about it altering the tensile strength and weldability of mild steel. Come to think of it I may have read it on this forum somewhere.
I tried to find substantiated information on the subject but couldn't find anything of value. I've stopped using it until I can find out more- which is a pity because it works so well as a rust remover.
I'm prepared to accept that it might (might ) be a problem given that phosphoric acid and etching primers shouldn't be used on spring steel for this reason.
It causes Hydrogen Embrittlement which really requires the steel to be heat treated to relieve the stress created in the metal. Basically it makes steel far more brittle and induces a situation like what the Titanic suffered from when it hit the iceberg.
Certainly not good for anything of a tensile nature but normal mild steel that isn't under any tensile strength is ok.
Being an Electroplater by trade this was a common issue with anything that wasn't used in a standard mild steel application.
Cheers, BB.
I live a 24 Hour lifestyle, but every now and again I seem to fall asleep, well at least that's what my wife tells me.
Well I am learning something new. A question of the electrode setup. Are you connecting positive or negative to the metal object to be clean? Also does it need a pulsing DC charger or would pure DC with my solar panel work?
Other that I have only had two uses for molasses that was eating with my pancakes and making a M&M solution for when you can't go #2. Darn guys around here just want make the molasses before the cane is fully ripe (still too green).
After the bath I usually water blast it , as this removes any loose paint .Dry it in the sun and get paint on as soon as possible as rust starts fast.....
I have heard about that idea that molasses weakens the steel. But how deep does it penetrate steel.......
The grass hasn't grown in Bundaberg for months....... cheers speedy
........................Keep your blades sharp......................
Hi prd and others, I seriously doubt some sugar cane molasses has the power to penetrate the steel and change it's atomic composition. I'm not planning to build bridges with it or soak the blade holder either. I think an engine cover and some odd fasteners should be ok. Nice shot Speedie. Wish I had a section of ARC fencing to use for painting.
Ahh, if only victa had kept producing the thumblatch catcher series, they would be in better shape today!
If using the electric set up you would connect the negative to the job and positive to the anodes, normally plating would be the reverse of this as you would be taking metal from the anodes such as Nickel or copper and putting it onto the job that's hanging in the centre of the bath, but as you are taking rust particles (metal) from the job to the anode you have to have the electricity flow the other way.
So in normal order negative flows to positive through the electrolyte solution.
Now if you are not using electricity you'll find that there is no hydrogen being produced so generally speaking you'll have no change within the structure of the steel. Now for what MF is doing and what he's doing it to there's absolutely no issues at all as it's merely an engine cowl that has no tensile structure applied to it.
Hope that this clears up that issue.
Cheers, BB.
***Please Note, that I have two anodes in the photo that are merely looped together with the red jumper lead. The more surface area you have on the anodes the more the current will flow and the amperage will read higher on the amp meter, thus the faster the process happens and more bubbles appear.
Last edited by Bonnar_Bloke; 31/08/1801:55 PM. Reason: added image
I live a 24 Hour lifestyle, but every now and again I seem to fall asleep, well at least that's what my wife tells me.
What's an example of washing soda I can get from a chain store? I have no idea. Ratio to water would help also. I haven't mentioned that I also plonked in a pair of lower Victa handle stems (the ones that mount to the sides of the alloy hi arch frame) which are stress bearing. Hope they don't crumble in use!
Ahh, if only victa had kept producing the thumblatch catcher series, they would be in better shape today!
Okay I understand what is going here. Tnx BB for the explanation.
I would note that using this process should done in a well ventilated area as Hydrogen can be very flammable and can produce an explosion hazard in a confined space. Just look at what it does in a rocket or missile.
I give a try to see what the results are just got to obtain some washing soda or make some. I like to compare it to the muriatic acid bath I use. My solar panel produces up to 5 amps so that should enough for testing
BB you gave me idea that I might try too and that is to try some plating of gas tanks after removing the rust. Any ideas what material I should use for the plating.
Whoa !!!! it's just not that simple. In the plating procedure you have to have a particular solution which differs from process to process and none of those are cheap. The cleaning of metals is relatively affordable compared to the actual plating of them.
Basically Nickel Solution is totally different to Cyanide Copper as is Acid Copper or Cobalt Gold for that matter, etc etc etc. Man we used to love standing around the Nickel Bath on a cold morning, a sweet smell indeed along with great warmth on a winters morning. As such we never really hung around the Copper or Cadmium Bath for obvious reasons.
This is the reason why plating shops are mostly all long gone out of business as the EPA has closed many and the costs involved are huge. We just couldn't through the waste products down the drain in this country like the would do overseas. I witnessed a shop that went belly up go under the hammer and no one would dare even raise a hand and place a $5.00 bid to remove all the plating baths for scrap as they would've had to have reached into their own pockets and fork out a cool $100,000.00 for the removal and treatment of all the plating solutions before any of the baths could've been moved.
You just can't start up a plating line at home as you'll be hung drawn and quartered in a flash.
BTW I remember the console plating line they installed at Regency Park Trade School (TAFE) around 1979, now that one would've been a great little domestic line. That sadly went to scrap years ago when there were no more apprentices being employed in this country.
Out of around 25 to 30 Plating Shops we had here in Adelaide, I think we now only have 3, maybe 4 tops, employing around 10 blokes all up.
How Sad .
I live a 24 Hour lifestyle, but every now and again I seem to fall asleep, well at least that's what my wife tells me.
Kinda figure I would need a special solution. Do you know which would be better for metal fuel tanks with, maybe brass? Just researching. So disposal side would research. but I can get Cyanide free brass plating solutions.
Zinc would probably be the best and cheapest method but you'd never be able to plate internally as it's a "Low Current Density Area" unless you can get an anode to sit inside the tank and not touch the tank itself. This is the real art of plating which I was involved with. Definitely not your average back yard process that's for sure.
Generally most fuel tanks are Galvanised as this method gives coverage both inside and out. It can be a costly process as a one off job (around $60) unless you know someone that deals with a galvanising plant on a regular basis and you can put your gear in with their mass amount and this way it won't cost anything.
Most galvanising operations just don't want to deal with the average wood-duck and one off jobs, they just want to do larger volumes and do it as a mass production line situation.
Cheers, BB.
I live a 24 Hour lifestyle, but every now and again I seem to fall asleep, well at least that's what my wife tells me.
And an apology to Mowerfreak for hijacking the thread and I shut up for now as I would like to see the results of your work.
Not bothered at all AVB. It has lead to useful discussion on different methods of treating metal by immersion. I couldn't wish for a better outcome and I appreciate all the interest this has attracted. I'll will certainly post updated pics.
Ahh, if only victa had kept producing the thumblatch catcher series, they would be in better shape today!
I actually tried an electrolysis bath today using the 5% white vinegar. I didn't dilute it any further than what was in the jug from the store. Boy it is a lot faster with the charge from my solar panel. What normally takes several days was done in a couple hours so I might not need the washing soda after all. Kinda wished I took a before picture but the Briggs oil slinger metal was fully coated in rust. Don't look brand new but is definitely usable again. I just going need to redo it for 30 minutes as it came a cloud burst and it has flash rust on it. I didn't get to oil it first.
While we are awaiting Mowerfreak's pics I thought I post the one of the engine shroud I did did today. About 5 hrs due to it being partially cloudy. Seems to works best when I have a current at 1.4 amps or greater. Now I just got to try washing soda when I get some in to see if it is any faster.
The top two photos certainly don't show it in the best light as it still looks well rusted, especially the underside. The third shot looks good though.
I've found using a fairly concentrated solution using Washing Soda (stronger Caustic) removes all the rust very well and it will then require a good rub over using Scotch Brite to mechanically remove all the left overs on the surface. After that it's clean as.
Cheers, BB.
I live a 24 Hour lifestyle, but every now and again I seem to fall asleep, well at least that's what my wife tells me.
BB the top two where before I did anything other than pull it out the recycle pile. The last pic was after I pull it out the 5 hour bath and cleaned with water and only light rubbing by my bare hand the last bits that the normal water hose pressure didn't get off easily. If I had set up the pressure washer (just being lazy on my day off) it would have took care of it without me rubbing the surface. No Scotch Brite pad was needed or used. Now I know would there might some that are more rusted might need a little scrubbing or longer bath.
The underside was just as clean as the outside. Now my steel electrode did turn quite black but it also came out the recycle pile of used bar blades. Almost as black as the spray paint I use to paint the shroud just not high gloss. So the only cost was the 3 gallons of vinegar.
Overall I was very pleased with the results on that '98 shroud using the 5% white vinegar as the electrolyte and my 60w solar panel.
Just don't like using them on the wrong engine without changing the stamp model and type numbers. This process however will help on the restores and the used parts recovery especially the tins so I have a new use for my solar panel other than charging batteries.
As for the washing soda this is where the info is lacking as what the concentration that is being used. Other words what percentage (mix ratio) that is being used? Like one cup to a gallon or one cup to a liter. That would take the guessing out. Just for example the molasses bath I don't see where any mix ratio is posted.
Last edited by AVB; 03/09/1810:53 PM. Reason: wording correction
Regarding molasses bath, I read somewhere here that the minimum is 1 part molasses to 9 parts water but can be up to 1/4 molasses. The richer the mix, the less time to wait. I used close to the minimum as I'm happy to wait and I only have a litre of Molasses left. I used 1 litre of Molasses to 8.5 litres of water. Thanks for the before and after pics AVB. They are always satisfying. Can we see the inner part? That would be interesting. My Victa 125 two stroke cover was more scaly on the outer part than yours. Any chance of seeing piccies of your electrolysis setup?
Ahh, if only victa had kept producing the thumblatch catcher series, they would be in better shape today!
Sorry I was losing daylight fast yesterday but I can verify that it was just as clean inside as it was out but I have already repainted it to prevent flash rusting so I can't post an image of the inside now.
As for my setup it was very simple. A 5 gallon bucket with the negative lead attached to the shroud and the positive lead attach to an old 5/8" x 6" forcing bolt (that I mangled during a pull) from one of my pullers suspended in the center of bucket not touching the shroud and I had filled the bucket with 3 gallons of the vinegar; just enough to cover things. I actually use a 1 x 2 board across the top of bucket to suspense my bolt anode. My solar panel has about a 8 foot twin lead terminated with two small battery clips like on small chargers.
I am going to see if I can use different plastic container that has more room and look nicer, just got to look around the next time I out but the reclaimed oil bucket work fine.
I am kinda embarrassed to show my redneck setup but it is just temporary setup until I can made a more professional setup. It was good enough for initial test just prove to myself I understood the principal involved so I just used improvised items that were handy. What you on the left the setup for the anode bolt and on the right is the suspended belt pulley. I would like better hangers for the anode and object being clean but as I said it is just a test setup.
Haha very redneck as you call it. I don't care. There end result is all that matters. HELP!! Thick tufts of mould are growing on the surface of my brew. How do I remove it?
Ahh, if only victa had kept producing the thumblatch catcher series, they would be in better shape today!
Well I using it to clean up some rusted spindle pulleys this week. I going see how well it does on the double stack later today. Sure saves having to buy over $100 in pulleys for the '94 mower deck. Kinda hoping I can get the engine pulley off but I don't think the last guy used any anti-seize when he installed it. I may be only able to clean it with a wire brush. Everything so rusted up from sitting unused several years,
Originally Posted by Mowerfreak
HELP!! Thick tufts of mold are growing on the surface of my brew. How do I remove it?
Now you are not suppose to be growing your own antibiotics. I would think you just use a skimmer to remove the mold but the real question is how do you prevent it in the first place. That going to hard I would think as it got to be sterile environment so it need to sealed once sterilized.
Maybe those that has worked with the molasses bath before has some ideas on the mold prevention.
On side note I just found that I need a prescription just to get my antibiotic terramycin for my honeybees. What a bummer. I have been using it for 20 yrs and it was an over the counter medicine. Also I can only get it a 20+ oz package instead the smaller 6.4 oz package. The stuff goes bad quickly if not not vacuum sealed. Just more government control making things harder to do what is routine necessary treatment. Just wondering when they going make all the over meds prescription only so doctors charge for office visits get to headache meds which what doctors are pushing for here.
Alrighty, here is the result. Most of the rust was removed from the engine shroud, bar a couple of small spots with paint. Most of the old paint peeled off easily but I used the pressure washer to remove most of the rest. Then used steel wool. As it air dried, the iron oxide rapidly reappeared, so I used CLR and a blue scouring pad to wipe it off before rinsing and quickly drying it with a clean rag, before using a hairdryer for a few minutes. Then out with the can of black zinc paint. The paint revealed some pitting in the finish from years of rust, but that will be mostly hidden by the plastic dress cowl. Metal is hard work to clean up and repaint. Wow.
Ahh, if only victa had kept producing the thumblatch catcher series, they would be in better shape today!
Then you can sand it back with wet or dry, repaint, sand it back and continue the process till you get a mirror finish on it, then give it a coat of 2 pak clear
Then you can sand it back with wet or dry, repaint, sand it back and continue the process till you get a mirror finish on it, then give it a coat of 2 pak clear
I have a lot ahead. Finish is lacklustre but it's still an improvement to before. I'm a bit rusty on the sandpaper to use. 300 -400 grit from memory. How long to cure before rubbing down again?
Ahh, if only victa had kept producing the thumblatch catcher series, they would be in better shape today!






 .
. as I would like to see the results of your work.
![[Linked Image from i.imgur.com]](https://i.imgur.com/u40Wmdg.jpg)
![[Linked Image from i.imgur.com]](https://i.imgur.com/rhADGJL.jpg)
![[Linked Image from i.imgur.com]](https://i.imgur.com/JbrNB7d.jpg)
![[Linked Image from i.imgur.com]](https://i.imgur.com/xgeTUhF.jpg)