|
0 members (),
1,942
guests, and
610
robots. |
|
Key:
Admin,
Global Mod,
Mod
|
|
|
|
Joined: Nov 2013
Posts: 3
Novice
|
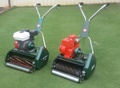
Hi Guys I've just purchased a second hand SB45 and need some help. Having read some of the forums, it appears that my issue is with the cutter clutch thrust pad and the position of the cutter clutch relative to the thrust pad. My clutch keeps engaging the cutter when it shouldn't. I was going to adjust the screw which moves the thrust pad closer to the clutch cone so that the thrust pad could push the cone in further and ensure the clutch was disengaged. However, if I do that then when it returns to the engaged position there is no gap between the thrust pad and the clutch and the thrust pad will melt (it already has started to). I can't adjust the thrust pad to have a gap between it and the clutch cone at all. See one of my pictures below where I am try to push the thrust pad back but it won't go any further. So, my question is how do I adjust this all so my clutch disengages and then the clutch does not melt my thrust pad. Do I need to take apart the clutch so check for wear? Is my clutch worn that it is engaging too soon, or is it fine and there is a way to adjust it? I've attached some photos below. Model is 450511 and Scott Bonnar engine is 80102 0233 01. I'm not 100% sure about the badging because someone has tries to restore and put new stickers over the old ones. It currently says it is a Rover. Thank you in advance. ![[Linked Image]](https://www.outdoorking-forum.com.au/forum/uploads/usergals/2013/11/full-7337-13121-20131115_0725581.jpg) ![[Linked Image]](https://www.outdoorking-forum.com.au/forum/uploads/usergals/2013/11/full-7337-13122-20131115_0726321.jpg) ![[Linked Image]](https://www.outdoorking-forum.com.au/forum/uploads/usergals/2013/11/full-7337-13123-20131115_0726441.jpg) ![[Linked Image]](https://www.outdoorking-forum.com.au/forum/uploads/usergals/2013/11/full-7337-13124-20131115_0726571.jpg) ![[Linked Image]](https://www.outdoorking-forum.com.au/forum/uploads/usergals/2013/11/full-7337-13125-20131115_0727101.jpg) ![[Linked Image]](https://www.outdoorking-forum.com.au/forum/uploads/usergals/2013/11/full-7337-13126-20131115_0728231.jpg)
|
|
|
|
|
Joined: Jul 2005
Posts: 6,362 Likes: 10
Administrator - Master Technician
|
Hi Dean, and a warm welcome to the forum.Its great to have another Scott Bonnar Model 45 on board.  I think I can see the problem with your clutch set-up. If you look at your pics you will see the clutch fork is leaning to the right (when viewed from the front). It should be straight up and down when the clutch is engaged in the cutting position. What you need to do is re-locate the whole clutch assembly closer to the engine...you do this by loosening the nut on the captive cotter pin on the inside of the inner clutch housing until the nut is flush with the top of the thread and gently tap it down until it releases from the engine PTO shaft. Then slide the whole clutch assembly towards the engine and then adjust the clutch fork with its locknut and screw until it is upright with some clearance between the thrust pad and the clutch cone....That means: When the clutch is in the cutting (engaged) position, there should be clearance between the thrust pad and the inner cone...Here is some pics: The first pic is in the engaged (cutting) position and the second in the disengaged position.... ![[Linked Image]](https://www.outdoorking-forum.com.au/forum/uploads/usergals/2013/11/full-1147-13050-dscf1730_medium.jpg) ![[Linked Image]](https://www.outdoorking-forum.com.au/forum/uploads/usergals/2013/11/full-1147-13051-dscf1731_medium.jpg) When the adjustment is complete, tighten up the nut on the captive cotter and lock up the clutch fork adjusting screw and your done!  Good luck with it, and please let us know how you get on. Re: your stickers and decals, they are available on eBay as reproductions for the Scotty 45 and are made by one of our OutdoorKing members, Willingworker. 
Please do not PM me asking for support. Please post your questions in the appropriate forums, as the replies it may receive may help all members, not just the individual member. Kindest Regards, Darryl
|
|
|
|
|
Joined: Nov 2013
Posts: 3
Novice
|
Thanks for the warm welcome Deejay. I'm so glad have found this forum. I was getting concerned about tinkering with this myself but the posts here give me confidence that some home restoration and maintenance is doable. I have already fixed the starter clutch which kept getting jammed on and tying knots in my starter rope. A little clean it is good as new (well 40 years new at least). I'm going to give the cutter clutch a go this weekend and see what it looks like. I've ordered a new thrust pad just in case. The other one is melted down a touch. I will also take some more pictures and get your opinion on the state of the sprockets and chains. I cycle quite a bit and am used to cleaning and re-greasing my cassette and chain on a monthly basis so am well versed in chain and tooth wear. Bikes are easy because the teeth are quite wide and it is easy to see them getting pointy in comparison. Could someone please point me in the direction of some photos that compare worn teeth and good teeth on the sprockets? On another note, how do you paint strip, prime and repaint? - Do I get a paint stripping disc (or 4) for the angle grinder or send it away for sand blasting?
- What primer do you use and how can I apply? I don't have an air compressor but would love an excuse to buy one
- Same for the paint? Can you just use spray cans or am I better to get it done at a paint shop/powder-coaters?
Thanks in advance Dean
Last edited by DeanH; 21/11/13 10:39 PM.
|
|
|
|
|
Joined: Dec 2012
Posts: 289 Likes: 2
Apprentice level 3
|
Hi Dean, I'll leave the mechanical advice to Deejay and give you some advice on the paint. I've been painting for some time on a semi-professional level and tried most paints and paint removal methods. There's a few ways you can go about removing the paint, all have some pros and cons. Using a sander or grinder is fairly time consuming unless you're working with plain, flat surfaces. You can't get into corners and grooves and if you're a little too hard on it and end up with some scratches in the metal, they'll show through the paint unless you fill them and re-sand them. Paint stripper is popular but it's nasty stuff if it touches your skin and makes a hell of a mess. I've used a commercial paint removal company once that used chemical baths to remove paint and rust and they did a fantastic job. Once the paint is stripped, you'll still need to sand the entire surface lightly before priming to ensure you get good adhesion. Sandblasting is my preferred method as it's quick, easy and gets into all of the little corners and grooves etc and gives you a nice surface ready to prime. There's different grades of abrasive from very fine to quite coarse, you just need to be careful not to go too coarse. If you want something fairly mild, glass beads are great otherwise you can use garnet for heavier work. If you only need one job done, get an abrasive blasting company to do the work for you as decent size blasting cabinets aren't cheap and they need a lot of air to run them. I have a cabinet than can easily accommodate a model 45 frame but the cabinet and compressor cost around $8000 and need 3 phase power. As for the paint, there's three main choices, enamel, acrylic lacquer and 2k. Enamel and acrylic are readily available in aerosol cans or can be mixed in a tin for spray gun application. 2k is what is used in professional paint shops but contains isocyanate and should only be applied in a spray booth with adequate breathing gear and suits. Enamel tends to be a little harder wearing than acrylic but is slow to dry, usually overnight to touch and then a week or more before it is fully cured. It's glossy out of the can or gun but once the finish starts to age over time, there's little you can do to bring it back. Enamel has the least amount of colour choices. Acrylic lacquer has been around for decades and was the common choice for automotive manufacturers to paint cars with up until the mid 90's. There's easily 40,000 colours available including metallics and pearls. It's not glossy when applied and needs to be wet sanded and polished to get a shine but can look absolutely stunning if done right. Acrylic dries really quickly, especially at this time of the year, usually 10 seconds to touch. The other great thing is in 10 years time when the finish looks a little faded, you can used ordinary car polish and wax to restore the shine. The major drawback is it is labour intensive to paint with. 2k is for the pros but it's fantastic stuff. It's the hardest wearing of all, cures quickly, can be wet sanded and buffed years down the track if needed, copes well with heat and solvents, the primers have high builds and the colour choices are endless. Unfortunately the chemicals used are very hazardous to your health and it's not safe or legal for home use. As for the primers, you'll need to match the primer to the type of paint you decide on. Enamel primer for enamel, acrylic for acrylic. Enamel can be applied over acrylic lacquer but acrylic cannot be applied over enamel. Hows that for some light reading?  Hope this helps with your decision. Michael
|
|
|
|
|
Joined: Jan 2015
Posts: 69
Trainee
|
Hi, I have just replaced the clutch body key and thrust pad following the notes on this forum with regards to its position i.e. there should be clearance between the thrust pad and the inner cone. When I pulled the cord to start the engine, I can see it is disengage and looks ok but as soon as the motor runs, the clutch engage the cutter when clutch fork is still in disengage position. I'm not sure if I did something wrong on re-assembly or is there something else that I should replace. One thing I also suspect is there should be a space between the clutch body and the engine as I can see some unpainted part of the shaft near the thrust pad. I have attached some photos and hopefully this will assist in problem diagnostics. Clutch Position With The Engine ![[Linked Image]](https://www.outdoorking-forum.com.au/forum/uploads/usergals/2015/01/full-8835-19975-img_0172.jpg) Engaged Position ![[Linked Image]](https://www.outdoorking-forum.com.au/forum/uploads/usergals/2015/01/full-8835-19976-img_0177.jpg) Disengaged Position ![[Linked Image]](https://www.outdoorking-forum.com.au/forum/uploads/usergals/2015/01/full-8835-19977-img_0178.jpg) Engaged - Closeup ![[Linked Image]](https://www.outdoorking-forum.com.au/forum/uploads/usergals/2015/01/full-8835-19979-img_0175.jpg) Disengaged - Closeup ![[Linked Image]](https://www.outdoorking-forum.com.au/forum/uploads/usergals/2015/01/full-8835-19978-img_0174.jpg)
|
|
|
|
|
Joined: Apr 2013
Posts: 118 Likes: 5
Lawn Freak
|
I have found the best position for the clutch on the output shaft to have about 5mm of clearance between the two components. Sometimes the output shaft extends too far into the outer clutch half and drags slightly even when the lever is disengaged.
Adjust the cluch fork so there is slight free-play between the thrust pad when the clutch lever is engaged
|
|
|
|
|
Joined: Aug 2011
Posts: 2,998 Likes: 16
Former Moderator
|
Hi Shannon and SimRice,
I have made a few observations from your photos and they are as follows,
1, Your clutch body is definitely too close to the engine, thus the whole assembly is running closer to the engine than it used to do, yes your witness marks on the shaft are telling you that.
2, when your clutch is in the engaged mode it looks like there is not that much cork left inside the clutch half as the cone comes out a bit too far.
3, There is also probably a tad too much clearance between the thrust pad and the clutch cone when it's in the engaged mode.
4, The main issue here maybe the alloy clutch housing itself ???
I have to ask, when you slid the clutch body back onto the engine PTO shaft, did you experience any play (wobble)?? if so that's probably where the issue may lie. I suspect that your body is not running true and it slightly grabs the cone on unloaded higher speed.
Until we clarify that information I can't see it being much else, but your clutch is definitely too close to the engine.
Cheers,
BB
I live a 24 Hour lifestyle, but every now and again I seem to fall asleep, well at least that's what my wife tells me.
|
|
|
|
|
Joined: Aug 2011
Posts: 2,998 Likes: 16
Former Moderator
|
Hi Again Shannon,
I'll also add that when the clutch is disengaged that the cone does not look like it's in far enough, thus a slight bit of clutch grab may be occurring. This is as a consequence of you having an extra bit of clearance in the engaged position. You might find that you just need to close up the engaged clearance a bit tighter and you'll pass on that clearance to the disengaged mode.
See how you go on that one before you do anything major.
Cheers,
BB
I live a 24 Hour lifestyle, but every now and again I seem to fall asleep, well at least that's what my wife tells me.
|
|
|
|
|
Joined: Jan 2015
Posts: 69
Trainee
|
I have re-position the clutch from the engine and the clearance is now approximately 6 to 7 mm and have also re-adjusted the clearance between the thrust pad and the inner cone. The clutch is now disengaging beautifully. Thank you guys for your help. I feel happy that I got it to work with your help.
The clutch body has a slight wobble when I tried putting it in without any screws or the clutch key but it is quite tight when I put it in with the keys and screw.
One thing that's happening though when shifting from disengage to engage, there is like a very short scraping sound. Other than this, it is running fine.
|
|
|
|
|
Joined: Aug 2011
Posts: 2,998 Likes: 16
Former Moderator
|
Happy to see you got a good result, as far as the scraping sound is concerned I'm wondering how much cork is left inside your clutch. It was something I had previously mentioned and had a bit of a concern with. Without disassembling the clutch body move your lever over the the disengaged position and see if you can see any cork inside the slight visible opening that has been created with the cone being moved inwards.
This is just a first port of call as more investigative may well be required.
Cheers,
BB
I live a 24 Hour lifestyle, but every now and again I seem to fall asleep, well at least that's what my wife tells me.
|
|
|
|
|
Joined: Jul 2005
Posts: 6,362 Likes: 10
Administrator - Master Technician
|
Hi Shannon and BB, I think that BB is right on the money and the cutter clutch cork needs replacing. A picture says a thousand words.....here's your clutch cone in the engaged position: You will see how the cone is protruding.... Here's mine for comparison in the engaged position: You will see how mine does not protrude as much...this is because of the replaced new clutch cork. Using BB's method, have a look and see the cork...if you can't, just remove the 3 screws that secure the clutch, and slide the outer half to the right and inspect the cork. Shannon, my congrats on your work thus far mate,  
Please do not PM me asking for support. Please post your questions in the appropriate forums, as the replies it may receive may help all members, not just the individual member. Kindest Regards, Darryl
|
|
|
|
|
Joined: Jan 2015
Posts: 69
Trainee
|
Thank you guys for your comments. This forum is great and really appreciate your help. When I disassembled the clutch body, the cork looks pretty much intact and still attached to the clutch body. I took the clutch body to outdoor king spare parts shop last time I pick up some parts and was told the clutch was still ok. First time I assembled it, there was no scraping sound however, the cutter is still engaged even though the clutch fork was in disengaged position. With the forums help, I then adjusted the position of the clutch against the body as basically there was no gap and adjusted the clutch thrust pad position. The clutch was working perfectly after this but then I hear this short scraping sound when shifting from disengaged to engaged. Could it be that I positioned the clutch too far from the engine. Attached are the latest photos: Clutch Position Against Engine ![[Linked Image]](https://www.outdoorking-forum.com.au/forum/uploads/usergals/2015/02/full-8835-20261-img_0181.jpg) Disengage showing cork ![[Linked Image]](https://www.outdoorking-forum.com.au/forum/uploads/usergals/2015/02/full-8835-20262-img_0191.jpg) Disassembled Clutch ![[Linked Image]](https://www.outdoorking-forum.com.au/forum/uploads/usergals/2015/02/full-8835-20263-img_0168.jpg) Disengaged ![[Linked Image]](https://www.outdoorking-forum.com.au/forum/uploads/usergals/2015/02/full-8835-20264-img_0186.jpg) Engaged ![[Linked Image]](https://www.outdoorking-forum.com.au/forum/uploads/usergals/2015/02/full-8835-20265-img_0187.jpg)
|
|
|
|
|
Joined: Aug 2011
Posts: 2,998 Likes: 16
Former Moderator
|
Hi Guy's,
I'll have to say that you've probably gone a bit too far out from the engine but nothing major that should cause any issues.
Generally there would be around 5mm between the face of the engine and the edge of the clutch body but this can vary depending on what the engine is.
Basically the the clutch fork should stand totally vertical when the clutch is in the cutter engaged mode and with the slightest clearance between the thrust pad and the clutch cone so no friction is created, thus keeping the thrust pad cool.
See how you go with that and see if you still have this scraping noise. Apart from that I'm a bit out of ideas.
Cheers,
BB
I live a 24 Hour lifestyle, but every now and again I seem to fall asleep, well at least that's what my wife tells me.
|
|
|
|
|
Joined: Jan 2015
Posts: 69
Trainee
|
Hell all,
I have re-adjusted the gap between engine body and the clutch to be 5mm (thanks to a hex key which I used to enforce this gap while tightening the screws) and it seems that the scraping noise has disappeared. The clutch is working though there's a very slight slippage which I think is acceptable. I'll see how it goes next time I used it but I think it's in a much better state.
I'll keep an eye on the cork as you have suggested and will inspect next time I disassembled the clutch body. Would you know what is the thickness of a brand new cork ?
Other than this I'm happy to move on and thank you very much for all your help on this topic. I wish I can find a forum as good as this for home appliances.
|
|
|
|
|
Joined: Aug 2011
Posts: 2,998 Likes: 16
Former Moderator
|
Hi Shannon,
Very glad to be of help.
The original thickness of the cork lining is about 2.5mm.
Cheers,
BB
I live a 24 Hour lifestyle, but every now and again I seem to fall asleep, well at least that's what my wife tells me.
|
|
|
|
These Outdoorking Forums have helped Thousands of people in finding answers to their equipment questions.
If you have received help, please consider making a donation to support the on-going running cost of these forums.
|
|
|
Forums145
Topics13,065
Posts107,263
Members17,850
| |
Most Online16,069
Sep 19th, 2025
|
|
|
|