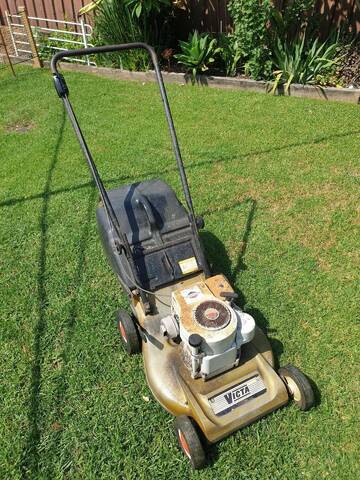
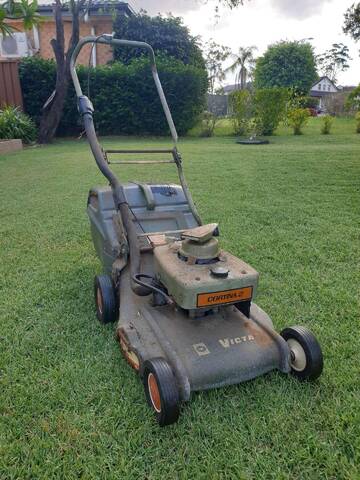
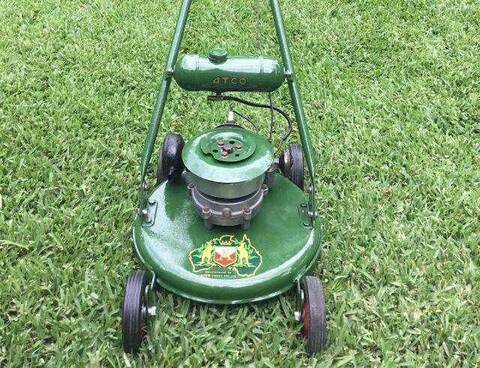
I have pulled down the engine of my newly acquired Super 600, which I am happy to say is in quite good condition and seems as it was reasonably well cared for.
It had starting issues so cleaned the carby and went through checks as outlined here in the archives, but still had issues, so decided to check the piston, rings and bore, mag, module and seals. Even though the piston rings and bore are in fairly good condition decided to replace with a re-bored barrel and piston which I bought from an acquaintance at a very cheap price, (can use original for another Power Plus that needs it). The bottom end seems in good condition so I will leave that alone.
1. How important is the muffler that go's with the high compression head? The Super has HC head but standard muffler as does the Power Plus. According to my research of the archives the HC head is supposed to have the muffler with the extra holes drilled in the baffle and denoted by a hole drilled into the outlet.
2. As careful as I've tried to be I am worried that some of the cleaning etc. may have contaminated the bottom end. Could I flush out with Kero or diesel, blow out and squirt a small amount of 2 stroke oil near the bearings before assembling the top end?
Hi Bushie, a bit of diesel, a thorough clean, blowout and a little oil around the bearings prior to assembly would be a good idea and definitely wont hurt. As for the muffler i've never run a HC engine with the standard muffler, or vice versa but have heard of others who have and they claim they can't notice the difference. My only concern would be around having the right back pressure to help with pushing back the fuel rich emmisions for a "second" burn. Generally speaking these engines aren't too muffler sensitive and will run irrespectively but i'm unsure of the long term effects of that.
Thanks heaps for your reply bigted, I was really frettin' about stuff in the crankcase. Sounds like I should get the right muffler for her though, as she'll be a keeper. Now that the frame pulled down so much I've decided to keep stripping, clean and paint, as time permits.
Cheers
Last edited by Bushie; 24/06/1409:55 AM. Reason: spelin
Hi Bushie, To save you the trouble of having to use the 'File Manager' to upload photos, we now have a forum 'Inline Uploader' that allows you to post up to 10 photos at a time.
Instructions for using it can be found HERE Hoping this is of help,
Please do not PM me asking for support. Please post your questions in the appropriate forums, as the replies it may receive may help all members, not just the individual member. Kindest Regards, Darryl
Had a go at a full crank head, didn't want to start on my head off the 600.
I gave it a soft steel wire brush out to get rid of the carbon, then used emery down to 240.
Where should I go from here? Should I take out all marks/imperfections such as the one about 1-2 o'clock, right up near the machined edge, then polish with something?
I stripped and painted the frame, to give those parts plenty of time to dry, before starting on the engine. Was hoping for a reply to the above but went ahead anyway and polished the HC head down to 400 wet & dry.
Pretty happy with the result, but any further advice would be appreciated. Have now started polishing the exhaust port and tidying up the inlet port up. Oh, and sanded the machined part of head to 250 on glass. Some further questions:
What is the best way to clean the outside of the crankcase and between the fins on the alloy head?
The foam between the petrol cap and the washer part has all but disintegrated, what do I replace this with? Ordinary foam?
Cheers, Bushie. edit: Didn't realize I had posted the same picture below
G'day Bushy, I think a lot of mower people go under ground in winter as the grass isn't growing.
Your HC head looks great, I normally just remove all the carbon, make sure I have a good mating surface and they run fine, I have cleaned them up before better than that, never done one as nice as yours above.
You can look at more threads on cleaning on this site. I normally google what I'm after and click on the outdoorking link, I find this easier than using the search option here.
For your petrol cap, you would have to use foam that wont be affected by fuel. Try to get a another cap at the tip shop or mower shop. Leave the foam out, if you don't over fill your long range fuel tank, fuel wont slosh out of the cap.
To answer one of your questions above, I have put a normal muffler on a HC engine and it starts and runs fine, that's if you cant get one.
Please keep sharing your images and experience. Enjoy
Thanks greatly for your answer Mark. I was hoping you would chime in as I see you have an affinity with the "Super". Also I share a liking for "full crank, side starters, electronic ignition and decompressors", though may be bias, as this is the first one I have done so much work on. This is one of three FC's and the next one I want to do similar to what you've done with the yellow side throw in this thread:
Yeah, should have realized a lot of mower people have hibernated... lol.
With the head, figured the 'shinier' it is the harder it would be for carbon to build up. Still not as good as Chris125's though. The exhaust port is coming along well too, but wish I had a Dremel.
Have read the thread you referred to, and others, but harsh chemicals and blasting are out for now. Noted to Google then go to ODK, good idea. Thanks for your other tips.
Started cleaning the outside of the crankcase today and my blue atom is a 'rust' atom and held in by a rusty little bolt.... Could this be part of my original starting problems?
Ground down casting marks and polished with stones and various other bits of 180, 240,320 and finished with 400. The foreground is not as good as this pic looks, with the light reflection, but the barrel end sides and the 'dip' is a fairly good representation. Looking into the bore you can make out the cross hatching, if that's a term, of hand (three finger) honing, as I don't have a honer yet.
Below is the inlet.
Just used a small stone to remove some casting irregularities and 180 grit. couldn't get into the sides of barrel end very well, a Dremel is definitely on the list before attempting another. Heat proof painting didn't adhere very well, probably due to final clean with turps instead of metho. ??
Comments welcome, including critical analysis, as trying to learn here.
Hey Bushie, I am not the guy to ask about porting, as I normally just scrape away all the carbon in the exhaust port and pretty much clean the inlet port.
I have read and since forgotten about chamfering the ports on the barrel side after your work, so that the rings wont catch. Cant give you any fine details there.
I have honed quite a few 2 stroke bores now and am due for a new set of stones. I use the 100mm 3 stone honer from super cheap as it clears the transfer ports. I set the spring pressure as light as possible and using my drill in forward and reverse try for a 30 deg cross hatching.
From what I can see you bore isn't scored and looks good.
Just read about your atom ignition module, if your bolt was rusty, this could have been an earthing issue, once you clean it all up, the end result your after is a series of blue sparks across the plug gap when you turn it over.
looking good Bushie your on the right path ,as Mark has said most mower people go under ground in winter,I sure have been getting big frost and down to -7 in the mornings am in firewood mode lol...
Must get a 3 stone honer one day Mark. This is a re-bored cylinder that had been sitting for a good while, just had a little surface rust which has been cleaned up with emery in a (supposed) cross hatch. Scored a couple of used modules yesterday, in far better looking condition than mine, so one of those with a brass bolt should do the trick. Oh yeah, do you recall the thickness of the foam in the brackets which clamp the tank? Mine had none.
Chris, do you reckon you got more torque out of your Mustang powerplus mentioned in the above thread? Did you chamfer the ports on the barrel side, as mark mentioned, on that job? Have read a little on this but not sure of importance. I guess you would at least have to make sure there were no burrs.
Cleaned bolts and painted some little items this morning, also overhauled the decompressor, nothing worthy of photos. One can see why these mowers held a premium price, I'm almost certain a great majority of the frame bolts, nylocks and the rear axle are stainless.
You must be in a cold part of Qld, our worst so far has only been -2.
G'day Bushie did I get more torque out of the Mustang well to run it seems strong so my mods did help it's a good strong workhorse, but what I did to that Mustang was mild to what I do now days......Should you chamfer the ports yes,for me it's not just to stop a ring catching on a port but also from what I have read the sharp edge of a port can wipe oil off the rings? who knows but sounds good to me so do it for peace of mind.....
Bushie, I have no foam in any of my long range tank brackets. If you are worried about vibration wearing into the plastic tank, you could put something there.
These super's are awesome machines and well worth the time and effort of getting them going , if you need new front axles they are the same as the current model master cut 600 ! beware of you handle being nice and tight at the base make sure you have heavy washers to clamp them well because they tend to crack and break away. as far as your tank goes i was too concerned of the tank rubbing through i used a piece of marine style carpet because it doesn't hold water. also upon reassembly to the deck beware of your belt tension , to tight and they are hard to start and under powered too loose and they near break your arm with kick back. its also well worth checking your blade plate hub as they from time to time need a shim adjustment or new top bearing and seal. cheers , tomo
Chris, could I ask you what, in your opinion, would be the minimum amount of chamfering ( spell check kept bugging me lol) needed ? Keeping in mind I don't have a Dremel. Would just rubbing down the sharp edges with emery be OK?
Yeah Mark I thought I read somewhere they did come out with something in the brackets.
Ah Tomo, good to hear from another Super aficionado! And to the rescue with the 'bracket padding' solution. Good advice on the handles too, had read in the archives some have trouble with breakage there. Will do as you advised. Is there a technique to the belt adjustment? I have read what's left of the instructions on the back, but it's a bit double dutch to me. How do you know if the plate hub need shims? The top seal seems sound for now, as does spindle bearings.
This is fantastic help blokes, many thanks to you and the forum.
Yes, I will put some foam in mine, as I have long range tanks on all of them now. This exploded diagram may help you. It is a later model but much the same. I notice the foam has a part number.
The belts aren't to bad to adjust just remember firm not tight not slack and you should be right. usually when they need shimming it has up and down movement on the shaft , the only thing that holds the hub to the shaft on the body is a cir-clip and i have had one drop a hub from to much free play the tin belt cover does catch it if it does come free
Am concerned about the rings in the picture below, after reading on another thread which talked about the upper ring being gray and the other black. Both these rings were the same and black. The rings are new old stock and the bottom ring has a ring expander under it. I have turned the engine over with a socket, hence the marks. It was quite tight, but being my first have nothing to compare it to.
Of a lesser concern, but still annoying, I stuffed up badly on my colour choice for the base. I realize the is an engine forum but can't justify, to myself, starting a new thread on this one rebuild. Hope it's OK to put it in here.
The colour on top of can was darker and didn't realize my original colour had faded so much. Even though I'm just doing it up for personal use it still bugs me as just about everything else is original as possible, front wheels excepted, but that's another story.
Any advice would be most welcome as I really need to get this finished.
G'day Bushie, cant really tell by your image, but hope there is plenty of 2 stroke oil in the bore & no grit from honing when turning engine over. Don't think you have too much to worry about with your rings. Your new rings will have to bed into the bore.
I have recently re-ringed a power torque engine and both of the new rings were black, normally one is grey. So, I measured both of them with a micrometre looking for a difference. Didn't see any real measurable difference, but put what I thought was the larger one as the compression ring, nearest the crown of the piston.
Paint looks great, it will make it easier to clean down.
Hi Bushie and Mark, I have to agree with Mark, the paint looks great...very close to the colour of the early Tilt-A-Cut.
Please do not PM me asking for support. Please post your questions in the appropriate forums, as the replies it may receive may help all members, not just the individual member. Kindest Regards, Darryl
After honing and porting the bore I washed the whole barrel in soap and water then high pressure water, then used compressed air and and heat gun to dry off and smeared with 2 stroke oil. I put pretty much poured a cap full of 2 stroke oil over the bearings and big end and smeared the barrel and rings just prior to assembly.
Had the barrel vertical and was turning over with a socket and funny enough, it was pumping oil out of the crankcase and accumulating in the bottom of the inlet and outlet! So I am really assured the bore is well oiled lol.
Keeping the above oiling in mind, I want to turn the engine faster with a drill, to check my spark, as after all it was difficult starting which prompted this overhaul. Would doing this be OK? It would be so much easier to attend to on the bench. Have seen it done on Youtube, doesn't make it right though...
I have made a little plate to hold in vice:
The used modules I was given are IIDA EY850, are they OK to use? Must be off a powertorque.
Am glad you both like the paint job, it has made it easier to accept, realize it's quite a few shades lighter than original, When seen in the flesh. Didn't recognize until I had stripped the base and saw the colour under the belt guard. Will live with it now as can't justify the expense of painting over.
Have learned quite a few things on this rebuild, will make a summary at the end.
Bruce, I - and a whole lot of other people - often use an electric drill to spin up an engine on the bench, both for compression tests and to work an overhauled engine for a while before starting it. However I would never use a drill on a rebuilt engine that I had not turned over by hand several times first. There are two reasons for this. First, the electric drill just applies as much force as possible whenever it is resisted. This will have ugly effects if something was incorrectly assembled. The second reason is that our hands are well-trained, fine-discriminating force measuring devices. They notice that slight grittiness, occasional small changes in resistance, and various other signs of insufficient lubricant or cleanliness, misalignment, or whatever.
There is an example of what can go wrong in your post 5710 earlier in this thread. You said that the engine was hard to turn over, after assembling with new rings. Meanwhile, those rings look as if they were not oiled prior to inserting the piston into the bore, and since the rings and grooves appear dry after the engine had been turned over, I wonder if the bore was oiled either? Oiling the rings/ring grooves and the bore is essential. If you do not, the rings are likely to be scuffed, as your lower ring seems to be, in the first seconds of the engine's life. This greatly shortens their life.



![[Linked Image]](https://www.outdoorking-forum.com.au/forum/uploads/usergals/2014/06/full-7837-16942-3s.jpg)
![[Linked Image]](https://www.outdoorking-forum.com.au/forum/uploads/usergals/2014/06/full-7837-16943-1s.jpg)
![[Linked Image]](https://www.outdoorking-forum.com.au/forum/uploads/usergals/2014/06/full-7837-16962-p6260743.jpg)
![[Linked Image]](https://www.outdoorking-forum.com.au/forum/uploads/usergals/2014/07/full-7837-17050-p7060748.jpg)
![[Linked Image]](https://www.outdoorking-forum.com.au/forum/uploads/usergals/2014/07/full-4730-17053-hjk_005.jpg)
![[Linked Image]](https://www.outdoorking-forum.com.au/forum/uploads/usergals/2014/07/full-7837-17062-p7100751.jpg)
![[Linked Image]](https://www.outdoorking-forum.com.au/forum/uploads/usergals/2014/07/full-7837-17063-p7100753.jpg)
![[Linked Image]](https://www.outdoorking-forum.com.au/forum/uploads/usergals/2014/07/full-5911-17089-cam00042.jpg)
![[Linked Image]](https://www.outdoorking-forum.com.au/forum/uploads/usergals/2014/07/full-4730-17099-exploded_diagram_frame.jpg)
![[Linked Image]](https://www.outdoorking-forum.com.au/forum/uploads/usergals/2014/07/full-5911-17104-belt_adjustment.jpg)
![[Linked Image]](https://www.outdoorking-forum.com.au/forum/uploads/usergals/2014/07/full-7837-17130-p7170757_2.jpg)
![[Linked Image]](https://www.outdoorking-forum.com.au/forum/uploads/usergals/2014/07/full-7837-17131-p7170756.jpg)
![[Linked Image]](https://www.outdoorking-forum.com.au/forum/uploads/usergals/2014/07/full-7837-17139-p7180758.jpg)