So decided to get up early this morning before the wind decided to come up and I managed to get some paint down on the engine, it's all done except the fuel tank and recoil starter.
A bit of experience bit me in the bum that I was able to work quicker knowing what I was doing and didn't realise I had sprayed to many parts to fit in the oven, lucky I didn't spray the tank and recoil started and managed to squeeze it all in. Lesson learnt spray only what will fit in the oven, got a bit cocky I guess.
Anyway 85% of the engine is done just waiting on new rings and gaskets and need to clean up the remainder of the internal guts and it should be good to mount.
I'll cook dinner tonight darling - you stay there and don't peek till it's done, want another glass of bubbles?
Do you want fries with that?
Thanks for sharing your progress Bon - you take good care and "do it right". Seeing your work makes me try to emulate the quality outcome.
That Poly paint stripper is the best, but there is a push to ban it so I bought a litre to do my second '45 reno. You're right about the skin burn - only took me one hit to realise a bucket of water nearby is a necessity... The fumes are pretty nasty too!
It's full of Caustic and that's definitely not good for the skin. Also having too much of it on hand is also an issue as it becomes weaker everytime you open it up and take some out thus letting more air in with it, thus why I only buy it in smaller quantities.
Also it's better once opened to take it out of its tin and store it in glass, this way it doesn't react with the steel which the tin is made of.
Cheers, BB.
I live a 24 Hour lifestyle, but every now and again I seem to fall asleep, well at least that's what my wife tells me.
It's Kirby for dinner tonight splashed in orange sauce. I might have to go out and buy another tin as I have run out and still got a fuel tank to do, I almost forgot how time consuming the engine was. Still plenty of cleaning to do and then re assembling but I'm now at a standstill as its a waiting game for parts to arrive before I can get stuck back into it. Looks like its time to go fishing
I didn't want to divulge too much info as that stuff is really nasty if treated without respect, and not for DIY'ers.
There's a solvents company in Sydney we use for work and I have a glass bottle of 100% strength to top it up. You really know your stuff BB and after telling the boys in our metal shop, they'd love to pick your brain. I've often relayed your words and they look at me like I'm not supposed to know this stuff!! I'm the kind of mind that l learns by 'doing' rather than reading and I've learnt so much these past months from everyone on the forum. Add that to the opportunity to show off my work AND get feedback, well, thats priceless.
Bon - a very nice finish on the parts - what temp do you bake at and what sort of timeframe? By memory you're a spray gun kind of guy, yes? Is yours fed from above or sucked up from below. I've used a sucker for restoring furniture but have heard gravity is better/easier to use.
I don't use a spray gun just cans from supercheap/Repco I bake at 90°-95°C for 1 hour as recomended on the labels. I use the Duplicolor hi temp engine enamel paint which has a ceramic formula and designed to be baked so it withstands engine temps of 260°C, oil and petrol if spilled to stop the paint from thinning or crazing. I first hit it with the primer then the colour, If you check out my thread on the last Kirby engine rebuild I did for the 45 it's all in there (note someone just re-reserected the thread). Oh word of advise don't use your kitchen oven, your misses will kill you plus it smells and is probably not good to then cook food in
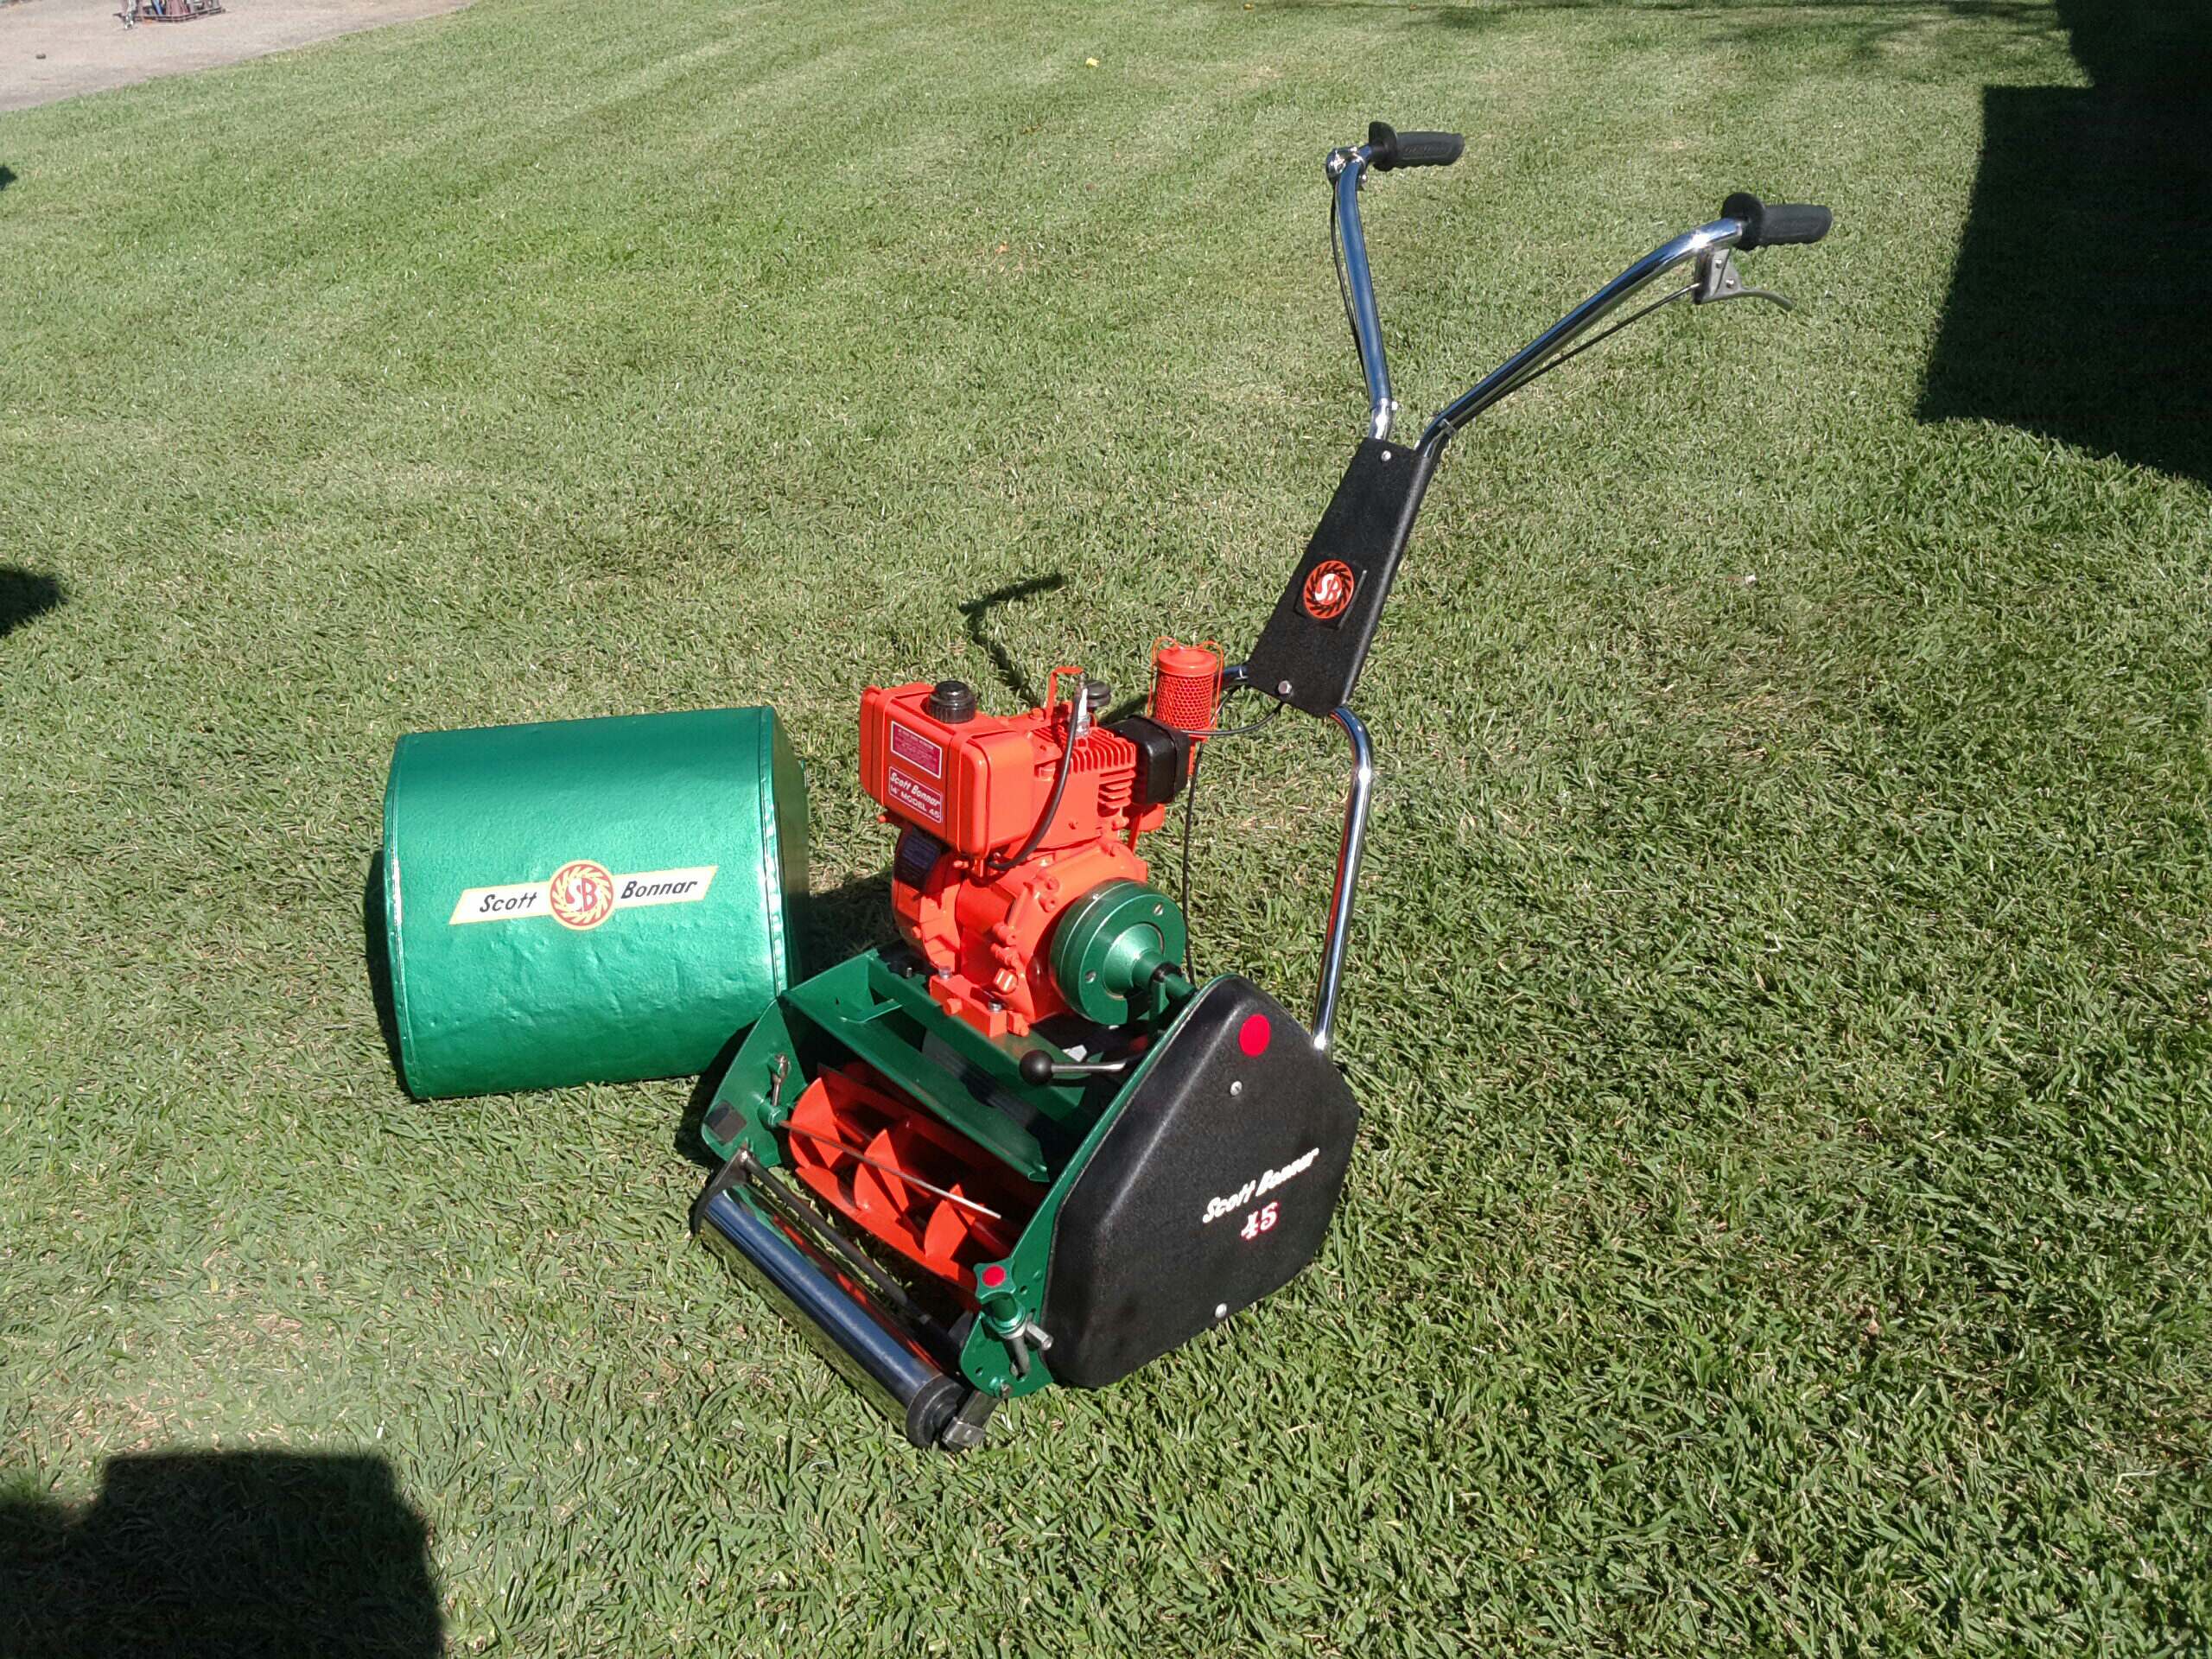
Sorry for the long delay in finishing this off but I promised I would document the whole build and show the end results.
I must say I'm proud of the finished results and I'm not one to blow my own trumpet but this edger looks top notch and one of the best I have seen.
Like my 45 it's as close as you can get to an origional factory build of its era. I even got the hand leaver re-chromed ($20.00 what a bargain) The only thing is the on/off tap decal which I managed to salvage off the tank with the heat gun and soaked it in rubbing alcohole to clean the old glue off, once I can work out what adhesive to apply to the decal it will go back on.
I really don't want to use it now as it's so nice and don't want to get it dirty but hope this helps and inspires others looking to do the same.
I now have a matching restored pidgion pair, 45 & 38
It looks absolutely fabulous, without a doubt the best one I've seen over the years. 3 years ago no one would've ever looked at a 38 but now they are the hottest property besides the Model 45 in the lawnmower landscape.
I totally understand where you are coming from about not using it and to be brutally honest I feel that most people that will restore one of these will probably never use it either as they don't fit into the gardens of today as I've previously mentioned, but regardless of my thoughts over the matter it's a beautiful piece of gardening machinery, just like the EH Holden is to the road, the Model 38 is that to the traditional garden.
Well Done young man, you should be proud of your efforts !
Cheers, BB.
I live a 24 Hour lifestyle, but every now and again I seem to fall asleep, well at least that's what my wife tells me.
Your not wrong about these edgers now being the hottest thing to buy next to a 45, everyone seems to want one and are now paying top dollar. Unfortunately there doesn't seem to be as many model 38's out there in comparison to 45's, so for those so called collectors or people who want one just to say they have a set are desperately killing each other to get their hands on one.
Personally I have always used these style edgers and picked this one up in Brisbane while I was on holidays purely for the Kirby engine incase I needed parts for my 45. Silly thing is you can pick up any brand of these older style edgers that do the exact same thing for $20.00-$50.00, I currently have 3 rover edgers and just sold a Jetfast edger. Only reason I buy them is for parts as it's cheaper to buy the whole machine than the part itself.
I'm tempted to keep using my daily rover edger as it's a left sided blade which I think will work better in my yard with certain edging directions due to fences, sheds and other objects getting in the way of the handle bars. As for those other edgers one is equipt with a circular saw blade which I use to cut small tree roots out of the ground and grind small tree stumps just below the dirt and it does the job fine.
I'm not short of edgers so I might keep this one as my EH Holden considering it's a more desirable series with the Kirby engine and white handle bars.
Hope everyone enjoyed this one as much as I did. Below is a pic of the belt pulley system prior to the guard being installed as I don't think I posted any pics of the blade system re-installed
There's not to many of them out there with the Kirby engines, wide tires and hand leaver the majority are the later Briggs series which most people are picking up and not many have restored them. I think if you going to have a model 38 edger and your going to spend the dollars to restore it your wanting to get your hands on the early white handle Kirby series as in my opinion it's the unicorn of Scott Bonnar edgers. It's a great looking machine when done properly and that Kirby engine gives it that vintage look which I love. I'm going to keep this one as a museum piece as I know there's a few of those obsessed Scott Bonnar lunatics with dozens of machines in there shed but don't have an edger let alone the earlier series. There's no way I will sell it as I'm an edger person and maybe I can pass it down to some grand kids one day and show them what quality Australian engineering is and how I restored it to its former glory. Who knows at the way prices are with these things now it may be a little investment in another 50 years.
Not quite sure If I'd hold my breath on that ???, currently there's still quite a few of these Model 38's out there. They show up every second Auction down here in Good Ol' Scott Bonnar town.
Like I suggested in another thread, I'd say in 50 years there won't be a substance called "Petrol". All these items will simply be static display pieces to merely look at.
Cheers, BB.
I live a 24 Hour lifestyle, but every now and again I seem to fall asleep, well at least that's what my wife tells me.


 plus it smells and is probably not good to then cook food in


