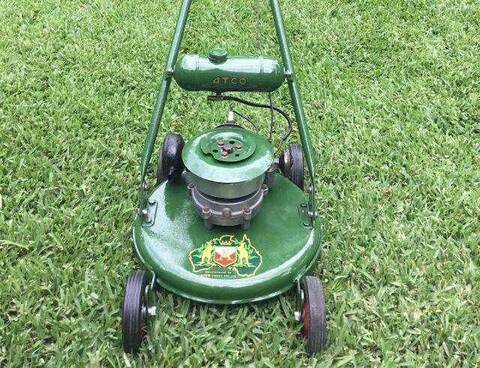
Well, I did it. I don't need it, but now I have it.
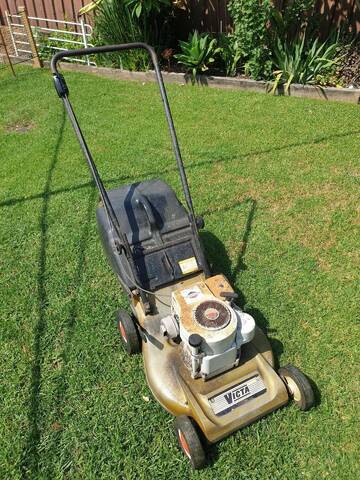
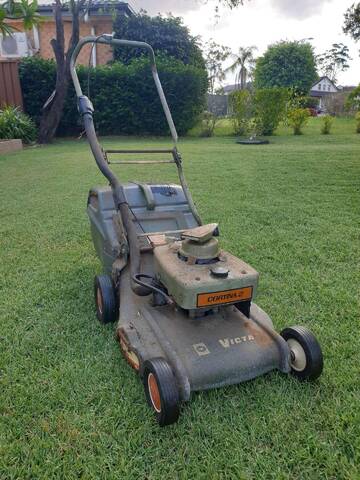
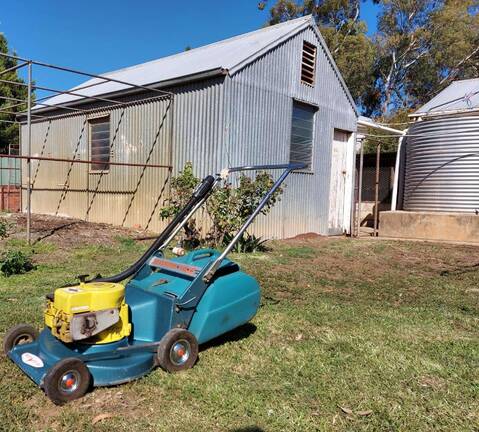
Say hello to what I believe is a Victa VC Autodrive Mk IV.
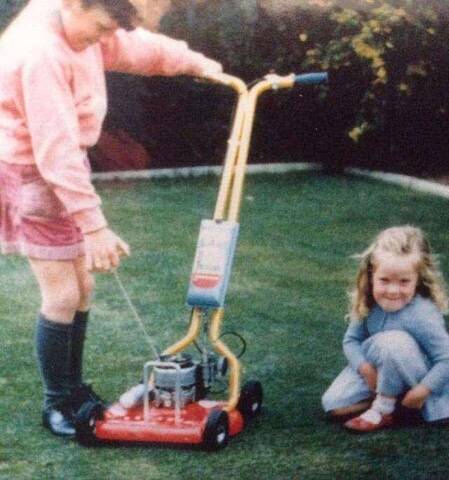
It is very, very clean. The bloke I bought it off used one as his first mower when he was younger, mowing the Post Office lawn. He purchased it a little while ago for sentimental reasons and it hasn't done much work since as he has used a ride on. I believe I'm now the third owner.
Very easy to start. I think the pull start assembly might need some lube as it feels a bit dry. The rest of the mower has a bit of surface corrosion but nothing too bad. Looks like it was stored in a nice and dry spot. I've hit some of the moving points and height adjuster spring with INOX as an interim measure.
There are two little issues I need to take care of. The first is that the drive is constantly engaged. I suspect the belt may need some adjustment? The drive cable is not tight, but not sloppy. The second is that it leaks around the spark plug. It wasn't in particularly tight, so that might be it, but is is the correct plug? It is a Champion DJ7Y.
Then there is a screw and clip I'm not sure are factory. It's in the picture behind the left rear wheel. The right front wheel has a bit missing from the inner side wall. You can see it in the picture of the blade carrier. The catcher has a small crack, thinking of stop drilling and filling with plastic weld?
After that, I'll be changing the box oil ASAP. I've found some Penrite Fork Oil which is 10W and fully synth. It claims it is safe for copper and brass alloys.
Then what? I'm not sure. It has to be used, so I'd like to give it as much protection as I can. I'm thinking the blade carrier sanded, zinc'd and powder coated. Can you fit a later four blade disc to these things? I'm also thinking of giving the same treatment to the catcher flap, give the handlebars a tidy, maybe clean the head. Unsure if I want to blast the deck and respray? What are your thoughts? Finally I'll see if I can get some reproduction stickers for it.
Last edited by Mystyler; 19/04/2007:02 PM.
I don't collect mowers. I just require Multiple Mowing Solutions™.
Hi Mystyler, that machine is such a survivor I would stick to a patina restore. Clean it thoroughly and leave it's flaws. Many are doing this. Limit painting to clear coating parts that rust easily. Another poster did this with a well kept side pull FC steel deck Victa from the early 80s using car polish in parts and it looked sensational while keeping it's history intact. Why paint the blade carrier when it's only going to get ruined the minute you cut the lawn? I'd only do that if it was to be a display item only. Ages ago a guy fully restored an 80s SPFC Mustang only to spoil it after his first use.
Ahh, if only victa had kept producing the thumblatch catcher series, they would be in better shape today!
Thank you MF for some ideas. I had considered a "patina" finish. That was the original idea for my SB45 but then I went the whole hog with that...
I do love the way it looks. I'm just concerned about keeping it going and not corroding away. So a Penetrene resto you think?
I want to do as much as I can to keep that blade carrier if I can't get replacements. Happy to replace with a PT one, but unsure if they fit?
If anyone has a service or repair manual, that would be handy. I've not worked on a FC, nor a Victa SP mower before. PTs are all I know when it comes to rotaries. I'll keep posting what I do here on the Forum for sure. For interest of others, and I'll be looking for all the help I can get so I don't fluff up a decent example!
I don't collect mowers. I just require Multiple Mowing Solutions™.
It's probably not too bad so long as you didn't lean flat out on the wrench - but you have a taper fit plug not a flat washer fit
Fortunately the thread diameter is the same - so there is less risk of stripping the thread than I thought
You do have less thread reach though - which means some of the threads aren't being used. Might be worth cleaning out the threads a bit before fully winding in the cj8 - just in case it is a bit carboned up in the lower thread
Cheers Tyler. I'll be going to my local mower shop and Repco tomorrow for some essentials. They're within coo-ee of each other.
Thankfully I didn't lean on the spanner! If I can find a gasket at the mower shop I'll pull the head off and give it a quick clean. I didn't twig to think when I pulled the plug and it had no gasket washer.
I don't collect mowers. I just require Multiple Mowing Solutions™.
When you go to get a head gasket, its worth noting they are same as the later PT (although the FC one hasn't got the edge cut outs like the PT one they work the same as both PT and FC have same bore size)
I'd recommend going for the NGK BM6A plug - from my time in the OPE game I don't think well of Champion plug quality, and they're no cheaper. Set the gap to 0.025" before you install it.
Any of the motor trade parts supply shops [Repco, Bursons etc] will have these on the shelf, at a better price than the like of Bunnings or mower shops.
That 'clip' is actually called a 'Tinnerman nut' - and no, it's not ex-factory - you'll have to work out why it's there.
Re the blade disc and catcher flap, powder coating is a major no-no! It gets damaged, water gets trapped underneath it, and away goes the corrosion process - on steroids, so to speak.
For a working mower, I'd just clean off the loose rust with a power wire brush, then brush on a 'fish oil' corrosion preventative, and let it dry. After all, have you ever seen a rusty fish?
Cheers, Gadge
"ODK Mods can explain it to you, but they can't understand it for you..."
"Crazy can be medicated, ignorance can be educated - but there is no cure for stupid..."
If anyone has a service or repair manual, that would be handy. I've not worked on a FC, nor a Victa SP mower before. PTs are all I know when it comes to rotaries. I'll keep posting what I do here on the Forum for sure. For interest of others, and I'll be looking for all the help I can get so I don't fluff up a decent example!
You're going to have to haunt FleaBay for while to find a copy; #103 is the earliest edition that I have on hand, that covers that series of Auto Drive. #424 was the last edition that did so - I have that one too.
Cheers, Gadge
"ODK Mods can explain it to you, but they can't understand it for you..."
"Crazy can be medicated, ignorance can be educated - but there is no cure for stupid..."
Tyler, thank you for the heads up. I didn't end up getting any, as I thought I'd leave it well enough alone for the moment and take care of the 'box first. Oh how I wish I did pick some up. Never mind, I'm going to need a few more parts now. Read on if you dare!
Gadge, thank you for the link. Why didn't I look in Tech Talk? I was too blind looking for a "Manuals" Subforum. To eBay it is. I’ve had a look for the plastic welding kit, but that one in particular has been discontinued. Looks like there are other options out there. I’ll give it a go on a milk bottle first, so I don’t stuff it. Funny you mention powder coating. I’ve heard what you say before, but surely there are powder coats, and then there are powder coats? Like Oils ain't Oils, kinda thing? I’m curious to know how paint can avoid this, when in theory it could trap moisture underneath as well?
Well, what a day. Just like prior attempts, nothing quite seemed to go to plan.
The first order was to see what that Tinnerman nut was holding on. As I suspected, it was keeping the drive cover on over the rear most pulley. No idea how that was put on, but I really didn't want to wreck anything getting it off. Tried "unscrewing" it. Nope. Tried a tiny hacksaw. Nope. Started to get annoyed and got the Dremel. Thankfully, that wouldn't fit... A bit of time spent with a pry bar and screw driver got it out in the end without damaging anything. Looks like the hole in the deck *is* factory though? I suspect that a bolt and nut may have helped hold the cover on originally. I'll work on a more elegant solution later. New air filter and BM6A plug goes in. By that stage, I reckon I'd earned myself a cuppa.
With that cover job for future me, I thought I'd drop the oil out of the 'box, or at least see if there was any. I looked for a drain plug and all I found was what looked initially like a rivet. It isn't a rivet. I think the thead has been mostly stripped. Not having anything at my disposal to rectify this problem, I shifted that job into the future as well and decided to see how the cowling comes off.
Removed the zip starter. A squirt of INOX and a few pulls got that nice and smooth again. A bit of rust under there as you can see in the photos. No to worry, a bit of INOX will also solve that! I'm so clever, job well done there. I took off the Prismatic fuel cap and set that aside. I undid the screws and lifted the cowling off. I didn't need to remove the fuel cap! Fuel cap back on, fuel hose removed. Oh, hello, a spring and another press clip thing, complete with zip tie!
Now I'm really curious. The drive worked, but it never really disengaged. Originally thinking that might have something to do with the cable tension, it had me confused a bit. So off came the other drive cover to see what, exactly, the cable moved. What I saw didn't look right. The idler pulley was hard up against the frame and pulling the drive lever really didn't seem to move much. Belt was really tight too. Then it dawned on me.
Remember that press clip thing, spring and zip tie? It looks like at some stage, a previous tenant tried to change the drive belt and installed the incorrect one! I tried to reinstall the spring, but the belt was just too tight. I then wondered if the idler was doing any damage to the deck if it was spinning and hard up against it. Time to remove the motor so I can get this belt off!
That didn't go according to plan either. The blade carrier nut is too big for any impact sockets I have, or any spanners, not that there was any real danger of getting it off with a stuffed elbow currently. Decided that I'll hit up Toolmart before work tomorrow. Motor stays on.
So, still worried about the idler, I cut the belt off. From memory it was an M31. I don't know what the correct belt is, but this most certainly was the INCORRECT one. Way too small. Looks like it was put on and then pushed into the corner of a shed, only to run again when I picked it up. Thankfully, I didn't decide to run it over the lawn right after I got it, as It had already started wearing a groove in the deck.
With no real progress made, the idea of actually mowing the lawn seemed like a great idea. No drive belt means no hole being chewed in my deck, so it was reassembled and despite looking blue and two-strokey, the fuel in the tank was drained and I put in my fuel which I know is 25:1. Doesn't look as blue, but who knows what the ratio was of the old fuel, and I put Sta-Bil in mine which changes the colour. Excellent! Fueled up, Zip-Start on and...
Nothing.
Not a damn thing. For some unknown reason the Zip isn't engaging anything. Well, that's got me stuffed as I didn't take it apart. Off it comes again, I have a look at how it works, and the penny drops. That INOX I sprayed in the starter cup housing thing seems to prevent the little spring loaded metal pawl things from grabbing. I guess the thing needs friction to work. On goes some de-greaser and a serious wipe down with a rag. Zip Starter on. After a few pulls it finally engages but not reliably and only in about the last 1/5 of travel. Nevermind, I figured I could see if it would start anyway.
What a magic motor! The tiniest of engagement and away it goes! I don't like asking too much of a motor straight off the bat, so I let it warm up for a while. I'm pretty sure the PT manual states a warm up time, so an old FC is just as deserving. In all the excitement noise and aroma, I forgot to put on the catcher. Motor off. Catcher on. Hot start position and away we go!
We're cutting! She's warmed up now, so how about we go MAX CHICKENS and push that throttle lever to the "firewall!" Man, this baby is loud. Is it over revving? Dunno, never had an FC before. Bit of smoke coming out from under the cowl. Or is that under the deck from the exhaust? Hard to tell. Smells a bit hot. *@$% WAS THAT A SPARK?! ABORT, ABORT!
Mild panic has set in. I'm starting to feel that the only FC I have ever owned is now about to burst into flames. How has this happened? A lot of smoke under the deck now, and she smells hot. Oh man, did I straight fuel it? I've never misfueled anything IN MY LIFE. These thoughts are going through my head as I think back to the colour of my fuel. Was it the right container? Check. Did I not pour in oil before I filled it up just recently? I remember throwing the empty oil bottle out, but can't specifically remember adding the oil to the tin.
I now don't trust my own fuel tin.
Now convinced the spark I had seen was molten piston ring, off comes everything. Starter, cowling, shroud, head, exhaust, cylinder. Actually, it doesn't look too bad. I've seen running PTs in worse condition. Rings are nice and free and springy. So now I've pulled the motor almost completely apart, the blade carrier is still on and the deck is covered in junk. Just great. Usually my mowers will be given the "Joe Carroll Special" treatment of degreaser and a pressure wash to minimise foreign object debris before I pull them apart. Too late, it's done now. This is going to be a slightly more detail "touch up" than anticipated.
Tomorrow is a new day. At least the Greenfield finished off the lawn for me. And after looking at the muffler, I reckon the spark was hot carbon shooting out the massive hole that had rusted away. Such is life!
Pictures and captions for your amusement.
Last edited by Mystyler; 21/04/2001:56 AM.
I don't collect mowers. I just require Multiple Mowing Solutions™.
Bugger. I have done the same thing myself in a rush and eagerness to use things (not straight fuel but other things). If its any consolation here is a photo of the piston from my Ozitio Leaf blower. Dropped a washer off the carby stud and bounced into the carb off the choke plate when pulling the carby halfway through use as it carked it (bad metering diaphragm). As soon as I revved it - bang grind.
Another piston and some cleaning up and away it goes again
Can't compare ozito to an old victa, but the level of p*ss off is the same when you start thinking 'What the f just happened'.
I am betting it was a bit lean on the oil but not straight
Stick a icecream/yoghurt container full of the suspect fuel outside for a few hours - it will go dark (as the petrol evaporates and it goes toward 12:1) and eventually almost pure oil if it had 2 stroke in it.
It looks about right for a 40+year old mower- this is the bore of my old VC sports and it runs perfect. Note fire extinguisher in second photo just in case
Originally Posted by Mystyler
Nothing.
Not a damn thing. For some unknown reason the Zip isn't engaging anything. Well, that's got me stuffed as I didn't take it apart. Off it comes again, I have a look at how it works, and the penny drops. That INOX I sprayed in the starter cup housing thing seems to prevent the little spring loaded metal pawl things from grabbing. I guess the thing needs friction to work.
My sincerest apologies, I thought about typing that and completely forgot as I have done the same thing on my old Victa Monaro
What you will have to do is undo the end (its either a phillips screw or e clip depending on model. Then a spring, then a metal washer, then a fibre washer, then the pawl assembly, then another fibre washer, then another metal washer. Get all the oil out and sometimes you may even have to sand the fibre washers as they get a glaze on them anyway.
Originally Posted by Mystyler
Is it over revving? Dunno, never had an FC before.
If you feel its really motoring upon rebuild, turn the little black knurled knob the vac line goes into in your 4th photo left or right. It controls rpm. They are a bit louder than a PT, but have a sweet note.
Do yourself a favour and try to track down some Penetrene for the stubborn bolts - it is absolutely the best. Expensive but worth it.
I did a major service on my car a few days ago - turns out the previous mobile d*ckhead (before I bought it) put in regular copper plugs not platinum (they were worn out to .060 gap) and torqued them down that hard I couldn't get one of them out - one spray of penetrene and ten minutes later it just came out.
Also worked out he put in straight water in the radiator and put green coolant just in the clear overflow bottle - which is just shonky. On the plus side the car now runs spot on.
Having full service history means absolutely nothing. haha
I’ll give it a go on a milk bottle first, so I don’t stuff it.
Ahh, no - milk bottles are Low Density PolyEthylene, catchers are High Density PE. Very different materials to weld. Look around for a plastic bucket - they're HDPE. The Recycling Symbol for HDPE is 2, BTW. Re the plastic welder, yes there are alternative kits available; I just linked that thread to show a nice welder kit example, really.
Quote
Funny you mention powder coating. I’ve heard what you say before, but surely there are powder coats, and then there are powder coats? Like Oils ain't Oils, kinda thing? I’m curious to know how paint can avoid this, when in theory it could trap moisture underneath as well?
Well, there are two aspects to that. One is the quality of the bond formed between the metal and the coating - paint will bond better, to a well-prepped metal surface, as a rule.
T'other is the mechanical strength of the coating; when a paint coating fails or is chipped by object impact, it will lose local film integrity, and flake off - but the flake size will be limited to the area where the coating/metal bond has been destroyed.
Powder coats however, will lift off the metal surface, but remain an intact film, with a small gap between the coating and the metal.
This situation is tailor-made for a phenomenon known as 'capillary action' [CA]. The effect of CA is to draw water into this gap, from any 'break' in the coating, and trap it against the metal surface. The powder coat film prevents evaporation of the water, and corrosion cells [corrosion is an electrochemical phenomenon] will be established, and start to gnaw away at the metal, forming rust.
Rust has a volume ~7x that of the parent metal [engineer's rule of thumb], so that will lift even more of the coating away from the metal, and the corrosion will consequently spread very rapidly.
Quote
With that cover job for future me, I thought I'd drop the oil out of the 'box, or at least see if there was any. I looked for a drain plug and all I found was what looked initially like a rivet. It isn't a rivet. I think the thead has been mostly stripped.
Righto, that pic has made all things clear. Yep, that's a rivet, and your machine actually has the AD MkII type gearbox. This one is grease-packed, which is supposedly good for the 'life of the mower'. Don't tackle a re-pack until you get the shop manual - it's a complex assembly. Recommended grease is BP Energrease A0, which is NLA - I'll get back to you with a current equivalent.
Quote
That didn't go according to plan either. The blade carrier nut is too big for any impact sockets I have, or any spanners, not that there was any real danger of getting it off with a stuffed elbow currently.
It's a 1" AF nut; removal calls for a rattle gun, or it can also be done with a long ring spanner, and a 2lb hammer to hit the spanner with. As we did back in the 70s, when rattle guns were a factory/motor racing team only tool...
At the end of the day, you haven't had an irretrievable disaster here, and at least you'll have confidence in the condition of the rebuilt top end. Victa full crank bottom ends are quite bulletproof; only straight-fuelling or water ingress will kill them.
BTW, you're very lucky that the Prismatic fuel gauge is intact - E10 fuel dissolves them! That's been the fate of most of those gauges we see.
Cheers, Gadge
"ODK Mods can explain it to you, but they can't understand it for you..."
"Crazy can be medicated, ignorance can be educated - but there is no cure for stupid..."
Fixing the cup starter is dead easy, file slots in the cup about every 10mm and the starter will grab as soon as you start to pull the cord every time
Have you got a pic of a finished cup? Just to make it clear how to go about it...
I should say here too, that the other way to get the pawls to grip the cup properly, is to ensure that the pawl ends that engage the cup have sharp, square edges. This is so that they will 'bite' into the cup. They can be touched up on an oilstone - IIRC the metal is too hard to file.
Cheers, Gadge
"ODK Mods can explain it to you, but they can't understand it for you..."
"Crazy can be medicated, ignorance can be educated - but there is no cure for stupid..."
Guess I will have to go and do one Gadge, I have done a lot of them and everyone works perfectly, I will take some pics as I go.I use a half round file so that it gives a slight leading edge for the pawls to slip into. Probably would work ok with a square edge file but I haven't tried it. The half round gives me a square edge for the pawl to hit against. As I said I have not had one that didn't work perfectly every time. The slots I'm cutting are probably less than half a mm deep
The slot idea should be a last resort IMO. Only one FC cup starter has ever given me problems and I've had many. Once they start slipping, it gets worse as it chews shavings of aluminum. Putting oil on these starters is a definite no no. Maybe carefully placed graphite powder is ok. Did they even receive any lubricant from new? I would start with compressed air to clean out any debris before any sort of lubricant.
Ahh, if only victa had kept producing the thumblatch catcher series, they would be in better shape today!
G'day MF, No, absolutely no lubricant was anywhere near the pawls/cup, ex-factory.
Bit like the Briggs recoil starter clutches - the B&S spec was to use a couple of drops only of light oil on the felt pad in the top; and cleaned, degreased and dry around the balls.
The only possible place for lube in these starters, is on the starter spring itself, and even there I'd use a solid-drying type, like wax or Teflon spray.
BTW, the pawls in these Zip starters were intentionally designed to be reversible, when the sharp edge wears off one end of them...
Cheers, Gadge
"ODK Mods can explain it to you, but they can't understand it for you..."
"Crazy can be medicated, ignorance can be educated - but there is no cure for stupid..."
No, absolutely no lubricant was anywhere near the pawls/cup, ex-factory.
The only possible place for lube in these starters, is on the starter spring itself, and even there I'd use a solid-drying type, like wax or Teflon spray.
BTW, the pawls in these Zip starters were intentionally designed to be reversible, when the sharp edge wears off one end of them...
I agree Gadge - I only put some silicone spray in the spring when its apart - except the last time it backfired as the spray tube popped off and I accidentally doused the pawls and had to rip it all apart
I have reversed the pawls in the past, but sometimes you just have to do a new set of pawls and/or do the slots in the cup. It's not like anyone is ever going to see it and it works everytime
Not much happened today. Just picked up the 1" impact socket. I have more time tomorrow before work to fiddle. I'll try to at least get the motor off the base so I can start giving the base a good clean, and maybe a bit of protection from the elements. I've gone so far as to use Aussie made Car Care products on my restored SB "daily" and it really does help keep it tidy. Bowden's Own make some awesome gear if that's your thing.
Tyler, not to worry. I'll clean the cup up a bit more later. I squirted some INOX onto the spring. The things you learn. It was working a treat before I tried to protect it! If worst comes to worst, I'll do what Norm has done - appreciate the pictures Norm. I didn't know about the black knurled knob either. The G4 seems nice though as it has an idle adjust on it too. I've unclipped it from the motor, but otherwise left it. My experience with these (LM, anyway) has been if they are working, leave them! And you're right, even though it's "just an Ozito" it doesn't really matter. The feeling is the same! While I'm here, would you spend the money on a new piston and rings? Get a rebore? Just a hone? I don't want to say "cost no object" but I don't spend my money on much else. I guess my goal would be maximum reliability and service life.
Gadge, that was the most anyone has been able to explain about the "problem" with powder coating. I appreciate the time you took to type that out. Thank you. Guess this one will be painted or just hit with something to prevent more rust, as has been suggested. Will newer model discs fit this shaft and base? I see that the disc nut and washer are different to PT models.
In the meantime, I'll certainly be leaving that 'box alone. I was never going to attempt disassembly without some form of reference material. And as luck would have it, I found a copy of Gregory's #424 on eBay. A little greasy but good otherwise. Now here's hoping I don't have to wait a month before it gets here. Same as parts from ODK. Will certainly be supporting them. I'll leave the rest of the frame as well. There are a million springs everywhere, at least compared to what I've pulled apart previously. I'm sure these were built to a price, but that price was probably pretty generous. Solid unit.
I must say that it cut the grass really, really well. Especially for a two blade jobbie. Speaking of blades, I have a few packets of OEM Victa 18" blades, but for mowers 1984 onward. No chance of them fitting this disc? I'm fairly sure I know that answer and no biggie if not, they're not expensive.
Grease wise, I'll see what I can find. I have some Penrite Molygrease EP 3% at hand. If that's not the same as the BP stuff, I'll keep looking. Kinda glad I chopped off the drive belt, I can only assume the grease is dry, caked and no longer where it should be. "Sealed for life" - man I hate components like those, no matter the field.
I'll see what I can find regarding my fuel. Funny thing is, I think my PT should have blown up by now if I had mixed it incorrectly. Maybe I'll just dump it in the car. Fuel is stupidly cheap at the moment.
And just for interest - a Pace with a thumb latch catcher popped up on Gumtree for $149 from a deceased estate yesterday. Looks like it had a dicky rear wheel but fairly clean otherwise. I reckon it went within the hour. Unreal.
I don't collect mowers. I just require Multiple Mowing Solutions™.
I would definitely spring for new rings and give it a light hone whilst you have it apart - piston doesn't look that bad. I am quite sure the PT piston is backward compatible so if you have a spare.
You would pay $15 for just a standard set of rings - this way with a hone, new piston, gudgeon, rings and clips, you effectively have it all sorted. There is the issue with the bore wearing oval in the 160's but It doesn't look that worn out (judging by the body).
$36 is SFA in the scheme of things if you plan on keeping it for the long haul
Originally Posted by Mystyler
even though it's "just an Ozito"
And it only cost me $2 haha.
Got a Talon hedger, 2 whipper snippers, the ozito blower, 3 beach umbrellas, and 3 new in box umbrella bases for $20 - best deal I ever had at the tip Had a tankful of water
Originally Posted by Mystyler
I have a few packets of OEM Victa 18" blades, but for mowers 1984 onward.
Are you sure it doesn't say 1974 onwards? - I don't know of any 1984 blade change. Judging by your photos, the regular blades you fit to 18in PT engined mowers will fit - they are just standard Victa blades
With the grease, doesn't it have to be some 'brass safe' stuff? I dont know about grease - I just use penrite hi temp bearing grease in everything from kingpins to trimmer gearboxes and chainsaw tip sprockets. If I come across something that may need special grease, I look into it and get the right one.
I have ripped apart several 15-20 year old gearboxes of trimmers which don't have grease points - have to manually 'split the gear case'. Bolens/troybilt 31cc Brush cutters if you are wondering.
The grease was so dry it was cracked - and all flicked into the crevices away from the gears. Repacked with HTB grease and much quieter
Originally Posted by Mystyler
"Sealed for life" - man I hate components like those, no matter the field.
Thats what they reckoned about my transmission - never need to change it. It was black and the magnetic sump plug had a 8mm coating of thick metallic mud. They also say 'oh, you must use the expensive SP3 Hyundai branded oil or your auto will blow up'. Well, in went 4L of Penrite Full synth Trans oil which 'Exceeds SP3 Mitsubishi and Hyundai'.
Be careful in ordering there Mystyler - yes, the Powertorque pistons fit the earlier full crank 160's [but not vice versa], however, this link is actually to a 0.040" oversize piston. If your barrel has been rebored, the oversize will be stamped into the piston crown.
Quote
Originally Posted by Mystyler
I have a few packets of OEM Victa 18" blades, but for mowers 1984 onward.
Are you sure it doesn't say 1974 onwards? - I don't know of any 1984 blade change. Judging by your photos, the regular blades you fit to 18in PT engined mowers will fit - they are just standard Victa blades
With the grease, doesn't it have to be some 'brass safe' stuff? I dont know about grease - I just use penrite hi temp bearing grease in everything from kingpins to trimmer gearboxes and chainsaw tip sprockets. If I come across something that may need special grease, I look into it and get the right one.
I might as well do this update here; the original grease Victa used, 'BP Energrease A0', was a 'semi-fluid' Non-EP grease with an NLGI rating of 0. This has a 'somewhat runny' consistency, so that it will flow freely into the nooks and crannies of the gearbox internals.
The appropriate Penrite replacement product is their 'Semi Fluid Grease', rated NLGI 00 - just slightly more on the 'runny' side. It's also safe to use with 'yellow metal' [i.e. the brasses and bronzes] gearbox components. And it's available in small quantities too - 450g cartridges or 500g bottles. Other manufacturers do make suitable greases, but only have them in minimum 2.5kg or 20kg pails. HTB type greases are essentially 'non-flowing' and 'non-melting', and are not suitable for this application. These properties are desirable in disc braked car hub bearings, but not here.
Quote
I have ripped apart several 15-20 year old gearboxes of trimmers which don't have grease points - have to manually 'split the gear case'. Bolens/troybilt 31cc Brush cutters if you are wondering.
The grease was so dry it was cracked - and all flicked into the crevices away from the gears. Repacked with HTB grease and much quieter
Yep; even the semi-fluid greases can 'go off' in this way in time - we here at ODK see this a lot in gearboxen like the Foote 35 F-N-R ones fitted to older Rover ride-on mowers.
Originally Posted by Mystyler
"Sealed for life" - man I hate components like those, no matter the field.
Yer, the 'chuckaway society' thing - another detester here!
Cheers, Gadge
"ODK Mods can explain it to you, but they can't understand it for you..."
"Crazy can be medicated, ignorance can be educated - but there is no cure for stupid..."
Thank you again. I'll double check my piston when I clean it up. Would it be worth the rebore if it hasn't been done so already? $36 for a new piston and ring set won't break the bank, and I don't think a rebore will either.
I was slightly out with my blades - they are from 1982 onwards. I suspect they won't be compatible but I've attached a photo anyway. Part is CA09506B, different to what is linked.
I also managed to get the engine off today. It's a 1977 model. I'll give the base a good thorough clean in the coming days. I think progress will be slower than hoped. You can see my tiny work area, and I don't think my manual or parts will be getting here quickly. Rather than try to solve the delivery problems, Australia Post would much rather just tell us about them. Hey, I could do that for $2.6m/year as well if I were the boss! Ok, that's enough of that...I have mates out of work because of this Wuhan Flu mess.
My problems are trivial.
Last edited by Mystyler; 23/04/2001:06 AM.
I don't collect mowers. I just require Multiple Mowing Solutions™.
That's the last iteration of that body before the powerplus model with the VC Sports base and island engine cover. Then they went back to a more comprehensive engine cover again with the next model. Makes you wonder why they didn't go with a black VC Mustang full cover instead.
Ahh, if only victa had kept producing the thumblatch catcher series, they would be in better shape today!
Gadge, that was the most anyone has been able to explain about the "problem" with powder coating. I appreciate the time you took to type that out. Thank you.
Well, it is a subject on which I can bring some professional expertise/experience to bear. That meant that I didn't need to look up any of that info...
Quote
Guess this one will be painted or just hit with something to prevent more rust, as has been suggested. Will newer model discs fit this shaft and base? I see that the disc nut and washer are different to PT models.
Maybe treat it the same way I'm going to do a Mayfair Ute base underside soonish, after a suggestion from NormK. Power wire brush, grit blast any pitted areas, brush on coat of 'fish oil' anti-rust, final coat of bitumen paint after the fish oil has dried. Bitumen paint doesn't 'set hard' when it dries, so it won't chip off.
Not sure offhand about PowerTorque disc compatibility - but the blade sets for your original disc are easy to get anyway.
Cheers, Gadge
"ODK Mods can explain it to you, but they can't understand it for you..."
"Crazy can be medicated, ignorance can be educated - but there is no cure for stupid..."
Blade carriers can be swapped around as long as it has the boss with the 2 ears on it, the thing is the nut is different between the PT and F/C. One thing I haven't tried is fitting a boss from a sidepull F/C on one of the really early motors. If anybody wants to know I can check it for them, never really looked. Regarding the powder coating of bases, I stripped a Victa mower down yesterday that had done a minimal amount of work (wheels, bushes all as new) and the only reason this mower was dumped was because the body looked so bad because of the rust that had grown under the powder coat. This mower would have been in much better condition if the customer had bought the thing with no coating on it whatsoever. It would have had surface rust but nothing like it had. This mower was not that old because it had very late model wheels. I guess the reason manufacturers powder coat mowers is to speed up the rust process.
You may have issues finding anyone to do the rebore - half the places just don't seem interested
I can't see the differences between these blades and the 1974 onwards ones, but happy to be corrected
I would suggest putting in an EI module as well whilst its all apart - bypass the point and you will never have to worry again
Yes, it is indeed difficult to find someone who does 2-stroke rebores - there is one bloke around Garfield in Vic that I know of, who does these for the 'Forgotten Era' class of classic 2-stroke racebikes.
However, what Victa servicing dealers used to do, back in the heyday of the full crank 2-stroke engines, was to stock 'service exchange rebore' barrel/piston/ring etc kits. When we fitted one of these kits, the barrel removed from the mower went off to the reconditioners for reboring, and a fresh kit was returned to us. A Victa barrel can have several rebores, at oversize increments of 0.020"/0.5mm, before it becomes unserviceable BTW.
Now, the point of all this is, that GA Spares still offer these 'service exchange rebore' kits, via their dealers.
You take/send your old barrel to the dealer, who inspects it to determine whether it is OK for reconditioning, i.e. that there is no damage/over limit bore etc, that would render it only fit for scrap.
Or, you can pick up the kit, and pay a 'core deposit' - which is refunded when/if you take in your old barrel, and it checks out as OK.
Edit: And in re the Electronic Ignition module fitment; it's simplest to leave the points and condenser in situ - that way they're still in place as a backup, if that should be needed.
Mystyler, that's the correct blade/bolt set you have - the final letter of the part number is just a supersession code.
Last edited by Gadge; 23/04/2011:30 AM. Reason: Add EI fitment info
Cheers, Gadge
"ODK Mods can explain it to you, but they can't understand it for you..."
"Crazy can be medicated, ignorance can be educated - but there is no cure for stupid..."
Your comments are appreciated. If worst comes to worst I have a few mates who are into their karting. One of their engine builders has a shop about 20 minutes away from me. Maybe they can blueprint and balance my engine while I'm there...!!! I'll check with my local mower shop. They're pretty bloody good, so I'll see.
I had half thought of putting on EI. That would require removing the flywheel? I don't have a whole lot at my disposal to get that off, let alone the correct tools. I'd hate to crack it, it's in really good nick.
I'm starting to think I should not have powder coated my Scotty! It really doesn't see water, and I love the finish, but I'll be keeping an eye on it. What are your collective thoughts regarding vapour blasting? Again, just throwing ideas around, but getting the deck blasted that way could leave it with a really cool finish. Kinda factory, kinda not. Bitumen paint the carrier and deck underside and it'll probably outlast me.
Bring on that service manual.
I don't collect mowers. I just require Multiple Mowing Solutions™.
Your comments are appreciated. If worst comes to worst I have a few mates who are into their karting. One of their engine builders has a shop about 20 minutes away from me. Maybe they can blueprint and balance my engine while I'm there...!!! I'll check with my local mower shop. They're pretty bloody good, so I'll see.
They'll have the gear to give your barrel a hone, so get that done. If this cleans up the bore OK, and the bore is not worn 'oval' near the base, no need to rebore it!
Edit: the Garfield bloke I mentioned earlier charges $90, for a rebore and hone only. Customer has to source and supply the piston kit. Not bad value; the GA Spares kit for your motor seems to run $140-180 [changeover basis] from online dealers.
Quote
I had half thought of putting on EI. That would require removing the flywheel? I don't have a whole lot at my disposal to get that off, let alone the correct tools. I'd hate to crack it, it's in really good nick.
Flywheel removal on a Victa full crank doesn't require many tools anyway [unless the rust gremlin has been to visit] - just two flat blade screwdrivers, and a 13/16" AF socket to undo the retaining nut. It doesn't seat on a shaft taper; the shaft is parallel, and has a keyway for a square section steel key cut in it. The later external coil full crank engines didn't even have a key, just a flat machined on the shaft, and a 'D' shaped flywheel bore to match.
PS: Haven't used 'vapour blasting', but my bike mechanic recommends soda blasting for alloy components; and bead or grit blasting for steel components, depending on the surface finish desired.
Last edited by Gadge; 24/04/2009:12 AM. Reason: Add rebore costs
Cheers, Gadge
"ODK Mods can explain it to you, but they can't understand it for you..."
"Crazy can be medicated, ignorance can be educated - but there is no cure for stupid..."
Tyler and Gadge, cheers. I ended up with a 13/16th impact socket "just in case". Didn't realise it'd be that simple to remove the flywheel. And if just splicing in a wire or two will give me EI, I will perhaps just do that.
Slow going otherwise. I've ordered some parts (gaskets, muffler, drive belt) from ODK for a start. I'm hoping they will arrive not to long after my manual. Fingers crossed! Going to try to clean up the engine and deck a bit this weekend.
I don't collect mowers. I just require Multiple Mowing Solutions™.
Here's a pic of how to position the screwdrivers. This is an external coil 160, which still has contact points under-flywheel, but the same technique applies to the coil-under-flywheel models. I haven't removed the nut for the pic, but you'll see the ratchet drive in the background, with a 13/16" AF spark plug socket on it.
The vital bit of this method is, the flywheel is raised by lifting the handles of both screwdrivers upward simultaneously. If it doesn't move straight off, you can apply a 'rocking' motion by alternating the upwards pressure - that usually shifts them.
This technique isn't mentioned in any of the workshop manuals, but it sure works a treat!
Cheers, Gadge
"ODK Mods can explain it to you, but they can't understand it for you..."
"Crazy can be medicated, ignorance can be educated - but there is no cure for stupid..."
Gadge, I find those generally just lift of, maybe with a bit of a tap on the side. It is a good design, it is the earlier one that I have to use a puller on, some of those can be super tight on the taper.
Agreed, these external coil flywheels almost always come off very easily.
Back in the heyday of the coil-under-flywheel FC Victas, the workshop in my family's Cobram, Vic OPE business [we owned it 1973-83] used this 'two screwdriver' method as routine, and rarely had to resort to the screw type puller.
I'd guess that you'd encounter more 'rust-bound' flywheels on these motors now though, than we did back then. Because these flywheels actually aren't on a tapered shaft, they are actually more prone to becoming rust-bound, if any water gets in there.
Cheers, Gadge
"ODK Mods can explain it to you, but they can't understand it for you..."
"Crazy can be medicated, ignorance can be educated - but there is no cure for stupid..."
Had to read a few things two or three times to understand what the manual was referring too, but a lot came off the mower today.
This one really is in good condition. Besides having the wrong belt installed, the only other problems I have come across have been two broken rivets holding the steel safety skirt that sits over the rear axle, and the clips that hold the pulley cover on are missing. That would suggest the non-standard Tinnerman nut and screw arrangement?
I do have some questions relating to the tear down.
1. What is the suggested method to remove the handle bars? 2. Can the catcher flap be removed simply by tapping out the rod? 3. The upper end of the clutch cable, according to the manual, can be removed from the handle by tapping out the little bit of meta (roll pin)l. I cannot be sure I'm tapping out the correct part - it seems it will be tapped into the black plastic handle? Alternatively, can the push on fix be pulled off the pivot pin? Seems pretty stuck fast when I'm using a little pry bar. I will admit to not putting too much effort into it so I don't break the 40 year old plastic handle. 4. Speaking of push on fixes - can the one one the deck securing the height adjuster spring be removed without damaging it? What is the best way to remove and what is the correct replacement if I do damage it? 5. Are these the correct part numbers for the front axle bushes? CH80603A, CH82399A. The replacement I'm looking at is Jak Max branded from ODK. Might as well replace while it is apart.
Attached are some pictures for those following along at home.
I don't collect mowers. I just require Multiple Mowing Solutions™.
Taking your questions in order, and referencing the Exploded Diagram on p.122 of your #424 Manual;
1. Remove the top section of the handle, by undoing nut #81, and withdrawing the Locking Bar #82. Then remove the Latches, #23. Note how the spring #24 is fitted, and preferably take a pic before pulling it apart. IIRC, the Latches are retained by an e-clip on the end of the spindle. Or it may be necessary to remove nut #28, and remove the Latch and its Bush as an assembly.
The two lower handle halves can now be removed; again IIRC, these may also have an e-clip retainer, on the end of the pivot pin.
2. No. It has an e-clip retainer, #76, which has to be removed first. The position of the e-clip groove can be seen in the pic of the rod, #10. It can then be drifted out - I'd start off with a pin punch and medium-weight hammer.
3. Correct - the roll pin has to be drifted into the handle; ref. Diagram on p. 130. It will then be necessary to get the roll pin out completely, from the inside of the handle - a pair of needle-nose Vise-Grip pliers is very useful for such tasks [also great for removing e-clips]. It may be necessary to remove the Pivot Pin to accomplish this.
4. Sometimes! These 'push nuts' are really intended as 'single use'. My most successful technique with these, is to grip the outer edge in a pair of Multi-Grip or Vise-Grip pliers, and 'rock' the nut while pulling upwards.
5. Ask Bruce at the ODK Shop - he will know.
Cheers, Gadge
"ODK Mods can explain it to you, but they can't understand it for you..."
"Crazy can be medicated, ignorance can be educated - but there is no cure for stupid..."
Having been a mod and long term poster for a forum many moons ago, I understand the effort you (and others) have gone to in order to continuously lend a hand here. I have never worked on this handlebar arrangement before, so while it may be easy as pie to some, it had me scratching my head as to where to start. I can't thank you all enough!
Going to give it all a crack now, and start the crappy process of cleaning.
I don't collect mowers. I just require Multiple Mowing Solutions™.
Ps - Sorry I can't be of any help with the SP side of things - I have always seen SP mowers as too complicated for my own use and have thus far avoided like the plague
There was no E clip keeping the catcher flap rod in place - another little piece of the puzzle missing. So that was easy to remove. Handles all removed, forgot to tap out the roll pin from the clutch lever, but that doesn't really matter.
Most the day was taken up degreasing the drive wheels. Holy hell, that isn't something I want to do again. Three cans of degreaser later, a smidgen of petrol and I think that is the best I'm going to get them with what I have to hand without asking the environment to take another one for the team...
Deck came up pretty bloody well. A bit of degreaser on that and a brush and scrubbed. Pressure washed off. Still managed to keep the original "Press to Prime" sticker pretty well intact. As a bit of an amateur photographer, forgive me for taking before and after shots in different light.
Tyler - I really only wanted a VC160 or Mustang. But beggars can't be choosers. I have no need for SP, don't really want it but getting the gearbox and ancillary bits apart, cleaned and reassembled correctly will be a new challenge. Hopefully, it'll "preserve" it for a few more years too.
I don't collect mowers. I just require Multiple Mowing Solutions™.
Yep, that looks like Moly grease in those wheels - filthy stuff to remove! Bit late here, but a 50/50 mix of petrol and diesel works well at shifting it.
I used to have to do that on the CV joints, and inside the steering knuckles, on the front end of my old FJ45 Landcruiser when I serviced it. It was quite a regular job, as I used to take that truck through river crossings up in the High Country quite frequently, back in the day. I was buying 2.5kg pails of Moly grease, for that job.
The thing about that grease in your wheels though is, it shouldn't have been there! The manual says 'Grease the Dust Seals with Multi Purpose Grease. Do not grease the gear teeth.'
Cheers, Gadge
"ODK Mods can explain it to you, but they can't understand it for you..."
"Crazy can be medicated, ignorance can be educated - but there is no cure for stupid..."
Tyler - I really only wanted a VC160 or Mustang. But beggars can't be choosers. I have no need for SP, don't really want it but getting the gearbox and ancillary bits apart, cleaned and reassembled correctly will be a new challenge. Hopefully, it'll "preserve" it for a few more years too.
I agree Mystyler - I couldn't have passed it up either given its condition - its great you are preserving it as opposed to others who may have just bought it to run into the ground
Gadge, I was unsure if petrol or your 50/50 would eat at the plastics. I'd didn't think it would, but I didn't want to chance it. Absolute PITA it was. And I read that part in the manual as well!!! Dust seals will be getting grease and not much else. However, would the teeth benefit from a very, very light layer of...something? In the interest of longevity.
Tyler, she'll be looked after. Still unsure which way to go with the "restoration". If I don't paint the deck, perhaps a clear coat to stop the Al from corroding and pitting?
I don't collect mowers. I just require Multiple Mowing Solutions™.
Gadge, I was unsure if petrol or your 50/50 would eat at the plastics. I'd didn't think it would, but I didn't want to chance it. Absolute PITA it was. And I read that part in the manual as well!!! Dust seals will be getting grease and not much else. However, would the teeth benefit from a very, very light layer of...something? In the interest of longevity.
Not really. It's apparent that the wheel centres are moulded from one of the 'engineering plastics', most likely one of the Nylon resins [i.e. thermoplastic polyamides]. As such, these resins have considerable 'self-lubricating' properties, and abrasive dirt doesn't stick to them.
If you must apply lube, I'd suggest a 'dry-coat' Teflon based spray. Easily the best of these I've used, is one that Jaycar Electronics sell under their house brand.
Quote
Tyler, she'll be looked after. Still unsure which way to go with the "restoration". If I don't paint the deck, perhaps a clear coat to stop the Al from corroding and pitting?
Yep, even a rattle can clear coat will help to preserve the original finish. Try to pick one that's petrol-resistant if you can, though. The Rust-Oleum brand is usually good.
Cheers, Gadge
"ODK Mods can explain it to you, but they can't understand it for you..."
"Crazy can be medicated, ignorance can be educated - but there is no cure for stupid..."
I have a 1972 VC Autodrive with the SP system removed. It's in very good physical condition but without it's SP specific catcher. Is it better off being parted for it's remaining good bits like the wheels, engine base, handlebars and green engine cover?
Ahh, if only victa had kept producing the thumblatch catcher series, they would be in better shape today!
Thanks again Gadge, I'm also in contact with Bruce @ ODK.
I might try to get the rest of the grease off with a bit more fuel and a nylon brush. Thankfully my local council will properly dispose of waste fuel and oil in appropriate containers for no charge.
Mowerfreak, I'm in two minds about this sort of thing. If the mower is in working condition, half of me says keep it going. The other half thinks that if it can complete others, maybe it's worth a part out. I could come up with a dozen arguments for either side. It looks in pretty decent nick, and I do love those embossed early bases.
Haven't really progressed much. I did get some of my car care products out (a shameless plug for Bowden's Own here, and they're Aussie made and owned!) to see what I could achieve with some of the chrome work. I'm actually amazed at what I managed to do with a couple of cloths and some cleaner, metal polish and sealant. Almost all the surface rust has been removed, even though some of the chrome is flaking off in some parts. Kinda fits this rebuild though. Worn, used character, but solid. I couldn't really take any decent photos in the evening light. Now that I know I'm not wasting my time, I might really get stuck into it.
I don't collect mowers. I just require Multiple Mowing Solutions™.
With dirty fuel, it's not hard to just set it outside in an open tin, and set it alight.
Or if you want to reuse it for further cleaning, a cheapo paper vacuum cleaner bag will filter out the dirt - that's what I've used for years, on used parts cleaning fluids. My 'parts wash' trough is a cut down re-purposed home heating oil tank, with cut down legs, and a ball drain valve in the bottom. So it's easy to filter the used fluid as it drains out.
Back in the day, when we had petrol that had been used for parts cleaning to get rid of from the family OPE business, we'd just take it out to the local tip, when we took out the surplus mower cartons and shop/workshop rubbish.
The council back then didn't mind if you set cardboard rubbish alight. I can bear witness that a mower box full of petrol vapour goes up in a quite spectacular fireball!
BTW, a fast way to scrub rust off chromework is with a scrunched up piece of aluminium foil, dipped in water + detergent.
Cheers, Gadge
"ODK Mods can explain it to you, but they can't understand it for you..."
"Crazy can be medicated, ignorance can be educated - but there is no cure for stupid..."
Petrol was pretty easy to get rid of when we had a farm. Many a, "voooomph" was had. Slightly harder in suburbia these days, maybe when the next Milo tin is emptied it can be repurposed.
While aware of the alfoil method, I've never tried it. I'll be giving it a go on the upper handle bar half. I also got out the Dremel yesterday, and I've got a tiny wire brush attachment for it, and a soft polishing attachment. Between all of this, I reckon they're going to come up pretty well. My SB45 bars were so cooked they needed to be rechromed and that cost a small fortune.
I was not aware of the vacuum bag trick. That one I'll certainly be saving for later, cheers Gadge.
Might look at dropping the head and cylinder off to be vapour blasted today, and I'll try to tidy up the block and piston myself. I don't really want to split the crank case if I don't have to.
I don't collect mowers. I just require Multiple Mowing Solutions™.
OK, hit a little road block. I'm trying to remove the pulley off the crankshaft.
The service manual says to rest the pulley on a block of steel and hit the opposite side with a hammer to break the taper. OK, I don't have a steel block, so tried the old muffler with no joy. The heaviest hammer I have is 500g and I don't want to do any cold forming!
I do have a three jaw, 4" puller...? It fits...but will it result in damage?
I don't collect mowers. I just require Multiple Mowing Solutions™.
OK, hit a little road block. I'm trying to remove the pulley off the crankshaft.
The service manual says to rest the pulley on a block of steel and hit the opposite side with a hammer to break the taper. OK, I don't have a steel block, so tried the old muffler with no joy. The heaviest hammer I have is 500g and I don't want to do any cold forming!
I do have a three jaw, 4" puller...? It fits...but will it result in damage?
No, pullers do not work on these! If you don't have a heavy block of solid steel [e.g like my anvil]
to use as backup, a club hammer or sledge hammer/ block splitter head will work.
Cheers, Gadge
"ODK Mods can explain it to you, but they can't understand it for you..."
"Crazy can be medicated, ignorance can be educated - but there is no cure for stupid..."
What about an air powered palm hammer normally used for hammering in confined spaces. Mine has got me out of trouble a couple of times. It uses several percussive hits per second. I've knocked out large rivet centres with ease as well as knocking back the metal bracket onto the base of the side window glass of my car, where a regular hammer wouldn't. Worth a try on this.
Ahh, if only victa had kept producing the thumblatch catcher series, they would be in better shape today!
Thank you for the ideas. I've pumped some INOX down it, but no joy. I no longer have a block splitter and my compressor is an El Cheapo, 70L/min FAD 1HP with an 8L Chineseium tank.
Might have to take a visit to the mower shop in the morning on the way to picking up some parts from the Vapour Blaster.
I've gone overboard and got pretty well everything blasted. I just couldn't bear to think any parts were slowly corroding away. Were these things painted in a hammer tone silver? Are there any brands you could recommend that are petrol resistant? I think a clear coat over the top of a hammer tone defeats the hammer tone purpose?
I don't collect mowers. I just require Multiple Mowing Solutions™.
I'd make a small tin of 50/50 atf/acetone and 'park' the mower on top of it for a few days with the crank down in the tin (use the height adjuster to get the right clearance)
Wouldn't suggest getting the mix too near the lower seal though
It wasn't supposed to be like this. Just a tidy up, I said. Nothing too extreme, I said. So I wonder how we ended up with my motor in a fruit box! It's in super good nick. Going to get all prettied and cleaned up.
Do I spy, with my little eye, something called EI?
Last edited by Mystyler; 14/05/2007:39 PM.
I don't collect mowers. I just require Multiple Mowing Solutions™.
Hi Gadge, The Loctite that really caught my attention years ago was the 518 . I was putting an Indian "repaired" Enfield together for a mate and the top of the cases looked like they had been machined flat by rubbing them back and forth across concrete or asphalt, the oil was pouring down the front of the cases like a waterfall. Gave them a clean, bead of 518 around the top of the cases, bolted it back together and not a drop of oil got out through the gap.
I agree with Gadge with using gasket cement; Permatex #2 [or #3 Aviation] non-hardening cement but Loctite SI 596 is Verboten ,it's classified as oil resistant but not fuel resistant . Silicone breaks down when used in a fuel environment.
Do I spy, with my little eye, something called EI?
Well thats a nice little bonus. I could see the crankcase was going to end up getting split haha
By the way, remember you may have to retime the engine once the coil is back on (edit, actually ignore me as the holes aren't oblong)
Max, quick question - which of the permatex's are actually petrol proof (or at least resistant). Everytime I look at Repco or SCA I never seem to find one (except for one called permashield I think)
Max and Gadge, thanks for the advice. I did end up doing some extra reading and came to the same conclusion that Si is not the best in a fuel/oil ENVIRONMENT. I didn't realise that cement and silicone gasket sealant were different beast. I almost bought some Loctite 518, but at $30+ on special, I settled for some Permatex #2! Maybe I'll treat myself next time. If Norm's experience is anything to go by, it sounds like a magic product.
Tyler, from my reading, Permatex #1, #2 and #3 are resistant. Max will no doubt clarify if I'm wrong. And yes, massive bonus! I pulled the flywheel (by hand, no less) and was really confused when not much was there!
Now, I don't think I'm going to pull the crank to bits. That's probably a bit much, and I ain't got any of the proper tools for it. I don't even have the correct tools to replace the oil seals. But the crank does have a bit of surface rust. I figure I should probably remove this with a VERY light sanding? I'll grab a photo and post it up later today.
I don't collect mowers. I just require Multiple Mowing Solutions™.
Some photos for the brain's trust. The crank in all its glory. Kinda looks a bit worse in the photos. Does it need attention? I'd prefer to leave it if it will do no harm as we're now starting to get into territory I've not been in before.
I don't collect mowers. I just require Multiple Mowing Solutions™.
As long as the bearings feel ok I would leave it alone, not like it is going to be returned to tearing through heave vegetation ever again. Replacing the big end is specialized and requires special jigging to true it up and you will struggle these days to find somebody capable of doing it
Legend, thank you Norm. Aside for the surface rust, it all feels very nice.
And no, the most it'll tackle is about 120sqm of very spoilt suburban Buffalo, but only for about three months a year when it's not covered in Box Tree leaves or nuts!
Last edited by Mystyler; 16/05/2011:08 PM. Reason: Added mower job description.
I don't collect mowers. I just require Multiple Mowing Solutions™.
I'm wondering if I should replace the seals? They look good and feel good? I don't have the correct (or any) press to do it but could still get it done. I'm also wondering if the little bit that has corroded away near the bottom seal will present a problem. I don't think that area would be under too much stress? I've circled the area so it is hopefully easier to spot. I'm happy I pulled everything apart, didn't realise there was so much corrosion going on at the bottom. The pulley was full of old grass and debris so perhaps it shouldn't be much of a surprise.
The bore has been honed and I'm fitting new rings. I ordered an entire new piston set just in case but it still looks good.
Now the question is how to repaint it. Still haven't solved that dilemma yet. I think the base certainly needs a hammer finish.Luckily my parts aren't here yet so I've got time to think on it.
I don't collect mowers. I just require Multiple Mowing Solutions™.
I'm wondering if I should replace the seals? They look good and feel good? I don't have the correct (or any) press to do it but could still get it done. I'm also wondering if the little bit that has corroded away near the bottom seal will present a problem. I don't think that area would be under too much stress? I've circled the area so it is hopefully easier to spot.
Most definitely replace the seals, while it's in bits.
Absolutely no need for a press for this job; all you need is a light hammer; and a pin punch, soft metal drift, or even a piece of wood dowel. I've fitted uncountable numbers of Victa FC seals this way; it's the quickest method, too.
Drift the old seal out, then the new one in.
Lube the new seal's circumference with a drop or two of engine oil. When fitting the new seal, work around the periphery of the seal, with light hammer taps, so the seal stays reasonably straight as it goes in.
It seats against a shoulder in the crankcase bore, so that'll ensure it's perfectly square to the crankshaft axis.
Cheers, Gadge
"ODK Mods can explain it to you, but they can't understand it for you..."
"Crazy can be medicated, ignorance can be educated - but there is no cure for stupid..."
If only there weren't so many that needed cleaning MF! But thank you.
Gadge, cheers. I bought a handful of top and bottom seals from ODK just in case. They were cheap enough. If I read correctly, the bottom seal goes on last, and is tapped down the crank?
I don't collect mowers. I just require Multiple Mowing Solutions™.
That's as good a method as any; it's the way we used to do 'in-service' bottom seal replacements.
Or you can install it prior to assembling the crankcase halves. Put the bottom half upside down on a clean flat surface, and just tap the seal in as above, until its outer edge is just flush with the lower edge of the chamfer in the crankcase bore.
Cheers, Gadge
"ODK Mods can explain it to you, but they can't understand it for you..."
"Crazy can be medicated, ignorance can be educated - but there is no cure for stupid..."
If its any consolation, I did the exact same fin (1 from left of upright) trying to get the flywheel off my sunbeam - I was thinking about reattaching and put a little glob of selleys knead it epoxy steel weld,
It stuck to the crack and is like concrete - probably more or less made up for weight loss
Took it out today, gave it a light wash and clean - started first pull after 2 months
Oh well, These things do happen. As it happens, there is considerable 'overbuild' in the 'fan capacity' of these flywheels. From a Fluid Mechanics perspective, that is.
So it may seem counter-intuitive; but the best thing to do is, to knock off the diametrically opposed fin; this maintains the dynamic mechanical balance of the flywheel, and won't affect the 'fan capacity' appreciably.
Cheers, Gadge
"ODK Mods can explain it to you, but they can't understand it for you..."
"Crazy can be medicated, ignorance can be educated - but there is no cure for stupid..."
The shitty part is that it need not have happened.
In order to protect everything from the rain, the parts were put in boxes and stored in the storeroom. I needed to grab something out a few days ago, and the blade carrier accidentally took a tumble into the box next to it. I had a quick look then, fearing I may have snapped a flywheel fin, and obviously missed it.
Tyler, I'm guessing it has held ok? That was my first though, using some metal "weld" epoxy. My second though was as you suggest Gadge, Dremel the opposite fin off. My third and current train of thought is that I don't like either the first or second thoughts. The first because I'd hate for it to let go in service, the second because I haven't learnt yet to accept "good enough" on my projects. And I take great pride in maintaining all of my equipment to the highest standards. I'm entertaining the idea of it getting professionally fixed. Or finding a replacement flywheel.
I apologise for the mini-rant. I am just a bit upset when the level of effort and care otherwise put into the project is nothing but 110%, with limited space and tools to boot. I had a few dodgy aerosol cans of paint let go today as well. Character building!!
Let's see what tomorrow brings. I appreciate your continued assistance in this project.
Last edited by Mystyler; 07/06/2012:58 AM. Reason: Added to text.
I don't collect mowers. I just require Multiple Mowing Solutions™.
I would suggest going to the tip and looking for one. Only problem is most already have a tooth or 2 missing. I hate to accept it as well sometimes, but others I just put up with it
Was trying to fix a hot air damper on the Camira last week, snapped the flap off. That should mean new air filter assembly, but a slim chance of ever finding one. So I will have to use a glue to put it back on and hope it doesn't drop and melt on the exhaust manifold. Putting in a new (read expensive) choke pull off valve tomorrow and if I stuff this up there's going to be a problem haha.
Have sliced fingers, lost marbles and once almost sacrificed toes in the pursuit of perfection - often can't be stuffed especially when it often comes back to bite me or ends up no better
Hi Tyler, Just about the Camira I saw on an outback collectors show last week, some bloke in WA has a factory built Statesman with a Camira engine, only one in Aus. They were not called a Statesman, some other name, Jupiter or something like that and they were only sold in NZ, real oddball thing and I guess a bit short on power as well
Geez NormK why would anyone entertain such an idea and actually carry it out? They were not known for low end performance and they put it in a heavy car. Reminds me of the HJ Kingswoods badged as Mazdas, exported to Japan and fitted with rotaries. At least the Kingswood taxicabs I remember fitted with four pot Peugeot diesel engines would have had low down grunt.
Ahh, if only victa had kept producing the thumblatch catcher series, they would be in better shape today!
It was a VN Calais with the 2L JE camira MPFI engine - they had around 86kw v the 1.6l 64kw - called the Holden Royale. I was sitting there watching it saying 'VN Royale from NZ with 2.0l' as I had heard of it
Cars were pretty expensive back then in NZ (before grey imports they love), so the cheaper 4 cyl (along with perceived fuel economy) probably made sense at the time
The New Zealanders did that from the VH onwards - always had a 4cyl SL/E equivalent 'Royale' - with the starfire 4 up to and including the VK, and then a Nissan RB20 in the VL
I can't have you lot mentioning the 160cc full crank and Starfire in the same paragraph! A rotary, however...
I must say I had NO idea that the Kingswoods were ever fitted with a diesel. Admittedly, they were before my time.
Going to see what the tip shop holds tomorrow. Otherwise I might just have to suck it up. On the plus side, the hammertone paint on the deck is looking superb! Will hopefully have that finished up tomorrow.
I don't collect mowers. I just require Multiple Mowing Solutions™.
Hey Tyler, I was going to have a peek at the Balcatta one. I've taken a whole heap of stuff there, but never had a look around. Not a decent selection?
I don't collect mowers. I just require Multiple Mowing Solutions™.
MF, I happened to pass by an old mower shop on my way to get some bolts for the Pope that I know has there for donkey's. They had one, single wrecked 160cc FC out the back amongst a pile of power torques! Got a few other bits for it too.
However, the Mower Gods giveth, and the Mower Gods taketh away. Shortly after that photo was taken, I had my last aerosol can of Hammered Silver let go about 10 seconds into spraying. What a mess. OK, no worries, I took it back and they were most understanding. There were no more cans of this paint left, so I got it exchanged for a small tin of the same stuff. Light applications with a decent brush and I ended up with bristles pulled out everywhere and a sag line on the arch to round it off. I think I'm going to get it blasted again and TAKE IT TO THE BLOODY PAINT SHOP.
It was looking incredible, now it looks backyard.
Oh well.
I don't collect mowers. I just require Multiple Mowing Solutions™.
Oh no!! Hammered paint is very forgiving -at least the Ultra Color brand I got. They are horrible for stopping a quarter the way through. Don't t give up yet Mystyler!
I succeeded in reactivating mine several times enough to finish my gold high arch base you saw earlier. I used carby cleaner (which is basically acetone in a can) with a straw to drop it down the tube in the can and run some though the nozzle before getting a few more seconds spray time and doing it again. I'd sand the run and go over it with the reacivated spray can if you can get it running. You have nothing to lose.
Ahh, if only victa had kept producing the thumblatch catcher series, they would be in better shape today!
MF, your Gold base turned out fantastic. I can't complain about the finish quality of the stuff I got from the cans. And I'll certainly put my brush technique down as "needs more practise". But geeze, this has been an exercise in frustration.
I'm thinking I may just have to concede that this battle has been lost. I have no real work area and setting everything up to protect the surrounds takes longer than the action of painting. I can't use solvents in the storeroom as it is connected, bizarrely, to the kitchen via the stove extractor fan. If I use anything too volatile it ends up stinking the house out.
It seems I also bought the last can of Hammered Silver around me until they can get stock in. So I'm snookered there.
I shan't give up on the mower, but the painting process may have beaten me. I promised last time I would outsource my painting. Except that job turned out very well!
I'll see how I feel tomorrow.
I don't collect mowers. I just require Multiple Mowing Solutions™.
I painted mine in a beach tent in the back yard with flyscreen windows that I covered up with the built in window flaps each time I did a pass with the can. The base was suspended off the canvas floor on 100 mm thick scrap pieces of wood. Unfortunately as I was down the road, heavy gusts of wind decided to start and the tent was blown over in my absence. The paintwork was chipped off in four little spots around the left side of the base. I touched them up with a brush dipped into the gold paint squirted into the cap but shows as bright spots in certain light. It still bothers me but it's just not worth it to possibly risk further ruining it by another pass of the spray after months of curing. I'm hoping the height adjustment rod on the left side, which passes near the blemishes, will draw the eye away.
A drop sheet with weights around it will provide a work space almost anywhere.
Last edited by Mowerfreak; 08/06/2009:17 PM.
Ahh, if only victa had kept producing the thumblatch catcher series, they would be in better shape today!
Might have to leave it for a few weeks so that it fully hardens otherwise you might get a reaction and then you would have to strip it back to bare metal
You guys are enablers. I'm going to attempt some sanding, and then I'll try another brand of spray can.
God help me!
I take that to mean you will recoat the entire thing, as it will not likely match the Hamnerite's shade of silver. I would try and get that Hammerite spray to start by the method I succeeded in using. Then you can just spray the affected area with careful passes and it should blend in seamlessly while the existing coat you already applied is relatively uncured.
Ahh, if only victa had kept producing the thumblatch catcher series, they would be in better shape today!
Hello Norm and Mowerfreak, yep, she's been put in the sun and I'm going to recoat the entire bloody thing. I'll put the engine together instead, and work on getting the Pope running properly.
I don't collect mowers. I just require Multiple Mowing Solutions™.
Started the rebuild today of the motor. Popped the old seals out no worries. Got the top seal in, no worries. The bottom? Well, it seems to be putting quite a bit of drag on the assembly when you try to rotate it. It does not feel like a bearing problem, and only occurs when the bottom seal is in place. They're a bit of work getting in properly.
See if you can spot anything incorrect? I don't wish to go any further if I have to pull it apart again.
I don't collect mowers. I just require Multiple Mowing Solutions™.
This is why I ask. I wasn't convinced it was an "early model" but it's all relative. Something must have been lost over the phone when I was ordering them. I have more 20mm seals so that's not a worry. I suspect they'll be a ton easier to fit!!
I don't collect mowers. I just require Multiple Mowing Solutions™.





 Victa full crank bottom ends are quite bulletproof; only straight-fuelling or water ingress will kill them.
 It's a 1977 model. I'll give the base a good thorough clean in the coming days. I think progress will be slower than hoped. You can see my tiny work area, and I don't think my manual or parts will be getting here quickly. Rather than try to solve the delivery problems, Australia Post would much rather just tell us about them. Hey, I could do that for $2.6m/year as well if I were the boss! Ok, that's enough of that...I have mates out of work because of this Wuhan Flu mess.
![[Linked Image]](https://www.outdoorking-forum.com.au/forum/ubbthreads.php/ubb/download/Number/13180/filename/IMG_0812.JPG)

 Holy hell, that isn't something I want to do again. Three cans of degreaser later, a smidgen of petrol and I think that is the best I'm going to get them with what I have to hand without asking the environment to take another one for the team...

![[Linked Image]](https://www.outdoorking-forum.com.au/forum/uploads/usergals/2015/04/full-5630-21056-anvil_01b.jpg)