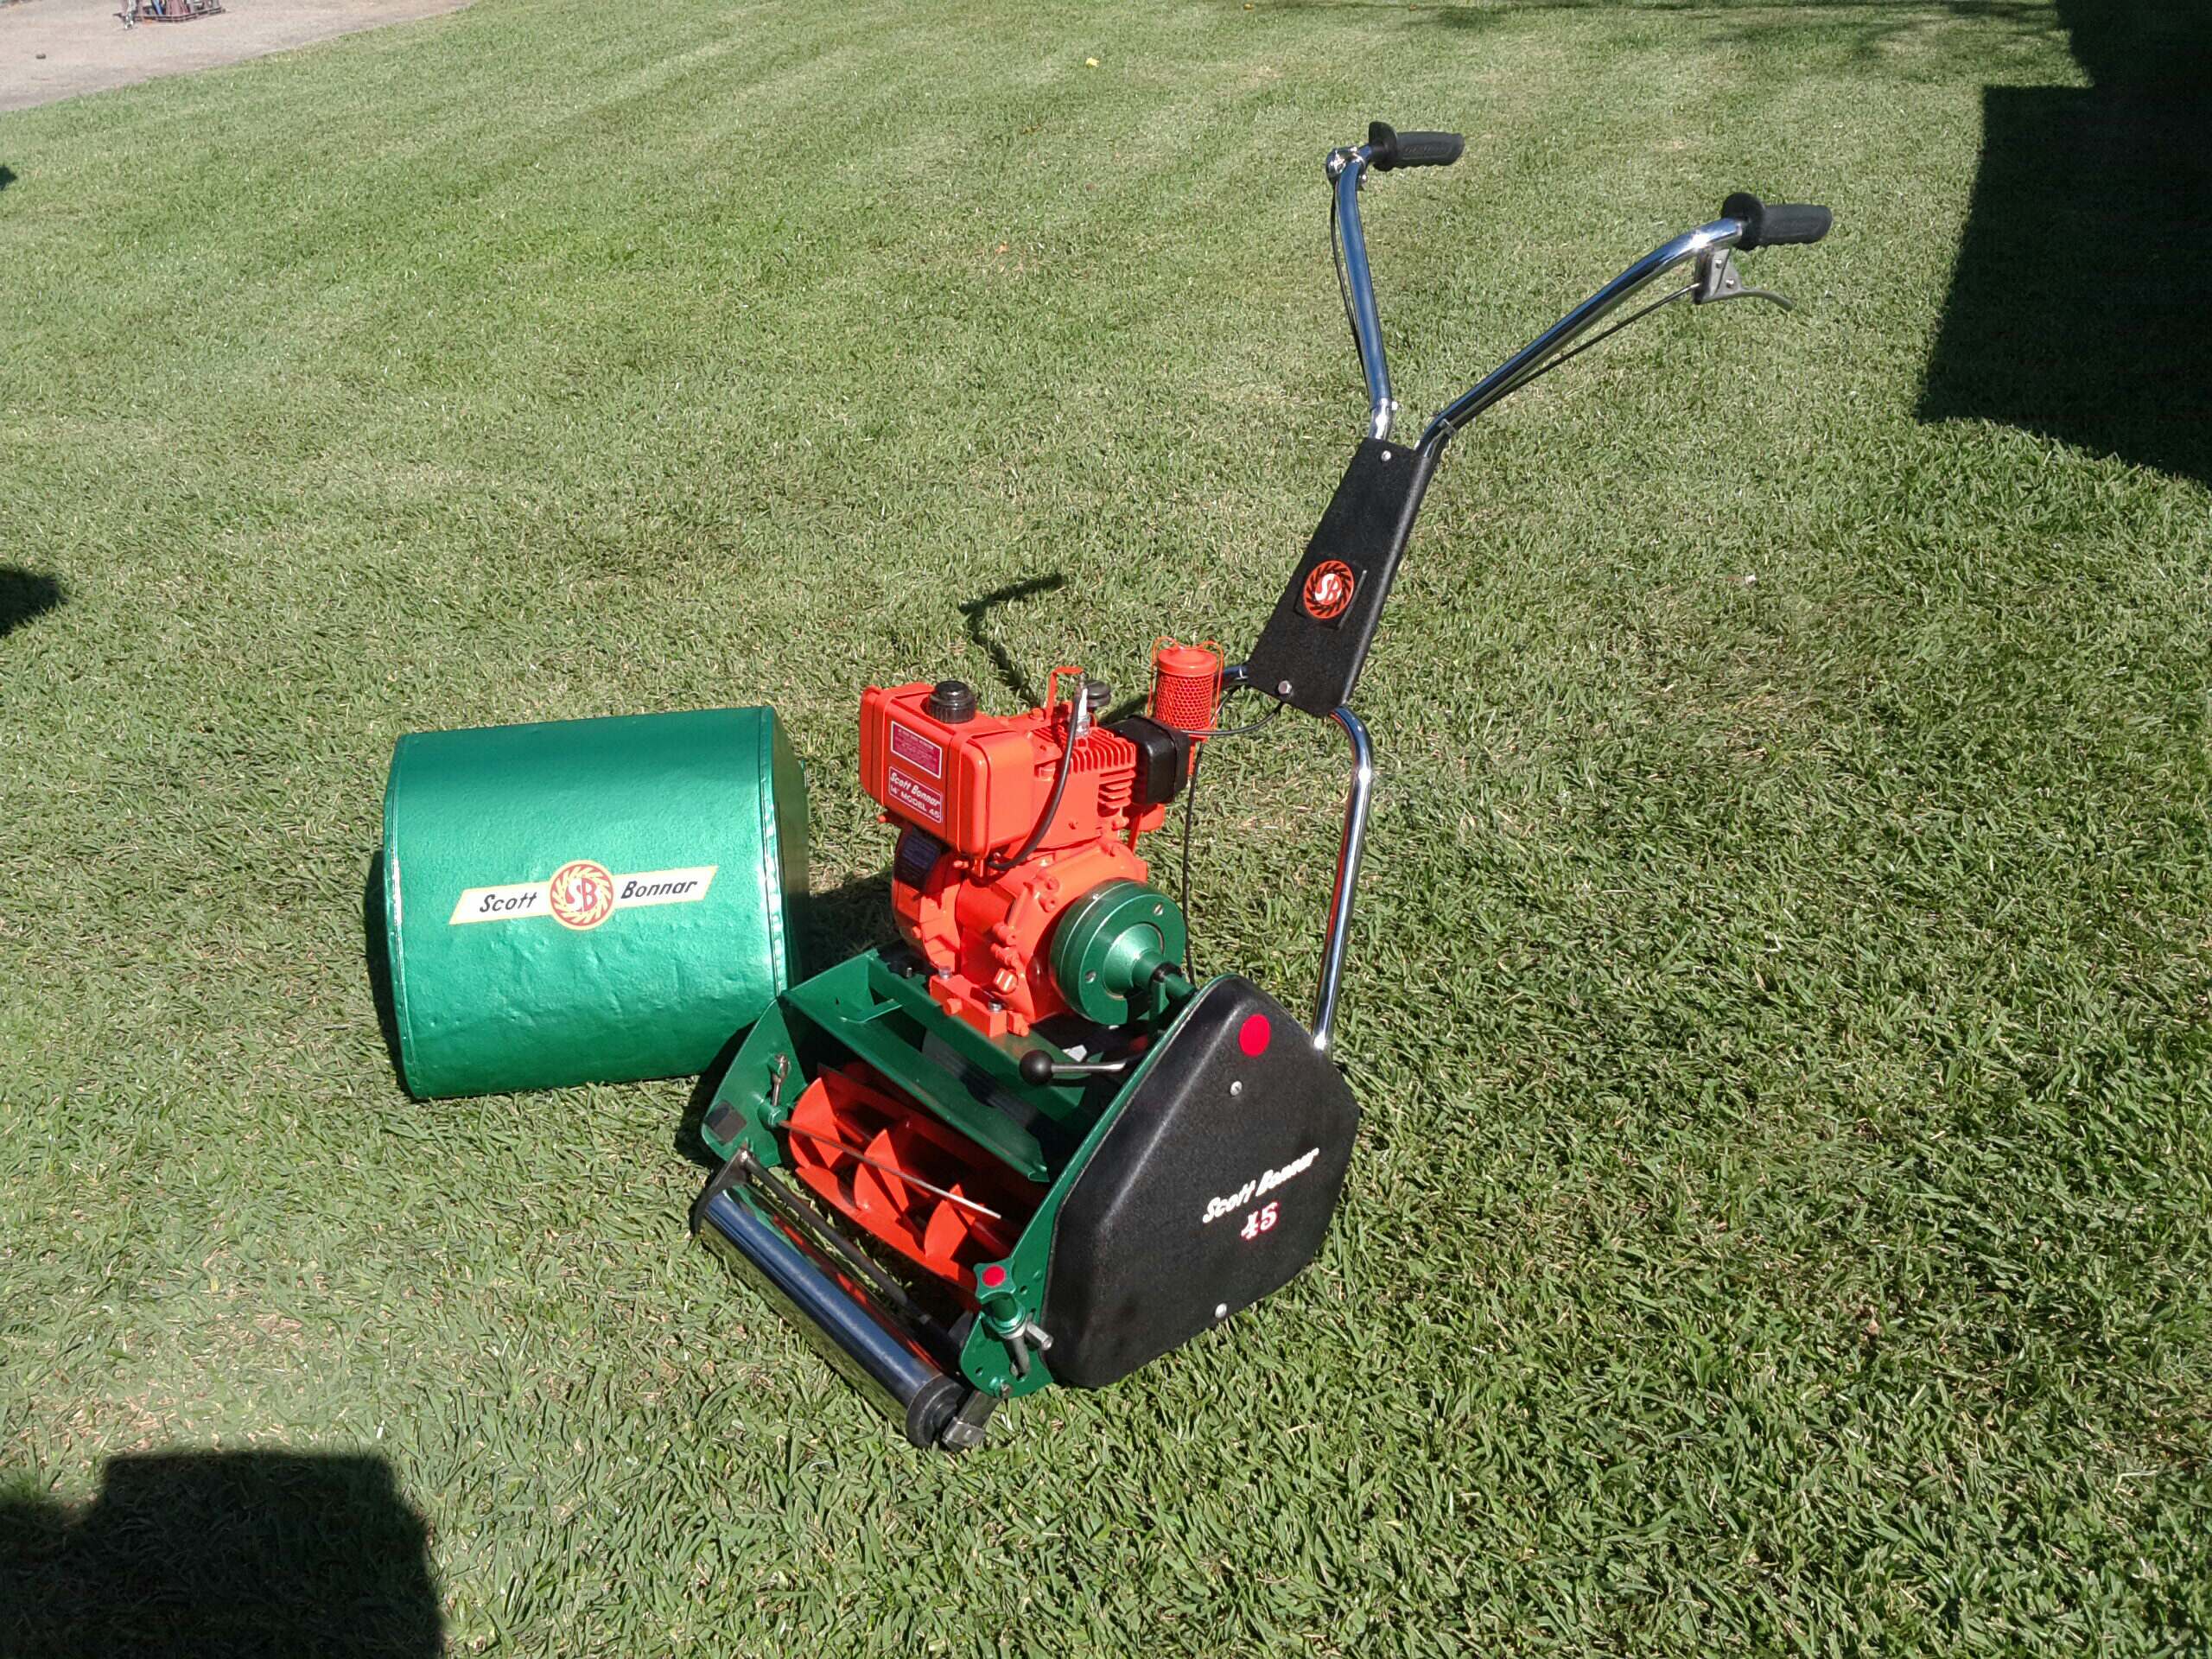
Hi guys I got a Scott Bonnar edger and I'm hoping to restore it.
Here are some pictures
I have issues with the engine starting. It used to run but now no luck. The spark plug is not generating a spark even after I gave it a good clean with wire brush.
I have another engine from a 45 reel mower but not sure if they the same motor, or should I just restore the motor I got.
Here are pictures of the motor...
Last edited by CyberJack; 30/11/1906:09 PM. Reason: Embed images.
You can still get serviceable replacement parts for those engines but I have noticed alot of mower shops are no longer keeping them in stock. Those older Briggs are good engines and easy to work on, as CyberJack mentioned you could change the ignition coil from the old points system to electric. If you have some knowledge on the ignition system you could try and clean the old points and check the gap, the other main problem I find with these old engines not getting a spark is that the main high voltage wire that connects to the spike at the end of the boot doesn't make contact and needs to be re spiked through the rubber insulation making contact with the wire inside the insulated rubber. As for the blade holder it looks worn out as the holes are supposed to be D shaped so the bolts lock in and don't spin. Blade plate and bolt kit are available as replacement new parts.
Good luck with the restoration hope to see more progress on your project.
Thanks guys for the replies. I've managed to source all the parts I need.... For now lol. Just waiting for them to arrive.
I'm interested in doing the points to electronic conversion, from What I read it's a more reliable system. But I'm not sure on what parts I need, from what I seen I need a new coil from a newer motor than mine. Can anyone help me on what I should search for? Like a part number or something? Is there any other parts needed to do the conversion?
Looking forward to seeing the progress and outcome. Loooks like you have your parts sorted out, are you replacing the bearings inside the blade shaft? Worth doing while it's all apart as to replace them later on you have to remove the whole leaver setup again which is almost tearing the complete machine down. Can't wait to see the colour you chose.
Looking forward to seeing the progress and outcome. Loooks like you have your parts sorted out, are you replacing the bearings inside the blade shaft? Worth doing while it's all apart as to replace them later on you have to remove the whole leaver setup again which is almost tearing the complete machine down. Can't wait to see the colour you chose.
Cheers
B_S
Are you referring to the bearings in this part?
I totally overlooked these... Do you need to press these in because I don't really have a way of pressing the bearings in. How does one determine bearing sizes/models?
Last edited by CyberJack; 28/12/1910:21 PM. Reason: Resize image for internet.
Yes there are 2 bearings in that part which sit inside where the blade goes on the shaft. There is a spring clip on the inside that needs to be squeezed inwards to remove the clip to allow access for the bearings to be removed. The bearings can be tapped out with care from the opposite end once the clip is removed but you need to be carefully not to crack the cast aluminium by using to much force. I can't remember the bearing numbers off hand but if you look through my thread on my edger restoration I have made reference of the bearing numbers otherwise the numbers are stamped on the side of the bearing. As to installing the new bearings I placed the bearing in position with a small amount of grease around the bearing socket and used a timber padded carpenters vice to squeezed the bearings in. Verry quick and easy using the vice. There's also a third bearing on the belt tensioner as well which is the same size as the other two in the blade shaft.
Looks really good, nice to see something a tad different, I guess engine decals would finish it off nicely apart from a bit of oil, but who really needs oil anyway I always say
If I may offer a bit of advice here prior to you starting it, the exhaust director that's fitted onto the muffler with two screws could be rotated one more position clockwise so as to avoid exhaust being aimed directly at the paintwork and rather have it go upwards on a 45 degree missing it all and saving that wonderful work from being damaged prematurely.
BTW if I may ask how are you loading your images on to your thread here ?
Cheers, BB.
I live a 24 Hour lifestyle, but every now and again I seem to fall asleep, well at least that's what my wife tells me.
Hi Solman,looks good,just wondering why u have the throttle cable comining over the top like that instead of out under the chassis like off the production line.
Looks really good, nice to see something a tad different, I guess engine decals would finish it off nicely apart from a bit of oil, but who really needs oil anyway I always say
If I may offer a bit of advice here prior to you starting it, the exhaust director that's fitted onto the muffler with two screws could be rotated one more position clockwise so as to avoid exhaust being aimed directly at the paintwork and rather have it go upwards on a 45 degree missing it all and saving that wonderful work from being damaged prematurely.
BTW if I may ask how are you loading your images on to your thread here ?
Cheers, BB.
Yeah I was gonna order some decals just to finish it off, just seems like it's missing something without them.
Good idea about the exhaust, I'll move that now 😊
I'm using imgbb as an image host then just placing a direct link in the thread.
Hi Solman,looks good,just wondering why u have the throttle cable comining over the top like that instead of out under the chassis like off the production line.
To be honest it's how it was when I bought it, I assumed that's how it normally is. But looking at other pictures now it seems your right that they do run underneath the motor. Is the cable fixed off somewhere underneath? If so where exactly?
Finished product looks good, I think you will find your blades are back to front. These edgers are deceiving as the rotation of the blade runs anti clockwise looking at the engine from behind the handlebars, the reason for this is because the engines are mounted front to back of the edger with the blade on the right hand side as opposed to most edgers which engines are mounted front facing forward with the blade on the left hand side. I would be guessing that 90% of model 38' are running blades the wrong way as its natural to the eye to install them this way. I'm not sure if this is a GA Spares mistake or if original blades were like this but it seems a bit strange that the flat edge of the blade faces the outer side of the guard while the sharpened beveled edge faces the inside of the guard To this day I can't really understand the blade setup so if anyone else can shed some light on this it would be greatly appreciated as even I had the blades on the same as Solman at first which will only send the back of the blade plunging into the edge first while the beveled side follows it out last wearing it out against the concrete, only way to avoid this is to push the edger on the grass so the flat side of the blade is against the concrete, pushing the edger smoothly on the concrete will wear the blade out.
First photo shows the correct way with the flat side of blade against concrete while edger is pushed on the grass, second picture show the wrong way with edger being pushed on the concrete wearing beveled edge of blade, also note blade in correct picture will rotate up out of the edge on the right hand side and the opposite blade will rotate down into the edge on the left side of the picture

![[Linked Image]](https://www.outdoorking-forum.com.au/forum/ubbthreads.php/ubb/download/Number/11506/filename/IMG-20191110-165826.jpg)
![[Linked Image]](https://www.outdoorking-forum.com.au/forum/ubbthreads.php/ubb/download/Number/11507/filename/IMG-20191110-174358.jpg)
![[Linked Image]](https://www.outdoorking-forum.com.au/forum/ubbthreads.php/ubb/download/Number/11508/filename/IMG-20191110-174043.jpg)
![[Linked Image]](https://www.outdoorking-forum.com.au/forum/ubbthreads.php/ubb/download/Number/11509/filename/IMG-20191110-171529.jpg)


![[Linked Image]](https://www.outdoorking-forum.com.au/forum/ubbthreads.php/ubb/download/Number/11769/filename/IMG-20191218-120140.jpg)
![[Linked Image]](https://www.outdoorking-forum.com.au/forum/ubbthreads.php/ubb/download/Number/11779/filename/IMG-20191219-151013.jpg)
![[Linked Image]](https://www.outdoorking-forum.com.au/forum/ubbthreads.php/ubb/download/Number/11787/filename/IMG-20191225-172332.jpg)


