|
0 members (),
995
guests, and
2,432
robots. |
|
Key:
Admin,
Global Mod,
Mod
|
|
|
|
Joined: Jul 2016
Posts: 10
Novice
|
|
|
|
|
|
|
Joined: Aug 2011
Posts: 2,998 Likes: 16
Former Moderator
|
Hi "dingaling" ??
Well that's an unusual user ID. Oh well horses for courses I always say.
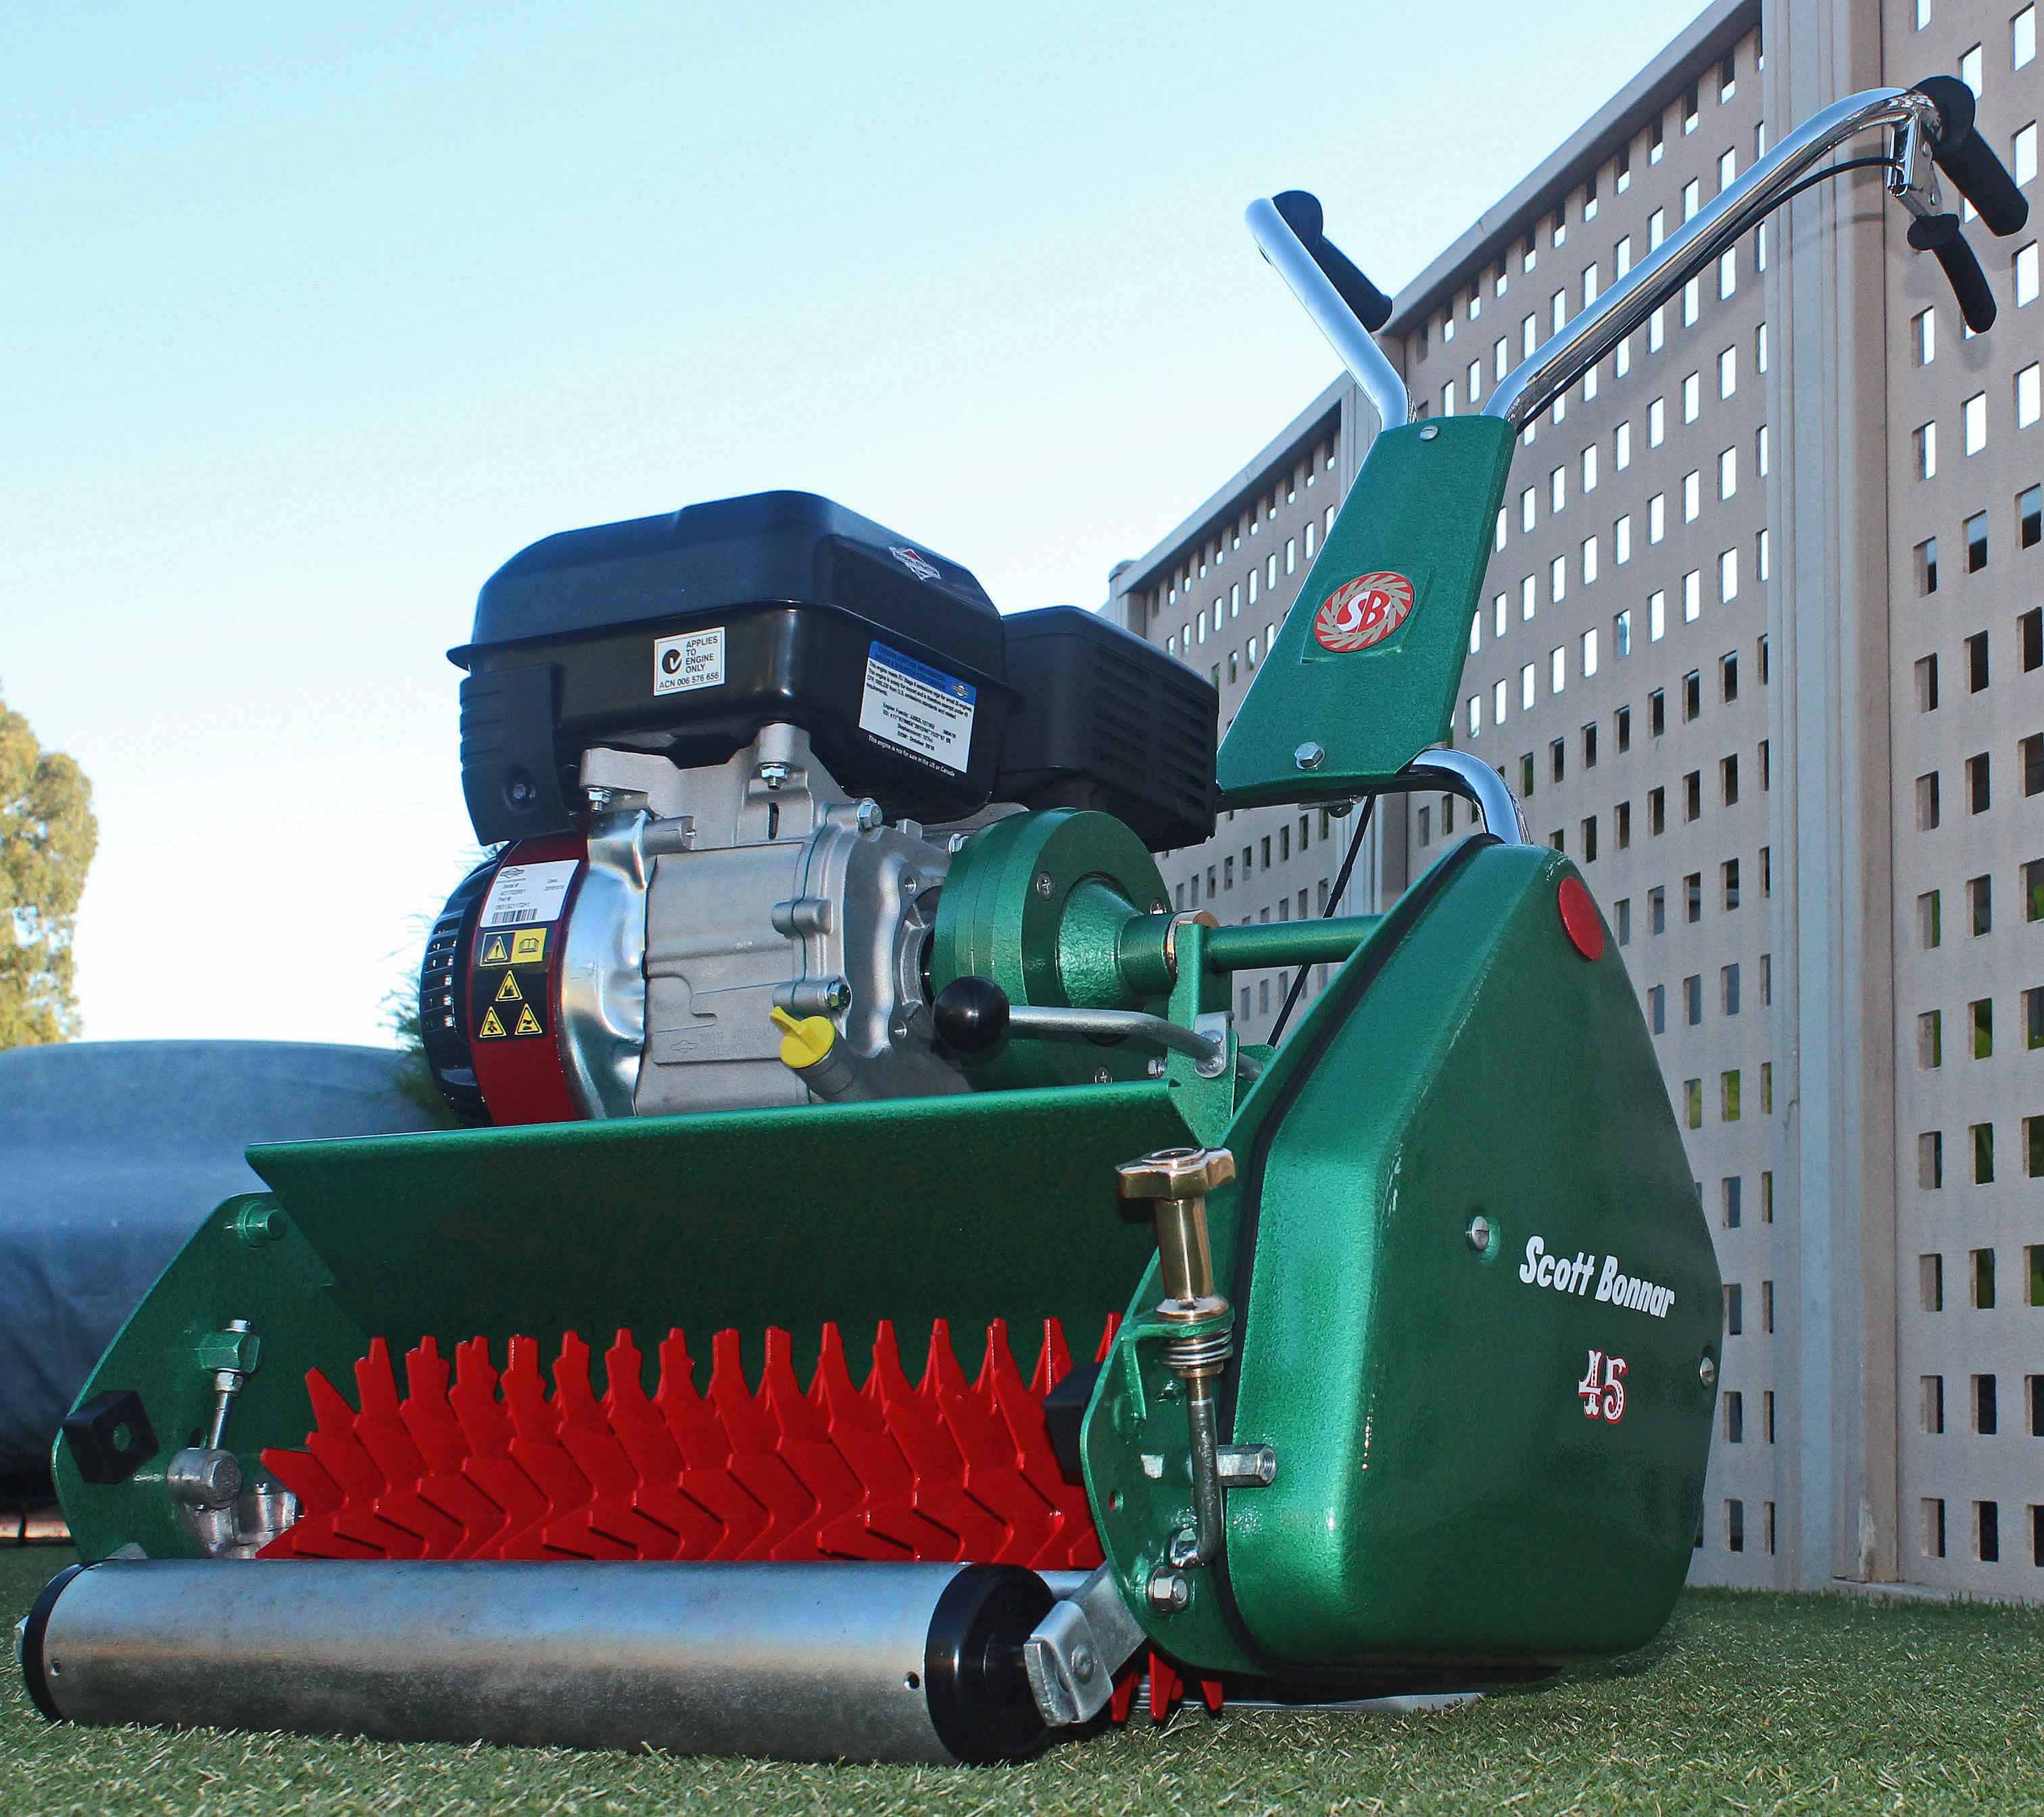
Welcome to the forum and it seems you've already been well versed in the Scotty lingo. Yes it's correct that you have obtained a Model 45 17 inch Series II mower. It's a tad unusual that it's fitted with a HK30 as most of the Kirby powered 17 inch machines had HK25's which is what the sticker on the tank actually states it has but the ID label says it's a HK30. The HK30 was a 3 HP engine and not a 2.5, so either someone has changed the tank or the air cowl has been substituted at some point. It should have a Kirby engine mounted from original as the Briggs power plants didn't come online until a bit later. I would check very closely around the engine mounting area for fine line fractures in the paint which would indicate stress fractures underneath the finished surface in the rails. If there are any fractures I would get those repaired before you go too much further as the problem is terminal if not corrected and the sooner the better.
Once again congrats on a superb new lawn ride.
Cheers,
BB.
I live a 24 Hour lifestyle, but every now and again I seem to fall asleep, well at least that's what my wife tells me.
|
|
|
|
|
Joined: Jan 2016
Posts: 387
Apprentice level 4
|
G'day Dingaling and welcome aboard. It would seem a lot of the members spent some time lurking in the shadows before deciding to join, I know I did. I went through the history pages and read a LOT before signing up. 'Tis an interesting choice of name and a nice looking machine you've got there.
This
Is going straight to the pool room.
|
|
|
|
|
Joined: Nov 2015
Posts: 637 Likes: 1
Qualified Senior
|
G'day Dingaling! Welcome to the Out Door King! I got my first Reel mower just the other day 2, got 2 at the same time. One has been moved on now, keeping the other. Just happened to get it of Gumtree as well  . Hope you have a great time on ODK mate, its a great page! Cheers Mate!
Thanks for reading!
|
|
|
|
|
Joined: Nov 2013
Posts: 6,938 Likes: 322
Forum Historian
|
The HK30 was a 3 HP engine and not a 2.5, so either someone has changed the tank or the air cowl has been substituted at some point. Hello from me too! BB, I have found other examples labelled as 2.5 but fitted with the HK30. These include 45 62273 and 45 65020 (from my records). So, I feel it is all original kit. Perhaps it was governed to a lower rpm? It should be a nice project and one to follow. There would be plenty of life in this one, and should serve you well. ------------------------ Jack
|
|
|
|
|
Joined: Jul 2016
Posts: 10
Novice
|
Thanks for the warm welcome.
I thought the name would get a few comments, wasn't my first choice. Comes from the banter at work.
Apologies for the rotated pics, couldn't work out how to rotate. (first ever forum)
If proven to be original engine, I would lean towards keeping it. As long as it up to multiple mows a week. (i have Kikuyu)
Anybody had any experience with removing rust with electrolysis as opposed to sandblasting. I don't know average sandblasting cost but could set up an electrolysis bath very cheaply.
|
|
|
|
|
Joined: Nov 2013
Posts: 6,938 Likes: 322
Forum Historian
|
Hello dingaling'dingaling' may also mean an 'eccentric' - a compliment in my view. I'm confident the engine is original [I hope BB agrees]. Here's another 450423 with a HK30:- https://www.outdoorking-forum.com.au/forum/u..._BONNAR_-_Model_45_Restor.html#Post68140There has been some discussion on electrolysis for cleaning. Just type that key word in the blue search bar and you will find it. I guess you know powder coating is out when it comes time to repaint. Hope this helps.------------------------- Jack
|
|
|
|
|
Joined: Jan 2016
Posts: 387
Apprentice level 4
|
I've had a play with electrolysis. I was impressed and plan to set up another bath soon. Just don't forget to use mild steel in it and NOT stainless or gal as it will produce some horrid chemicals that you REALLY don't want to be around. I didn't get my first choice of handle either but here I am!
This
Is going straight to the pool room.
|
|
|
|
|
Joined: Aug 2011
Posts: 2,998 Likes: 16
Former Moderator
|
Hi All,
I'd be inclined to say that it's the original power plant (as Mod CJ has suggested).
I would strongly recommend you look for any stress fractures radiating from the mounting holes in the chassis. My reasoning for saying this is that the clutch has been at some stage replaced to the current style unit with the 2 90 degrees opposed grub screws. When these clutches are fitted it is for a reason, and that is the previous clutch half was flogged out and in the process would've induced some vibration into the chassis. The twin railers were so prone to suffering from this issue and thus why I'm suggesting you have a good look before going overboard. This isn't a hard thing to solve but it must be done as it will lead to terminal failure in the long run.
Cheers,
BB.
I live a 24 Hour lifestyle, but every now and again I seem to fall asleep, well at least that's what my wife tells me.
|
|
|
|
|
Joined: Jul 2016
Posts: 10
Novice
|
|
|
|
|
|
|
Joined: Jul 2016
Posts: 10
Novice
|
Hi all,
Spent more time on my SB. closer look tonight at the rails and the rear rail has sagged. I'm guessing this is easy fixed.
Also removed Chains and Sprockets tonight, My novice eye tells me they need replacing. Can't seem to upload photos at the moment.
Tried to remove the reel, got one of the bearing caps off, but on the other side all I managed to do was chew out the screw heads which was a bit annoying. Anyhow will attack it again tomorrow.
Cheers
|
|
|
|
|
Joined: Aug 2011
Posts: 2,998 Likes: 16
Former Moderator
|
Hi,
Wow, rear rail sag without evidence of fracturing ? well that's a new one to me. Normally when a rail has sagged it will have a fracture in the vertical section of the rail, but I will say with those shots you provided it looks pretty good. I guess you'll have to strip more paint around the engine mount area so as to reveal what's really going on. If nothing then you are going to require the services of a press and reverse the bending process. One thing that I must stress and that is the bed knife will have to remain in the chassis when doing this procedure as it will hold the chassis rigid and stop the side plates from folding inwards.
To remove those screws one has to use the exact size screwdriver that completely fills the slot and then with solid downward force tap the back of the screwdriver while applying a twisting force. The impact will shock the screw loose.
You really don't want to bugger up a carrier as they can be quite expensive to replace, depending from where you buy it from.
Cheers,
BB.
I live a 24 Hour lifestyle, but every now and again I seem to fall asleep, well at least that's what my wife tells me.
|
|
|
|
|
Joined: Jul 2016
Posts: 129 Likes: 2
Apprentice level 2
|
if you not got press block of wood and heavy hammer will do the job, metal very easy to bend. soft blows first check top of rail with straight edge ruler till straight, repaired a few like this
|
|
|
|
|
Joined: Jan 2016
Posts: 387
Apprentice level 4
|
Hey BB could he just use an impact screwdriver? I'm thinking the old school ones that are metal and you hold a little pressure in an undoing motion while striking with a hammer while your mate backs you up with a dolly? Or perhaps a cordless impact driver? Just thinking. I've never had anything to do with a reel mower.
This
Is going straight to the pool room.
|
|
|
|
|
Joined: Aug 2011
Posts: 2,998 Likes: 16
Former Moderator
|
Hi Slashburn,
I must admit I've had an impact drive for well over 35 years now and in the days when I bought it I never experienced any joy with it and did nothing more than tear open the slot. I find that a correct sized screwdriver is far more controlled for me, but who am I to say it doesn't work for anyone else ??
and for Freebird, once again a press is far more controlled than a blow with a hammer, hammers don't get used much on my bench apart from plastic assembly hammers such as a Thor 412 Plastic unit.
Cheers,
BB
I live a 24 Hour lifestyle, but every now and again I seem to fall asleep, well at least that's what my wife tells me.
|
|
|
|
|
Joined: Jul 2016
Posts: 10
Novice
|
Hi all,
Thanks for the input BB and Slashburn. Didn't make it to the shed tonight but I fear I may have to use another method than the trusty screwdriver. I really did make a mess of the heads, I did oil them up and tried to shock them to no avail. I'm going to have to replace them anyway so if the screwdriver still fails, I'm thinking of using an ez out.....good idea?? Still having internet issues so no pics. Must say i am having fun and look forward to being in the shed.
Till next time,
Dingaling
|
|
|
|
|
Joined: Aug 2011
Posts: 2,998 Likes: 16
Former Moderator
|
Hi dingaling,
An ezi-out of that smaller size may just snap off giving you even more dramas as steel into alloy (diecast) can be a real bugger.
What I would do at this point is accurately centre drill the set screw only as deep as the head and then increase drill sizes until the head drops off. This way you'll be able to release the bearing cap up releasing the reel and you'll still have enough screw shank to put into a vice firmly and manually twist the carrier which will then set you free !!!, so to speak LOL.
Cheers,
BB.
I live a 24 Hour lifestyle, but every now and again I seem to fall asleep, well at least that's what my wife tells me.
|
|
|
|
|
Joined: Jan 2016
Posts: 387
Apprentice level 4
|
I'm with BB there. I have had more luck breaking easy outs than getting bolts out with them. My favourite trick is to weld a bolt to the mashed head of the stuck bolt. The heat from welding helps to loosen the stuck bolt and the new bolt is easy to get a spanner onto. I weld on an oversized bolt if possible.
This
Is going straight to the pool room.
|
|
|
|
|
Joined: Jul 2016
Posts: 10
Novice
|
Hi all, Took your advice BB, worked a treat! thank you very much for the idea. So tonight I removed the rear roller had a look under the rails, haven't scrape the paint off yet, but I think I'm good. How much sag in the rail is acceptable if any at all, will upload pics ![[Linked Image]](https://www.outdoorking-forum.com.au/forum/uploads/usergals/2016/07/full-10380-29198-img_0584.jpg) ![[Linked Image]](https://www.outdoorking-forum.com.au/forum/uploads/usergals/2016/07/full-10380-29199-img_0594.jpg) ![[Linked Image]](https://www.outdoorking-forum.com.au/forum/uploads/usergals/2016/07/full-10380-29200-img_0595.jpg) Also what is your opinion on my sprockets ![[Linked Image]](https://www.outdoorking-forum.com.au/forum/uploads/usergals/2016/07/full-10380-29201-img_0579.jpg) ![[Linked Image]](https://www.outdoorking-forum.com.au/forum/uploads/usergals/2016/07/full-10380-29202-img_0580.jpg) ![[Linked Image]](https://www.outdoorking-forum.com.au/forum/uploads/usergals/2016/07/full-10380-29203-img_0581.jpg) ![[Linked Image]](https://www.outdoorking-forum.com.au/forum/uploads/usergals/2016/07/full-10380-29205-img_0582.jpg) Have a good one Dingaling
|
|
|
|
|
Joined: Aug 2011
Posts: 2,998 Likes: 16
Former Moderator
|
Hi dingaling,
I'm glad that you managed to get the bearing carrier apart without doing any irreparable damage.
On to sprockets, it's certainly done quite a bit of work to wear all those teeth like they have been and also a tad unusual in profile, but on the other hand I have seen far worse than what you have there so it's not all bad news. Much of the wear has probably been more of a case of poor chain adjustment and letting them run too slack.
I don't think you will be able to purchase the land roll clutch sprockets, so you might just have to stay with those but all the others are still available.
As far as the amount of rail deflection that is evident it will most definitely have to be corrected to get correct primary clutch alignment.
Again as I suggested I would be using the services of a press and thus you'll be able to chock the rail in the correct places and only put the pressure on the specified section and not have an effect on the side plates. Hammers should not be used for this type of corrective action, well not in my opinion anyway.
I note that you are also in Adelaide and as such if you don't have access to a press I can help you out as I have one on hand.
Cheers,
BB.
I live a 24 Hour lifestyle, but every now and again I seem to fall asleep, well at least that's what my wife tells me.
|
|
|
|
|
Joined: Jul 2016
Posts: 129 Likes: 2
Apprentice level 2
|
dingaling bonnar bloke right press is best to fix but some people have no press. you don't have much to bend back. block of wood and hammer fix it very easy,its only thin steel and take your time , if you bend to far tap back . I have fixed quite a few this way over the years that came through our shop. if you replace sprockets best to buy new chains as well or you flog out neu sprockets when you make rail straight to stop it bend again if you can weld or can get some one to for you cut two strips metal or buy 25mmx5mm cut to rail length place strips od metal underneath rail inside lips . one strip metal on each inside lip and small stich welds along strips, no full weld ,small stiches let cool them do some more, keep heat down. best fix like this solid brace will not bend again 
|
|
|
|
|
Joined: Jul 2016
Posts: 10
Novice
|
Hi all BB your offer to help with my rails is much appreciated and I am interested, will PM you Got more done on the SB. Have set up an electrolysis bath and I am quite happy with the results. Have cleaned and primed the grass deflector and the plate off the handle. Have only applied an etch primer, my understanding is I still need to apply a surface primer as well before paint? ![[Linked Image]](https://www.outdoorking-forum.com.au/forum/uploads/usergals/2016/07/full-10380-29303-img_0635.jpg) Have disassemble the Rear roller ready for cleaning ![[Linked Image]](https://www.outdoorking-forum.com.au/forum/uploads/usergals/2016/07/full-10380-29304-img_0632.jpg) Reading other people's posts, to remove the cutter bearings without a bearing separator I need to cut them off with a grinder correct? Does this mean I will not be able ti fit new ones without a special tool? ![[Linked Image]](https://www.outdoorking-forum.com.au/forum/uploads/usergals/2016/07/full-10380-29305-img_0636.jpg) Also the bearing on the PTO is hard to remove. This is the self aligning bearing correct? Doesn't it fall apart in your hand? Bang on it a couple of times and the inner race moved but i don't want to damage it. ![[Linked Image]](https://www.outdoorking-forum.com.au/forum/uploads/usergals/2016/07/full-10380-29306-img_0633.jpg) ![[Linked Image]](https://www.outdoorking-forum.com.au/forum/uploads/usergals/2016/07/full-10380-29307-img_0634.jpg)
|
|
|
|
|
Joined: Aug 2011
Posts: 2,998 Likes: 16
Former Moderator
|
Hi dingaling,
Well that's one way to remove it if you don't have the correct tools, just be really careful so as not to damage the reel shaft as that's the critical area. There is probably another procedure you'll have to use when you refit the new bearings but I'll inform you of what that is later, especially on the driving side bearing which generally becomes lose over time and this situation must be remedied.
You can use top coat enamel straight over etch primer.
As far as the self aligning bearing is concerned, I'm not sure if yours actually is one as they are normally an open sided bearing and not fitted with neoprene seals. Check to see if you can oscillate the centre race. If not then you merely have a normal bearing and if that's the case you should change it for the correct type.
I'll look forward to your responses.
Cheers,
BB.
I live a 24 Hour lifestyle, but every now and again I seem to fall asleep, well at least that's what my wife tells me.
|
|
|
|
|
Joined: Sep 2016
Posts: 46
Novice
|
Dingaling, how are you progressing with this build?
|
|
|
|
|
Joined: Jul 2016
Posts: 10
Novice
|
Hi, It's been a while. Life got busy and the SB45 lost out, but I am now back into it. First a big thank you to Bonnar Bloke for pressing my rail straight and the chat, you know your stuff. I have painted the reel delicious red and had it sharpened with new bearings along with a new bed knife. ![[Linked Image]](https://www.outdoorking-forum.com.au/forum/uploads/usergals/2016/10/full-10380-30444-img_0665.jpg) After tossing up between buying a compressor and gun etc, paying someone to spray it, or go the spray can route. I decided I couldn't justify paying for a compressor to paint the chassis. After reading some posts I decided to get a couple of cans of Galmet Jade Green. It is quite a bit lighter than the original colour as you can see compared to chain cover. ![[Linked Image]](https://www.outdoorking-forum.com.au/forum/uploads/usergals/2016/10/full-10380-30446-img_0724.jpg) ![[Linked Image]](https://www.outdoorking-forum.com.au/forum/uploads/usergals/2016/10/full-10380-30448-img_0725.jpg) Don't know if it's too light for me or not but want to get it finished as spring is here and i want to mow with it. Ordered some parts tonight end caps thrust bearing etc. Hoping to move quickly now
|
|
|
|
|
Joined: Jul 2016
Posts: 129 Likes: 2
Apprentice level 2
|
your jade green looks great look forward to more pictures 
|
|
|
|
|
Joined: Aug 2011
Posts: 2,998 Likes: 16
Former Moderator
|
Hi dingaling,
I gather you found that Galmet Jade Green on our website ? if so it really isn't a good representation of the actual result you've got there is it. Honestly I'd like to remove that thread with that colour chip on it that is no where near what comes out the can. I feel that you're a tad disappointed and really wanted Alpine Green just like the inside of the chain case. The only way to get that is to get it colour matched which isn't cheap. We just don't have the correct formula as all that info was destroyed by Rover when they bought SB out.
I've spent many an hour trying to track down which paint company might have been SB's paint supplier as I'm still certain they would've bought local back in the 1960's ~ 70's and probably bought from Solver paints in Devon Park which wasn't far from the SB factory in Thebarton, but as they were bought out by Wattyl I feel that this corporate colour would've been deleted and never put onto their computerised database as it was no longer relevant as Rover wasn't a customer of theirs. Apple green isn't there either.
Cheers,
BB.
PS. I just love the reels in that colour after machining. Gotta Love it !
I live a 24 Hour lifestyle, but every now and again I seem to fall asleep, well at least that's what my wife tells me.
|
|
|
|
|
Joined: Jul 2016
Posts: 10
Novice
|
Hi all Received parts on Friday but I think ODK sent me the wrong bearing for the drive shaft, the self aligning one. Just finished chatting with them and they said that is what rover sends them. Ordered "Engine Shaft Bearing Model 45" OEM A1122225 but got this on the right next to the clutch bearing ![[Linked Image]](https://www.outdoorking-forum.com.au/forum/uploads/usergals/2016/10/full-10380-30563-img_0740.jpg) Have started putting her back together. going to stick with "Jade Green" but think i will keep the original colour inside the chain case for future reference ![[Linked Image]](https://www.outdoorking-forum.com.au/forum/uploads/usergals/2016/10/full-10380-30564-img_0729.jpg)
|
|
|
|
|
Joined: Aug 2011
Posts: 2,998 Likes: 16
Former Moderator
|
Hi dingaling,
I think you'll have to go to CBC to get the correct unit as I wouldn't be using a standard firm tracking bearing myself. Maybe that's what Rover might have done due to cutting costs, but as the engine does move due to rail flex this is the reasoning behind the self aligning unit being used.
Cheers,
BB.
I live a 24 Hour lifestyle, but every now and again I seem to fall asleep, well at least that's what my wife tells me.
|
|
|
|
|
Joined: Jul 2016
Posts: 10
Novice
|
Hi all Here she is in her natural habitat. Still need stickers and the handle bars cleaned upped a bit but she is not to bad for my first restoration. ![[Linked Image]](https://www.outdoorking-forum.com.au/forum/uploads/usergals/2016/10/full-10380-30661-img_0773.jpg) ![[Linked Image]](https://www.outdoorking-forum.com.au/forum/uploads/usergals/2016/10/full-10380-30662-img_0774.jpg) ![[Linked Image]](https://www.outdoorking-forum.com.au/forum/uploads/usergals/2016/10/full-10380-30663-img_0775.jpg) ![[Linked Image]](https://www.outdoorking-forum.com.au/forum/uploads/usergals/2016/10/full-10380-30664-img_0777.jpg) Now onto the engine. Planning on doing as little as possible as I am not overly confident pulling it apart. Just want to paint it.
|
|
|
|
M |
T |
W |
T |
F |
S |
S |
|
|
1
|
2
|
3
|
4
|
5
|
6
|
|
7
|
8
|
9
|
10
|
11
|
12
|
13
|
|
14
|
15
|
16
|
17
|
18
|
19
|
20
|
|
21
|
22
|
23
|
24
|
25
|
26
|
27
|
|
28
|
29
|
30
|
|
|
|
|
|
|
Forums144
Topics12,755
Posts106,798
Members18,121
| |
Most Online40,124
Apr 13th, 2026
|
|
|
|


![[Linked Image]](https://www.outdoorking-forum.com.au/forum/uploads/usergals/2016/07/full-10380-29108-img_0544.jpg)
![[Linked Image]](https://www.outdoorking-forum.com.au/forum/uploads/usergals/2016/07/full-10380-29109-img_0546.jpg)
![[Linked Image]](https://www.outdoorking-forum.com.au/forum/uploads/usergals/2016/07/full-10380-29110-img_0547.jpg)
![[Linked Image]](https://www.outdoorking-forum.com.au/forum/uploads/usergals/2016/07/full-10380-29111-img_0549.jpg)
![[Linked Image]](https://www.outdoorking-forum.com.au/forum/uploads/usergals/2016/07/full-10380-29112-img_0550.jpg)
![[Linked Image]](https://www.outdoorking-forum.com.au/forum/uploads/usergals/2016/07/full-10380-29113-img_0551.jpg)
![[Linked Image]](https://www.outdoorking-forum.com.au/forum/uploads/usergals/2016/07/full-10380-29114-img_0554.jpg)
![[Linked Image]](https://www.outdoorking-forum.com.au/forum/uploads/usergals/2016/07/full-10380-29115-img_0555.jpg)
![[Linked Image]](https://www.outdoorking-forum.com.au/forum/uploads/usergals/2016/07/full-10380-29116-img_0557.jpg)
![[Linked Image]](https://www.outdoorking-forum.com.au/forum/uploads/usergals/2016/07/full-10380-29117-img_0558.jpg)
![[Linked Image]](https://www.outdoorking-forum.com.au/forum/uploads/usergals/2016/07/full-10380-29118-img_0559.jpg)
![[Linked Image]](https://www.outdoorking-forum.com.au/forum/uploads/usergals/2016/07/full-10380-29119-img_0561.jpg)
![[Linked Image]](https://www.outdoorking-forum.com.au/forum/uploads/usergals/2016/07/full-10380-29120-img_0563.jpg)
![[Linked Image]](https://www.outdoorking-forum.com.au/forum/uploads/usergals/2016/07/full-10380-29121-img_0564.jpg)
![[Linked Image]](https://www.outdoorking-forum.com.au/forum/uploads/usergals/2016/07/full-10380-29122-img_0565.jpg)


![[Linked Image]](https://www.outdoorking-forum.com.au/forum/uploads/usergals/2016/07/full-10380-29130-img_0569.jpg)
![[Linked Image]](https://www.outdoorking-forum.com.au/forum/uploads/usergals/2016/07/full-10380-29131-img_0571.jpg)
![[Linked Image]](https://www.outdoorking-forum.com.au/forum/uploads/usergals/2016/07/full-10380-29132-img_0572.jpg)
![[Linked Image]](https://www.outdoorking-forum.com.au/forum/uploads/usergals/2016/07/full-10380-29133-img_0573.jpg)
![[Linked Image]](https://www.outdoorking-forum.com.au/forum/uploads/usergals/2016/07/full-10380-29134-img_0574.jpg)