|
|
|
0 members (),
1,685
guests, and
1,956
robots. |
|
Key:
Admin,
Global Mod,
Mod
|
|
|
|
Joined: Jan 2014
Posts: 3
Novice
|
Hi All,
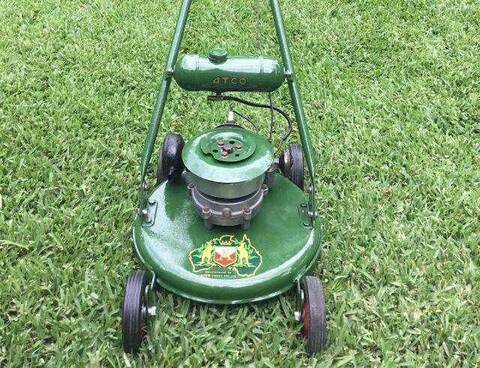
Thanks in advance for helping, I have a Victa Tilt-a-cut series 80 and the pull cord broke when I tried to start it last weekend (devastated as I was all ready to do my over grown edges!)
Can anyone give me a quick run down on how to replace the cord. I pulled off the housing and cowling and I cannot for the life of me find where the cord goes??
Steve
Last edited by Steveturtle; 14/01/14 05:25 AM.
|
|
|
|
|
Joined: Jan 2013
Posts: 445 Likes: 1
Qualified Junior
|
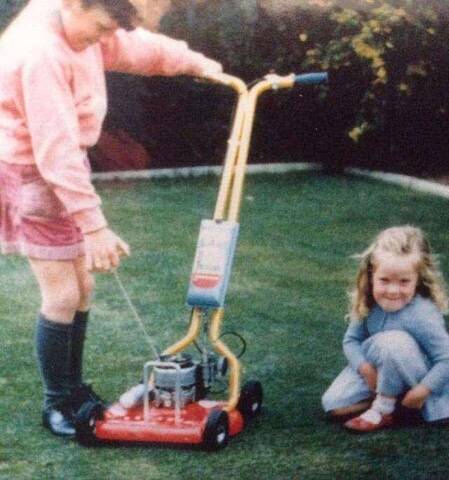
Steve, Can you confirm this is your edger before we go ahead and talk about how to replace the cord? It is a pretty simple process. ![[Linked Image]](https://www.outdoorking-forum.com.au/forum/uploads/usergals/2014/01/full-6412-14511-img_0190.jpg) As long as the spring isnt broken all you should need is some new rope!
|
|
|
|
|
Joined: Jan 2014
Posts: 3
Novice
|
Bingo! Thats the one Jaffa J...
Thank you so much in advance.
|
|
|
|
|
Joined: Jan 2013
Posts: 445 Likes: 1
Qualified Junior
|
I didn�t get a chance to get some photos so I�ll do my best to explain the process for you.....
1) Flip the cowling over and you will see the wheel which the rope retracts from when you pull the starter cord. Given the fact you obviously haven�t replaced the cord in a while, I am going to recommend you extract the starter unit and give it a good clean.
2) There should be a Phillips Head screw in the middle of the starter that will need to be removed.
3) Carefully remove the washers and friction washers along with the starter claws and be careful to keep them in the correct order. Lay them out on the bench in order as you take them off.
4) Next you need to remove the starter wheel. Be careful as the starter spring is underneath and will spring everywhere if you are not careful. Off the top of my head I forget the direction you turn the wheel before lifting is so the spring doesn�t pop out everywhere. If it does you will just have to wind it back up.
5) Clean everything down with an air compressor and re-assemble the starter and associated washers and claws.
6) Next you need to wind up the wheel to get tension in the spring. Once you have a satisfactory amount of tension (this may take you a few go�s) you will need to thread your new rope through the starter eye (with the wheel tensioned) and into the area where you tie if off on the plastic wheel. You will also need to re-tie on your starter handle as well.
7) If is easier get someone else to hold the rope wheel whilst it is tensioned and you are tying up everything. Make sure you melt the ends of the rope to ensure they don�t fray.
8) Once everything is tied up slowly release the starter wheel and it will wind the rope back into place. Make sure the starter pawls throw out when you pull the cord as they grip to the cup, if they don�t, flip them over.
9) Install it back on your edger and you should be good to go!
I always wear my good quality safety glasses when doing this work. You should make sure you wear appropriate safety gear.
Blokes with more experience like Joe Carroll and Bigted might be able to help with some further advice but with this, you should be ok. It always works for me!
|
|
|
|
|
Joined: Jan 2013
Posts: 961 Likes: 20
Moderator
|
Sounds good to me, although i get lazy at times and just feed the rope through. If you don't trust yourself dimantling the unit and cleaning it just follow steps 6 onwards, but definitely some good advice there.
|
|
|
|
|
Joined: Jan 2014
Posts: 3
Novice
|
FANTASTIC - Worked Perfectly! Thanks for that, easy and simple.. Cheer Jaffa!
|
|
|
|
|
Joined: Jan 2013
Posts: 445 Likes: 1
Qualified Junior
|
No problem. Glad it work out for you.
A picture of your finished product would be good!
|
|
|
|
M |
T |
W |
T |
F |
S |
S |
|
|
|
|
|
|
1
|
2
|
|
3
|
4
|
5
|
6
|
7
|
8
|
9
|
|
10
|
11
|
12
|
13
|
14
|
15
|
16
|
|
17
|
18
|
19
|
20
|
21
|
22
|
23
|
|
24
|
25
|
26
|
27
|
28
|
29
|
30
|
|
31
|
|
|
|
|
|
|
|
|
Forums144
Topics12,748
Posts106,774
Members18,085
| |
Most Online40,124
Apr 13th, 2026
|
|
|
|
|
|